


Ever had that frustrating moment when you pull your latest resin print off the build plate, only to find it’s a complete disaster? You’re not alone.
3D print problems can be common in both resin and FDM printing, but understanding why things go wrong and how to fix them is key to turning your failed prints into successes.
Let's face it—resin printing problems are inevitable, but most can be solved with a few tweaks here and there.
This guide will walk you through the most common resin 3D printing issues and show you how to troubleshoot them.
By the time you're done reading, you'll be well-equipped to fix those pesky print errors and get back to producing flawless models.
Issue #1: Print Doesn’t Stick to the Build Plate
We’ve all been there—you hit start, walk away, and return to find your print detached from the build plate and swimming in resin. It's one of the most common 3D printing problems, especially for resin printers, and can be caused by several factors.

What’s Happening and How to Fix It:
Build Plate Not Properly Leveled. This is usually the number one culprit. If your build plate isn’t perfectly level, you’re almost guaranteed a failed print. Take the time to properly recalibrate the plate. Many resin printers allow you to use a simple piece of paper to ensure the plate is aligned evenly with the vat. This simple fix often solves the issue of resin printer not printing properly.
Insufficient Exposure Time. Another common 3D print troubleshooting tip is ensuring your initial layers are exposed long enough to bond firmly to the build plate. Increase the exposure time of the first few layers by around 10-20%, and you might see a big improvement.
If you're dealing with Phrozen resins, check out our resin profile page to find the right parameters for your project. For best results, the Phrozen Aqua 8K resins, known for their durability and fast curing time, are an excellent choice to enhance adhesion and prevent failures.
Smooth or Dirty Build Plate. Sometimes, the issue isn’t with the resin or the settings but with the build plate itself. A smooth build plate can make it hard for the resin to grab onto the surface. Lightly sanding the plate or cleaning it thoroughly with isopropyl alcohol before starting a print can help improve adhesion.
You can also read our blog on maintaining a 3D printer to get practical and insightful tips ensuring that you get the best out of your 3D printer.
Resin Temperature. Resin that’s too cold can be thicker and may not flow properly, leading to 3D print problems. Keep your resin at room temperature, or invest in a resin heater if you're working in colder environments.
By addressing these areas, you’ll likely solve many of your 3D printing troubleshooting issues before they even start.
Issue #2: Delamination Between Layers
You’re halfway through a print, and everything seems fine until you notice that the layers are starting to separate, leaving gaps in your model. Layer delamination is one of the more frustrating 3D printing issues, but it’s not unsolvable.
What’s Happening and How to Fix It:
Under-Exposure. If the layers aren’t getting enough exposure, they won’t bond properly, leading to separation. Try increasing the exposure time for the regular layers. Remember, every resin has its ideal exposure settings, so it may take some experimentation to find the perfect balance.
Over-Cured Bottom Layers. The opposite issue can happen with the bottom layers if they’re over-cured, causing them to become too rigid. This creates stress on the upper layers and can lead to delamination. Reducing the exposure time for the bottom layers can prevent this, but be cautious not to underexpose and cause adhesion issues.
Lift Speed Too Fast. Often, delamination isn’t about exposure at all—it can be mechanical. If the lift speed of your printer is set too high, the layers might not have enough time to settle before the next layer starts printing. Slowing down the lift speed and increasing the wait time between lifts can help improve 3D print quality and prevent delamination.
Dirty Vat or FEP Film. If there’s cured resin stuck to the vat or the FEP film, it can interfere with the printing process. Regularly clean the vat and inspect the FEP film for scratches or cloudiness. This small maintenance step can make a big difference in preventing resin printer not printing problems.
Delamination can be tricky, but with the right adjustments, it’s easily fixable. For more in-depth advice on resin 3D printing troubleshooting, check out our guide on resin print quality.
Issue #4: Poor Surface Quality
You finally get your print off the build plate, but instead of the smooth, high-quality finish you were expecting, you’re left with a rough, pitted surface. Surface quality issues can be one of the most disappointing 3D print issues, especially if you’ve spent hours fine-tuning your settings.
What’s Happening and How to Fix It:
Over-Curing. When your resin is overexposed, it can result in a rough surface. Try reducing the exposure time slightly to prevent over-curing. If you’re still getting rough prints, consider running a calibration test to fine-tune your settings and improve overall 3D print quality.
Under-Curing. On the flip side, under-exposure can cause a bumpy or incomplete surface. If your layers aren’t curing enough, increase the exposure time until the surface smooths out. It's a simple step in 3D print troubleshooting, but often overlooked.
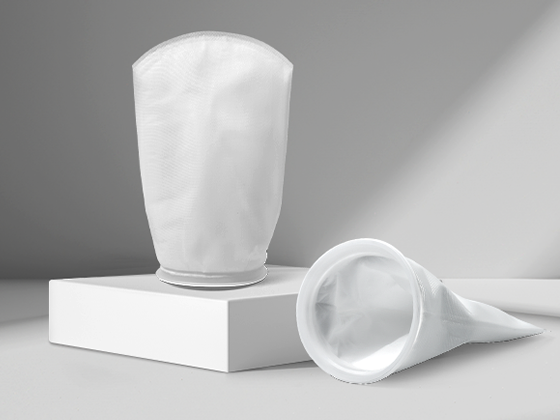
Contaminated Resin. Dust or debris in the resin can cause pitting on your print surface. Always filter your resin before each print and keep your printing environment clean to avoid contamination. This can be a big factor in troubleshooting 3D prints that have surface defects.
Poor Layer Adhesion. Another common issue is poor layer bonding, which can create a textured surface. Adjust your lift speed and exposure time to improve layer adhesion, which should help smooth out your prints.
Achieving a smooth finish is all about dialing in your settings and making sure your resin is clean and your build plate is prepared. 3D printing troubleshooting doesn’t have to be complex—it just takes a bit of patience and experimentation.

Issue #3: Support Failure
Have you ever had a print collapse midway through because the supports didn’t hold? Support failure is one of the most common 3D printing problems, especially for models with overhangs or intricate details.
What’s Happening and How to Fix It:
Weak or Insufficient Supports. The biggest reason for support failure is that they simply aren’t strong enough. Thin or sparse supports won’t hold up your print. Increase the support density in your slicer software and make sure the supports are thick enough to provide stability. You can also try using stronger support types, such as grids or solid supports, rather than relying on lattice supports.
Poor Placement. It’s easy to let the slicer automatically place supports, but that doesn’t always result in optimal placement. Take the time to manually place supports in areas where overhangs need the most stability. If you’re dealing with delicate features, consider placing more supports around those areas to prevent 3D print errors.
Wrong Support Settings. It’s not just about the number or thickness of supports, but how they’re configured. Experiment with the support tip size and ensure the supports are properly bonded to the print surface. If you're using tree-style supports, try switching to lattice-style supports, which might offer more stability for certain models.
Support failures can be frustrating, but with a little adjustment, your models will print successfully and stay intact. Troubleshooting 3D printing often comes down to experimenting with your settings, so don’t hesitate to tweak things like support placement and density.
Issue #5: Random Holes and Gaps in Your Print
You’ve just finished your print, and everything seems great—until you notice random holes or gaps where there shouldn’t be any. Missing parts or gaps in your model are often caused by under-curing or design issues.
What’s Happening and How to Fix It:
Under-Exposure. If certain areas of your print didn’t get enough exposure, you’ll end up with small gaps or holes. This can be especially true for thin walls or delicate features. Increasing the exposure time should ensure the entire model cures correctly, solving this 3D print issue.
Thin Wall Thickness. Thin walls can cause 3D print errors because they’re not strong enough to print properly. Adjust the wall thickness in your slicer to give your model more structure. A thicker wall will reduce the chance of holes forming.
Air Bubbles in Resin. Sometimes, air bubbles trapped in the resin can cause gaps. Before you start printing, stir the resin well and let it sit for a few minutes to allow any bubbles to escape. This simple step can make a huge difference in your resin printing troubleshooting.
Improper Draining for Hollow Parts. If you’re printing a hollow model without proper drain holes, pressure can build up inside, leading to print issues. Always add drain holes to your design to ensure excess resin can escape and your model prints smoothly.
Conclusion: Troubleshooting Resin 3D Printing Problems
Resin 3D printing can be a challenging process, but with the right approach, you can turn those frustrating print failures into successes. By taking the time to adjust your resin settings, clean your printer components, and experiment with different support structures, you’ll be well on your way to consistently successful prints.
Whether you’re struggling with failed prints, poor surface quality, or odd gaps in your models, there’s always a solution. 3D printing troubleshooting doesn’t have to be overwhelming. By following the tips in this guide, you can start improving your prints immediately.
If you’re still struggling with resin print problems, check out our in-depth guide on resin print failures, where we cover even more troubleshooting tips to perfect your prints.
Remember, every print failure is a learning opportunity. With persistence and a little fine-tuning, you’ll soon be printing flawless models every time!

16 comments
Otto
Im using 2x Mighty 14k to print Dental models with PhrosenWater washable dental resin. The details of the prints are perfect, to say the least, but the issue starts when I try to remove them from the build plate… They all break without exception…all
I also use Mighty 4k with the same resin and prints are very easily removed
How to address this?
———
Phrozen Technology replied:
Hello Otto, Thank you for commenting.
Please try decrease the exposure timing for bottom layer, that would make the adhesion of the model to the plate weaker so that it’s easier to remove the model from the plate.
Hope this helps.
Best, Phrozen Team
>
Sara
hello , i am using the resin vanilla aqua 8K in my sonic XL 2022 4K and its not printing . I used the parameters of the resin that you guys suply for a collegue and nothing .
What can be wrong ? the resin creats a film …
———
Phrozen Technology replied:
Hello Sara, Thank you for commenting.
Please validate the resin setting by printing some testing models such as XPFinder, and adjust the exposure timing for both bottom and normal layer according to the result, before using the setting to print the actual models.
Here’s an article on how to read the XPFinder result, alongside with the link to download the XPFinder: https://helpcenter.phrozen3d.com/hc/en-us/articles/6324821843993-How-to-Dial-in-Resin-for-Optimal-Results
If you need the assistance from our customer support agents, please don’t hesitate to submit a request by filling in the form on this page: https://helpcenter.phrozen3d.com/hc/en-us/requests/new
Hope this helps.
Best, Phrozen Team
>
Ana
Hi, I have a Phrozen Sonic Mini 8k, i have used for a few years now but today, when I wanted to start the print, the bulding plate reached the bottom and it kept pushing down. It never get back up to do the full cycle. And it kept pushing, i left it or a min to do that then i stopped it. I tryed to recalibrate it, but it did the same. I don’t know what is the problem. I tryed even to unscrew the screws from the building plate, but now they woun’t screw back in. Can you please help me?
Thank you,
Ana
———
Phrozen Technology replied:
Hello Anna, Thank you for commenting.
Please don’t let it keep pushing into the LCD as the pressure might break the LCD. Please power off the printer and spin the rod to manually move the build to its top position, update the firmware of your printer to its latest version. You can find the download link of the latest version of the firmware for your printer on this page: https://helpcenter.phrozen3d.com/hc/en-us/articles/6369983852569-Firmware-downloads-and-release-notes Please make sure to follow the instructions carefully when updating the firmware.
After that, please power on the printer and do the Z axis calibration again. If the plate still won’t stop after reaching the end of its bottom position, this might be the indicator that the end-stop switch sensor on your printer is not working properly.
As you can see from this Reddit post, there’s a sensor on the bottom left corner of the rod, and there’s an arm to trigger this sensor letting the printer know that the plate has reach the end of its bottom position, alongside the build plate if you look from the top: https://www.reddit.com/r/Phrozen/comments/yfyh8t/is_this_normal_sonic_mini_8k/ Please check the appearance of the sensor see if is broken, and if the arm can pass the space between the two ‘pillars’ normally. If you use your phone camera pointing at the sensor, you should be able to see the red infrared light as it’s being powered up. Anything otherwise indicates the broken sensor.
If your sensor looks physically normal, and may or may not have the sign of its being powered up, you can try opening up the chassis, disconnecting and reconnecting the cable of the sensor to make sure if it’s caused by the poor connection. Here’s an article of how to replace the mainboard, which you can use if as a reference of how to open up the chassis and locate the connector of the sensor, which is the No.7 connector of the 3rd figure on the page: https://helpcenter.phrozen3d.com/hc/en-us/articles/6365695266201—Sonic-Mini-8K-Replacing-the-Mainboard
If you are having a broken sensor, or you don’t see anything wrong with the sensor but the printer still won’t stop when the plate has reached the end of its bottom position, please contact our customer support team, our agent will assist you on diagnosing the issue, and provide you with the replacement parts if needed. You can send them a request by filling in the form on this page: https://helpcenter.phrozen3d.com/hc/en-us/requests/new
Hope this helps.
Best, Phrozen Team > >
Thomas
Hello, I have a Phrozen 14K printer. It only accepted .prz files in the past. Now the Print button is greyed out. I upload a .prz file, the machine is 30 Celsius, Z axis calibrated, etc. It drives me insane that it refuses to print!!!! Please tell what scenario is when the printer disables the Print button? Thanks
Best
Thomas
———
Phrozen Technology replied:
Hello Thomas, Thank you for commenting.
Sonic Mighty Revo accepts .prz and .ctb files. It’s know that some particular version of Lychee Slicer will export the .ctb file incorrectly which will not be accepted by the Sonic Mighty Revo. Please try updating the slicing software you are using to the latest version and see if it fix the issue. If not, you will need to contact Lychee to get this fixed, or just select .prz file as you previously did.
If you are experiencing the ‘Print’ button being greyed out when selecting the file, there are 2 possibilities that leads to this situation.
First, When writing to a non-Mac file system, Macs create a separate file for each file and folder that contains metadata about the file or folder called “AppleDouble” files. These have the same name as the files and folders in a directory, but are prepended with “. _”. For example, if you saved your file as “test.prz”, there’s probably a “._test.prz” in its same folder on your thumb drive created by the MacOS. You will have to select the real sliced file “test.prz” instead of “._test.prz” on your printer in order to print.
Second, you’ve probably selected the wrong printer profile in your slicing software or it goes off for some reason. Please delete the printer profile you are using, and add then select the correct printer profile coordinated to your printer back in to your slicing software. Use that setting to slice the model again, and see if you are able to print with the newly sliced file.
Hope this helps.
Best, Phrozen Team
>
Sara
Hello Phrozen team
In the lab we have a sonic XL 4K from 2022 and we are using the phrozen aqua 4K resin in ivory and our models are getting bigger than they should . What can i do ?
I have try to change the exposer and nothing change
———
Phrozen Technology replied:
Hello Sara, Thank you for commenting.
We are not recommending using consumer grade resin such as Aqua series resin with dental grade printers such as Sonic XL 4K. If you have any issue or need any support when printing dental models, please contact the reseller of your printer to get assistance, or submit a request to our dental product customer support team by filling in the form on this page: https://support-dental.phrozen3d.com/hc/en-us/requests/new Thank you!
Best, Phrozen Team
>
Jorge Olivella
Hi, I have a Phrozen Sonic mini 8K.
I was performing some prints and they all worked perfectly fine, but suddenly one of my models missed whole vertical printing section from the building plate upwards, as if there was nothing there in the model. I then performed another print with a different model and the result was also missing the exact area on the building plate including its complete vertical projection (no supports, no model) that was missing in the previous result.
Can you give me any word on what could be happening?
———
Phrozen Technology replied:
Hello Jorge, Thank you for commenting.
Please do a LCD test and dry print to see if your LCD and the UV LED are working properly. The LCD should show the pattern as the one that’s displaying on the touch screen, and the UV LED should light up evenly. Dry print can help you see if your model has been sliced properly. Please don’t hesitate contacting our customer support team for assistance on this matter, you can submit a request to them by filling in the form on this page: https://helpcenter.phrozen3d.com/hc/en-us/requests/new
Hope this helps.
Best, Phrozen Team
>
Craig
I have a sonic mini 8k
It’s not starting any prints.
It lowers the plate and then makes a kind of buzzing sound as if the plate is still trying to lower more
I have leveled the plate a couple of times and still no luck.
Any advice?
———
Phrozen Technology replied:
Hello Craig, Thank you for commenting.
Based on your description, we’d recommend two things to do:
1) For the grinding noise when the plate is moving up and down, please clean and lubricate the Z rod and see if it solve this problem. Here’s an article about how to maintain the Z rod of your Mini printer: https://helpcenter.phrozen3d.com/hc/en-us/articles/6325671107737—Sonic-Mini-8K-Cleaning-the-Z-axis
2) For the expected plate moving behaviour, please reflash the firmware of your printer and uninstall and reinstall the slicing software you’re using from your computer, when only reserve 1 instances of your slicing software at a time – which means only the latest version of the slicing software should be installed on your computer and previous one should be replaced by the new one or be uninstalled.
When reflashing your firmware and reinstalling the slicing software, please download the latest version from the website, and follow the instructions carefully when flashing the firmware of your printer.
You can download the latest version of firmware and find the instructions on this page: https://helpcenter.phrozen3d.com/hc/en-us/articles/6369983852569-Firmware-downloads-and-release-notes
Hope this helps.
Best, Phrozen Team
>
Bruno Teixeira
I have a Mighty 4K since 2021 and it worked fine till yesterday.
Now, every time I try to print it makes a complete surface for some layers before it starts the model itself. Its like it makes a “VAT Cleaning” before printing the model itself. But those layers always end up detached from the base after a few layers of model printing and compromising the rest of the model printing.
———
Phrozen Technology replied:
Hello Bruno, Thank you for commenting.
Please first check if your LCD is working properly by using the LCD test function. You can refer to this video about how to perform a LCD test for Mighty 4K.
https://www.youtube.com/watch?v=fX1rkdrm7mI
If you need further assistance, please contact our customer support team by submitting a request via this link:
https://helpcenter.phrozen3d.com/hc/en-us/requests/new
Hope this helps.
Best, Phrozen Team
>
NA LI
I updated software and firmware. Now it give me message: Incorrect File Resolution.
———
Phrozen Technology replied:
Hello NA LI, Thank you for commenting.
Please check if you have installed the correct firmware and followed the instructions when updating the firmware for your printer, and also check if you have selected the correct printer in your slicing software.
Hope this helps.
Best, Phrozen Team
>
Fuad
Hello, we have mighty 8k. When we try print onlay it works normal until print completed. When checked onlay it is like half one attached to resin vat other half attached to plate. Resin settings are same previous successfull printing .
Please help
———
Phrozen Technology replied:
Hello Fuad, Thank you for commenting.
You might want to dial in your resin using testing files for optimal results. Here’s a reference for how to dial in a resin: https://helpcenter.phrozen3d.com/hc/en-us/articles/6324821843993-How-to-Dial-in-Resin-for-Optimal-Results
Hope this helps.
Best, Phrozen Team
>
Nick
I am using the Sonic Mini. I am noticing that the bottom layers are adding that many layers to my print, instead of simply applying the bottom layer exposure time to the existing layers. Unless I float every object I print and use skates/rafts and supports for models that don’t need any, it just makes it needlessly thicker. Please advise.
———
Phrozen Technology replied:
Hi, Nick, Thank you for commenting. The increase in bottom layer thickness may be related to the exposure time. Recommend referring to our resin parameters for printing. If you encounter this issue when printing models close to the build plate, suggest performing Z-axis calibration again using 3-5 sheets of paper for calibration. If you have any further questions, feel free to contact our customer service team for additional assistance.
https://helpcenter.phrozen3d.com/hc/en-us/requests/new
Hope this helps.
<Sunny@comment.sunnysideapps.com> 於 2023年10月31日 週二 下午6:19寫道:
>
———
Phrozen Technology replied:
Hello Nick, Thank you for commenting.
You can solve this problem by setting the ‘Bottom Layer Count’ to 0 in Chitubox. If you’ve already done that, then the situation you are having is called ‘elephant foot’. In resin 3D printing, the first few layers of the print have to have longer exposure time, to adhere to the build plate. The longer exposure time will often cause the resin to form a protrusion in the shape of a circle larger than what it is intended to be. The solution is to float the model and using supports to hold them, and add the raft if needed.
Hope this helps.
Best, Phrozen Team
>
Marcos Bertoni
Buenos dias….tengo un Prozhen Migthy 4K y he estado imprimiendo sin ningun problema, pero ayer la impresora me ha dejado de imprimir por completo. El programa lo hace y cuando termina en el display me figura un cartel que dice “PRINTING DONE ELAPSED 03h57m” . Agradeceria cualquier tipo de ayuda. Muchas gracias
———
Phrozen Technology replied:
Hello Marcos,
Thank you for commenting. There are several possibilities that lead to this result. We would suggest you to do an LCD test to see if both your LCD and LED array are working properly, then run a dry print to see the file you are trying to print is also working, by observing the pattern showing on the LCD is the same as the one shown on the touch screen when dry printing. Last, would you have to recalibrate your build plate to make sure that cured resin are able to adhesive to the plate properly.
Please submit us a request via this link if you need further assistance: https://helpcenter.phrozen3d.com/hc/en-us/requests/new
Hope this helps.
Best, Phrozen Team.
>
David Guenter
Hello Phrozen Team
I own a Sonic mini 8K S. I have run into an issue with the exposure finder.
When i print the .prz file that is included on the momory stick everithing prints fine. But when i try to print the exposure finder sliced by myself on Chitubox and Lychee, the details that are above the borders of the exposure finder designe, like the slopes in the middle and the textures in the corners, they come out very flattened.
It looks almost like the z-axis does not raise enough from layer to layer.
I have no idea what could be the issue. If it is a Hardware, Firmware, Slicer or Print settings problem.
Can you please help me?
———
Phrozen Technology replied:
Hello David,
Thank you for commenting. For this issue, we would suggest you to relevel your plate with 3~4 sheets of papers to see if this solves the problem. And since you’ve mentioned, reflash the firmware and remove all the installations of Chitubox from your PC, reinstalling only the latest version could also be worth trying. If you are still having this problem, please contact us by submitting a request via this link, in which you can attach a photo of your test print result so that our support team can better know your situation.
To download the firmware and learn about the updating process, please check this link: https://reurl.cc/r65QeO
To submit a request, please check this link: https://helpcenter.phrozen3d.com/hc/en-us/requests/new
Hope this helps.
Best, Phrozen Team
pim mauve
After a few weeks of perfect print, the printer, a mighty 8K, now prints absolutely nothing; nothing on the bed, and noting in the resevoir. het does go through the whole print as if it was printing, but when it is done, nothing. I did a bed level calibration, lcd test and stir the resin wel each morning. any thoughts what can be wrong?
———
Phrozen Technology replied:
Hi Pim,
Thank you for commenting. If your printer has passed the LCD test, please perform a day print ie. start a print without vat installed and/or resin loaded, to see if the LCD shows the pattern same as what shows up on the screen. If there is nothing shows up on the LCD, or the pattern is not what it should be, please check the cable that connects LCD to the motherboard to see if they are connected properly. You can reference to this tutorial about the LCD cable:
https://reurl.cc/Ny0pDm
If it does not shows up anything or the pattern is still wrong after you check the connection, please submit us a request by fill up this form via this link, our support team will provide further assistance.
https://helpcenter.phrozen3d.com/hc/en-us/requests/new
Hope this helps.
Best, Phrozen Team
>
Jose Miguel
Hi. I own a Mighty 4K since 1 year ago and I use Model Grey resin. I print only dental models and from 2 months until now some models are printed with failures (specially support failures). The thing is that I have’nt change any parameter and all settings are the same. I usually print about 14 models at the same time and the last 2 months each time I print 2 or 3 of them fail. Last week I changed the fep, recalibrated the plattform and sometimes printer prints ok and sometimes ir fails.
I have printed 500 models until today.
What can be happening ? (I have pictures but can’t send them thru this form). Can you help me ?
———
Phrozen Technology replied:
Hi Jose,
Thank you for commenting! Unfortunately, we will need more information to help you with this situation, that will include the resin setting you are using, the photo of your failed models etc. Please contact us by submitting a customer support ticket. You can fill the form here: https://reurl.cc/651z8d
Or please join our Facebook group, where you can ask questions and see what’s going on with the community: https://reurl.cc/7kgxGy
Hope this helps!
Best, Phrozen Team
>
Dahlkemper
good day,
my phrozen sonic mini i purchased 6 months ago is not printing .
it has worked in the past however the files are not printing now.
i upload the STL file and it uploads into the printer and the machine runs for the 2 hour printing time and there is nothing on the plate.
i am using the aqua red clay. i have printed multiple files a month agp however not it not working.
the plate is balanced
the led light works
the resin is mixed
there is no film on the bottom of the dish.
i know its not the model design because my wholesaler is able to print on their end im just trying to save time by printing my own with the mini.
i am assuming its the setting for the printer.
what setting do i need to set the splice for
do i need a diffrent resin?
Please help
Thank you for your time
Shawn
———
Phrozen Technology replied:
Hi Shawn,
Thank you for commenting. The file format for the printer to print is .ctb for Sonic MIni, Mini 4K and Mini 8K. Please make sure you are exporting and choosing the right format when printing an object.
If you have exported and chosen the right format, and the printer also accepted it and started the printing process, please try to perform a dry print (start a print without vat in the place) and see if the LCD is lighting up correctly, corresponding to the pattern that is shown on the touchscreen.
If your LCD is working properly, and the dry print shows the LCD is showing the pattern corresponding to the touchscreen, then please try re-calibrate your z-axis. Further information can be found here: https://reurl.cc/11Vo38
If your LCD is not showing the pattern corresponding to the touchscreen during the dry print process, or your printer simply doesn’t accept the file, please reflash your firmware and format your USB drive, or try with another USB drive to see if it works. The latest firmware can be download here, along with instructions: https://reurl.cc/RzVbLr
If none of the suggestions above work, please submit our customer support ticket. Please let them know what you have already tried, with pictures like the results of LCD test, the dry print, the file you are trying to print etc., so that our team can better understand the situation you have been facing quickly by ruling out some of the possibilities. Here is the page that you can submit us a ticket: https://reurl.cc/QXq6Db
I hope this helps, thank you again for your comment!
Best, Phrozen Team
>