If you come across this article, there might be a good chance that you are thinking about choosing the right resin for your next project or trying to figure out the best test print model to get you all set up for your 3D printing journey. While we have other articles that give you a broad answer to those questions, this article will focus on understanding how different resins will have different properties and strengths, and how you can use that as an advantage for your next project.
To achieve that goal, we’ll introduce you to a tool called Phrozen RP Tester.
Phrozen Test Print Models: XP Finder vs RP Tester
We assume that you must have been familiar with our exposure finder test model—the XP Finder. Designed by Phrozen to test the resin exposure and parameter settings quickly and efficiently, with the least amount of resin, it’ll be a great model to print to kickstart your 3D printing game. Read our article about the 10 XP Finder Secrets That You Might’ve Missed if you haven’t heard about the ultimate Phrozen test print model.
Compared to the XP Finder, the Phrozen RP Tester—or Resin Performance Tester—was developed specifically for beginners and seasoned 3D printing enthusiasts alike to gain a better understanding of the resin they are currently working with beyond finding the right exposure settings. While the XP Finder focuses on finding the best exposure settings quickly for your resin and printer in said environment, the RP Tester will take slightly longer to print. However, it’ll also allow you to observe its results vertically instead of just the flat, plane-based you can find in XP Finder.
|
XP Finder |
RP Tester |
|
|
Full Name |
Exposure Finder |
Resin Performance Tester |
|
Shape |
Flat plane |
Flat plane with height |
|
Printing Time |
30 minutes |
2 hours |
|
Function |
Find the best exposure settings for your resin, printer, and environment. |
Understand your resin properties to maximize its performance. |
|
Download File |
When to Use the RP Tester?
While you might want to print the XP Finder every time you get a new printer, a new resin, or are printing in a new environment for the first time, you’ll only need to print one RP Tester with every resin you have. And you might want to save your RP Tester models as part of your collections or for your reference in the future.
For optimal results, make sure to only have a go on your RP Tester after you find the perfect exposure settings for your current printing combination.
The RP Tester is a resin test model made to understand the features of every resin you are working with and interpret the printing results easily. It covers both the horizontal and vertical sides of your prints, with every area made to simulate an actual printing condition.
So, what can you understand from the RP Tester?
- Printing exposure
- Resin strength
- Tensile force between various spans
- Performance of thinnest pillars and inclined lines
- Detail performance
This information will help you to choose the right resin for your next project. Do you need a resin that offers extreme precision? Or a resin that is reliable enough to print successfully even on the widest span? Do you need a resin that shows extremely embossed details, or engraved ones?
To better understand how to interpret the RP Tester, we’ll separate this test piece model into the areas below:
- The Checkered Patterns
- The Pillars
- The Sloped Thin Lines
- The Pin and Holes
- The Textures
- The Bridge
The Checkered Patterns
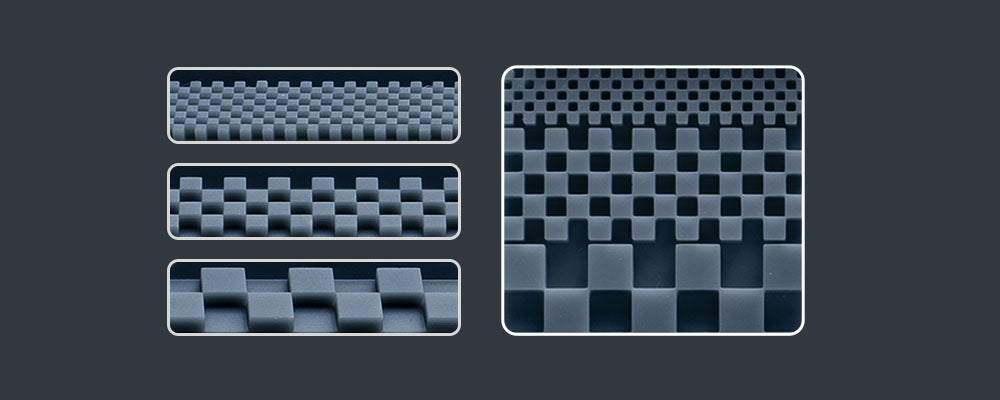
You might recognize this pattern from the XP Finder. As the fundamental component of a test print model, this will verify whether your RP Tester print is reliable enough for your resin properties observation.
First, check the flat squares and make sure that each square is just touching ever so slightly in the corners. When printed on a flat plane, you’ll be able to purely assess the exposure performance in the xy-plane, unaffected by the Z-axis. When there’s a significant gap between the corners, your print is underexposed. On the opposite, when your square corners overlap, it means your print is underexposed.
On the top side of the RP Tester, you’ll find a very similar pattern on a slope. This will be a better representation of your real printing situation when you put your models on an angle to avoid suction cups and peeling force.
Your observation of the RP Tester will only be reliable when your model is printed with the perfect exposure.
The Pillars
On the left and right side of the RP Tester, you can find two different pillars. The solid round ones on the left and hollow hexagonal ones on the right side. These pillars represent different diameters and thicknesses, telling you the limit of how thin your resin can print under a proper exposure time.
In the example below, we use three different resins to give you a better understanding of how different resins will have different strength performances and capabilities.
Solid Rounds
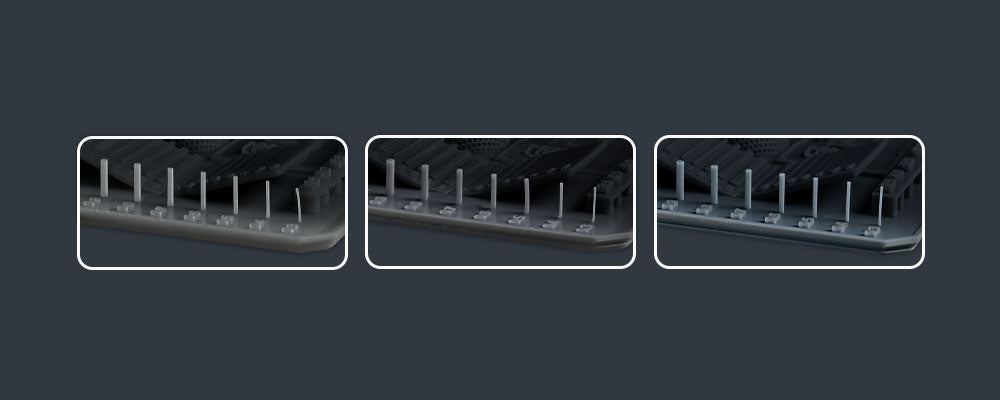
In the picture above, we can see that although the thinnest pillar was successfully printed with all three resins, the thinnest pillar on the first and second pictures on the left are slightly skewed. This means that these two resins on the left might not be the most suitable option for super thin parts as they are more prone to breakage, and the print results might not be as accurate compared to when you are printing with resin at the utmost right.
Hollowed Hexagonals
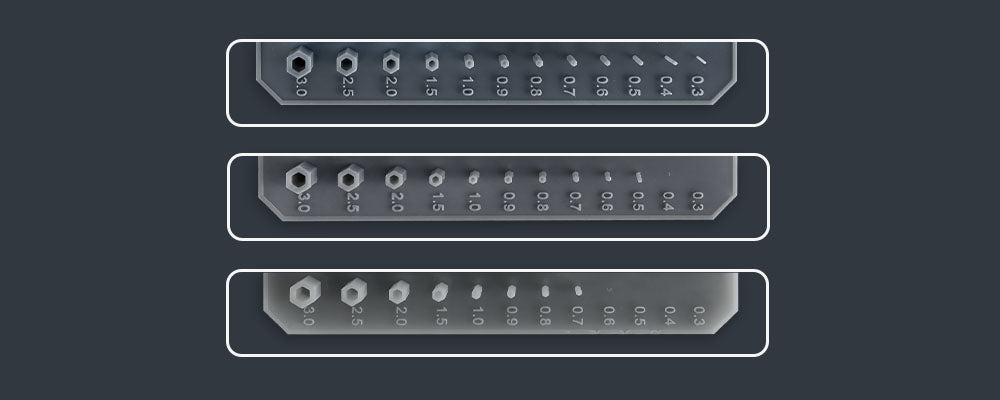
Similar to the solid round pillars, these hollowed hexagons will also show you how successful these three resins would be in printing out small hollowed models. As seen in the picture above, you’ll want to use the first resin to print models with extremely small hollowed details. The second one will survive when you are printing details larger than 0.5 mm, but the third resin could only print models with details thicker than 0.7 mm.
The Sloped Thin Lines

Placed on the right side of the solid pillars, you’ll find these protruding and intruding lines on a slope. These thin lines are one of the most common textures on typical 3D model files like miniatures and figurines. By observing these sloped thin lines on various RP Tester test models printed with different resins, you’ll know which resin to choose for the best details when you are printing those highly detailed miniatures of your favorite characters.
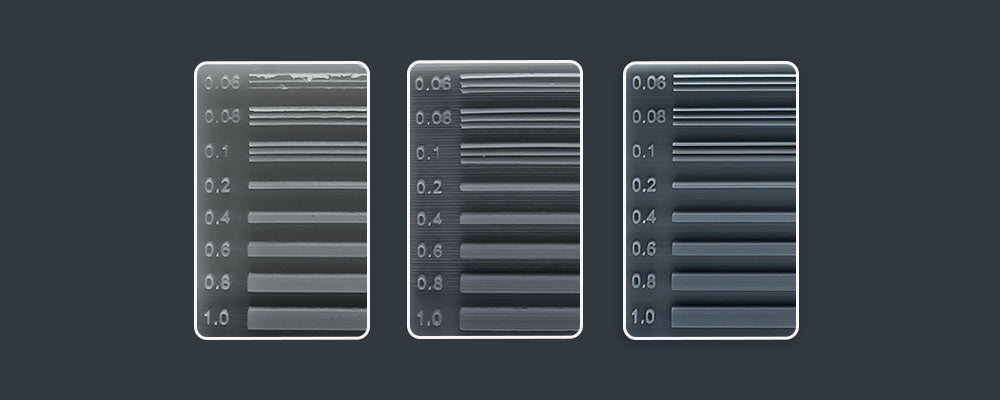
We can see in the picture above that the resin we use for this example can successfully print out the protruding lines even at 0.06 mm. The results might not look so clear on the 0.06 intruding lines, but compared to other resins, you might realize that this one right here is superior in this aspect compared to other resins.
These could be a consideration for choosing the right resin when you know your model will have a lot of super fine intruding lines.
The Pin and Holes

These pins are definitely similar to the round solid pillars on the most left of the RP Tester. The only obvious difference is that these pins are placed on a slope, which offers a more realistic situation on how these types of details will be showcased on your models.
You can see in the picture above how the resin on the most right successfully printed out almost every little pin up to the twelfth column, while the one on the most left has nothing printed out even by the tenth column. It shows that the resin on the most right has better strength compared to the other two.
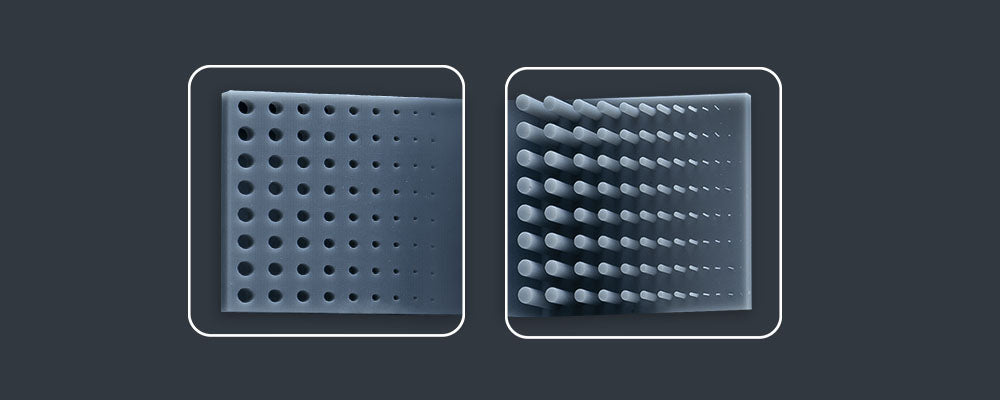
Like the pins, the holes were also placed on a slope to simulate real-life printing needs. Here you can see how precise and accurate the resin property is compared to other resins. Try to print out several RP Tester test models with your resin collections to see which resin performs the best in terms of strength and precision, just as depicted in the picture above.
The Textures
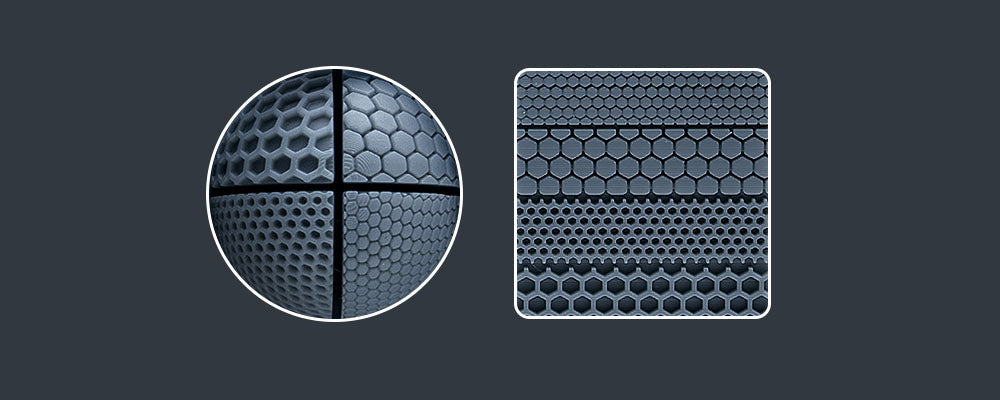
Perhaps the simplest and most straightforward of them all, the textures on both the flat plane and the sphere are designed to simulate how different resins will handle different details. If you are looking for a high-precision resin that could print every intricate detail on your model, you might want to pay close attention to how they perform on the RP Tester. Is the gap on the textures printed cleanly? Is your hexagonal pattern merged up altogether? Or is the quarter line that separates the sphere into four quadrants barely even visible?
By observing the textures on the plane and the sphere, you can have a good prediction of how your resin will perform when printing real detailed models.
The Bridge
Last but not least, we’ll take a look at the bridge structure. Placed at the bottom, it’s an important part of accessing your resin performance.
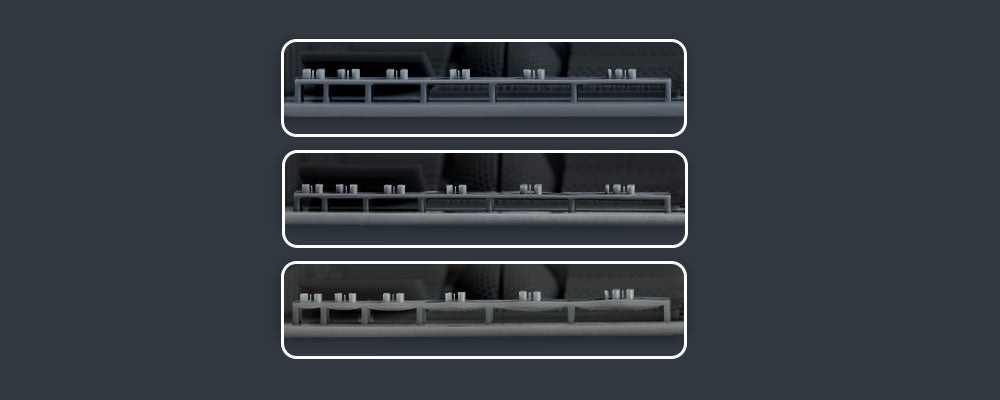
Take a look at home the third bridge looks thicker and bulging at the bottom compared to the first one. Designed to measure tensile strength, this structure right here will give you a good idea of how far you can go from one end to the other without needing support. This will be important to consider for your support settings. How dense should your support be and how close should they be from each other?
Now that you have learned everything you need to know about the RP Tester, are you going to print an RP Tester test piece for every resin you own?
It’s highly possible that some resin will excel in some parts better than others. For example, engineering resin might not be able to print the smallest solid pillars but will perform well in the bridge structure. It doesn’t mean the engineering resin is less superior, it simply means they are fulfilling different application needs for different projects.
So, do you think the RP Tester will help you to choose the right resin for your next project? Or is there anything else you would like to know about the RP Tester? Download the RP Tester now and let us know what you think in the comment below!

