
Jewelry 3D printing allows jewelry makers as well as everyday people to create all sorts of gorgeous, delicate, intricate jewelry pieces simply by clicking a few buttons on their resin 3D printer.
Jewelry-making is an art that can be used to create specialized jewelry gifts for loved ones. Professional jewelry designers or hobbyists can also use jewelry 3D printing as a way to create jewelry designs that can be replicated numerous times.
After designing your jewelry pieces, you will need to set supports on slicing software so that your jewelry pieces can be printed out perfectly. We recommend using the Phrozen Sonic Mini 4K or Sonic Mini 8K for best results.
Today, we’ll teach you how you can set supports for 3D printed rings, pendants, and earrings! But first, let’s review the process of how resin 3D printing is used for jewelry 3D printing:

First, you’ll need to design your jewelry pieces. You can easily create new jewelry designs or make changes to previous designs using jewelry design software such as 3Design, Rhino3D, or Matrix instead of restarting the entire process from scratch. These CAD software are specifically created for jewelry modeling purposes. Here, you can add details to your jewelry 3D prints or engrave different jewelry patterns onto your designs. Once you’re done, you can export your jewelry designs onto a slicer software.
Second, after exporting your jewelry 3D designs onto a slicer software, you can start adding relevant supports to your jewelry designs. Then, it’s time to 3D print your jewelry designs!
Lastly, for a more detailed tutorial on how to cast your jewelry 3D prints after your 3D printed models are ready, please click here.
Jewelry Supports for 3D Printed Ring

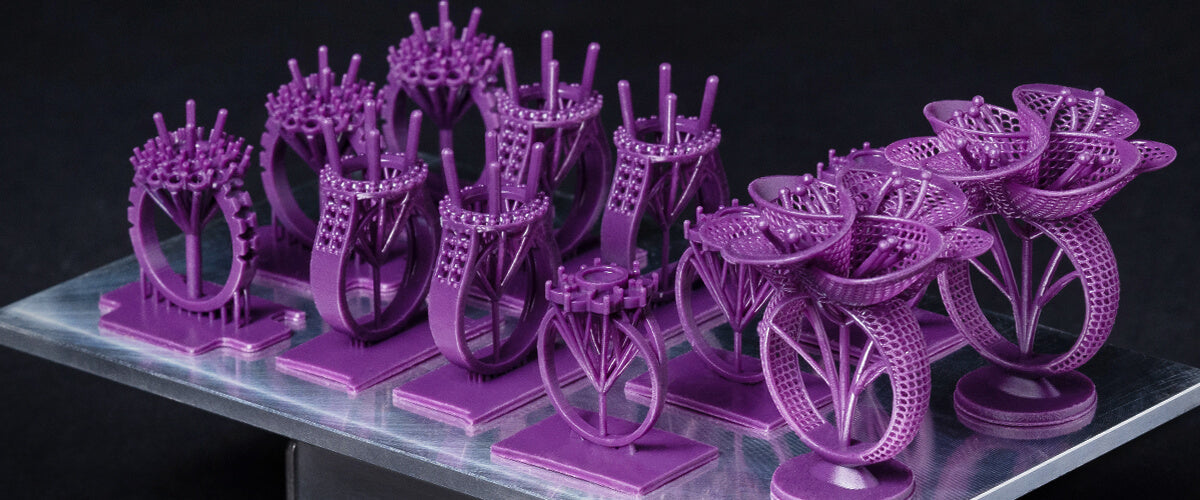
When placing supports for 3D printed rings, we start by making sure that the ring is placed in an upright position. Then, we can start adding necessary supports to the ring. Keep in mind that the fewer supports you add to the ring, the more likely it is to change in shape. The more supports you add, the more dense it will become, meaning that your ring is much less likely to change in shape, though it may take longer to post-process.
We start by adding a raft right below the ring and then we add a thick center support piece from the raft to the bottom-center part of the ring. Then, we add a few thinner supports. These will surround the thicker support piece. The support in the center has to be thicker because it will be used during the jewelry casting process later on after the jewelry has been 3D printed.
You can then ensure that the thicker support in the center extends to the center of the ring. After that, we can add a few supports that extend to crucial parts of the ring, such as the outer edges of the ring and the sides of the ring.
Make sure to only add minimal supports to the interior of the ring as adding too many supports may instead have the opposite effect, and cause the ring to distort in shape.
Jewelry Supports for 3D Printed Pendant

For the pendant pictured above, you’ll need to make sure there is a thicker piece of support that goes through the center of the jewelry 3D design. You’ll also have to add supports onto the sides.
As this is a more intricate design, try to add supports only to the centerpiece so that the surface of the 3D printed pendant can be as smooth as possible.
Jewelry Supports for 3D Printed Earrings

Earrings are so pretty and are a great way to express yourself. But these do tend to be a bit tricky as there tends to be holes in them. This means that you need to be extra careful while setting supports.
Tilt the earrings by roughly 45 degrees and make sure to only add supports onto the back of the earring. You can add some supports and make sure to only add them vertically. This will make the removal process easier and will leave fewer marks on the earring itself.
There you go! Make sure to read our post on how to select resin for jewelry 3D printing and how resin printing can also be used for vulcanized rubber molding.