So, you finally got your hands on some clear resin, ready to create crystal-clear prints—only to find your masterpiece turned cloudy, yellowed, or sticky. Clear resin problems like these are frustrating, but they’re also incredibly common.
The truth is, working with clear resins isn’t as simple as "pour and cure." Achieving a flawless, glass-like finish requires more than just using a transparent material. Material quality, curing techniques, and environmental factors all play a role in determining the success of a print.
If you’ve been wondering:
-
Why is my clear resin 3D print cloudy?
-
Why is my transparent 3D printer resin turning yellow?
-
How do I fix a sticky resin surface?
-
How do I prevent resin bubbles from ruining my print?
… then you’re not alone!
This guide will walk you through the most common clear resin problems and, more importantly, how to fix them. Whether you're into clear resin 3D printing or resin casting, we’ve got you covered.
Read on and discover ways to keep your clear resin prints looking sharp, professional, and crystal clear!
For more insights into troubleshooting common resin printing issues, check out this comprehensive 3D printing troubleshooting guide.
Moreover, if you want to learn more about transparent 3D printing—its benefits, applications, pros and cons, and more—you must read our detailed blog, Transparent 3D Printing 101. It's a must-read if you're looking to get into clear 3D prints.
Understanding Clear Resin: What Makes It Tricky?

Gold fish in a plastic bag: The plastic bag was 3D printed using the Aqua-Clear Plus Resin for a hyper-realistic effect. (3D Model by MatatamaCraft)
Before we jump into the solutions, let’s take a step back and understand why clear resin can be so challenging. Unlike opaque resins, clear resins show every imperfection—scratches, bubbles, layer lines, and yellowing all become glaringly obvious. Whether you’re printing with clear resin or using it for casting, getting that flawless, see-through finish requires attention to detail at every step.
Clear resin issues can arise from several factors, each affecting the final clarity and quality of your print.
Material Composition plays a major role, as some resins are more prone to clear resin yellowing due to UV exposure. Lower-quality resins may degrade faster, leading to discoloration over time, while UV-resistant resins help maintain transparency for longer.
Printing & Curing Methods can also impact the final result. Clear resin 3D prints require precise exposure settings to avoid over-curing, which can cause cloudiness, or under-curing, which can leave the print soft and sticky. Proper curing and controlled light exposure are key to achieving transparency.
Moreover, Environmental Factors like temperature, humidity, and even dust can affect how well your transparent 3D printer resin turns out. High humidity can introduce moisture into the resin, leading to an uneven cure, while dust particles can get trapped, creating imperfections in the final print. Keeping a clean, climate-controlled workspace helps prevent these issues.
Lastly, Post-Processing Techniques make a significant difference in achieving crystal-clear results. Even a perfect print may appear frosted due to microscopic layer lines. Sanding, polishing, and applying a clear coat help smooth out these imperfections, enhancing transparency and giving your print a professional, glass-like finish.
If you’re still trying to figure out which 3D printing resin is best for your project, this detailed guide on choosing the right 3D printing resin breaks it all down for you.
Now that we know why these problems happen, let’s break down how to fix cloudy resin, prevent yellowing, and troubleshoot other clear resin problems step by step.
Common Problems with Clear Resins (And How to Fix Them!)
1. Cloudy or Hazy Prints: How to Fix Cloudy Resin
Ever pulled your print out of the curing station, expecting a glass-like finish, only to find a frosted or milky-looking surface?
Cloudiness is one of the most frustrating problems with clear resins, especially when you expect a glass-like finish but end up with a frosted or milky appearance.
One major cause of this issue is resin contamination, where dust, moisture, or leftover uncured resin remains on the surface, affecting clarity.
Another common reason is over-curing or under-curing during the UV process. Too much exposure can create a hazy effect, while too little leaves the resin soft and unevenly cured.
Additionally, layer lines from printing settings can make the print appear frosted, as light refracts through the uneven layers rather than passing through smoothly.
However, if you’re using Phrozen resins, we provide a detailed resin profile for each one. These profiles ensure that you achieve the perfect print every time.
What is the solution for this?
To counter this problem associated with clear or transparent resins, you should consider the following:
-
Thorough Cleaning. To achieve crystal-clear prints, thorough cleaning is crucial. Always rinse your prints properly in fresh IPA (isopropyl alcohol) or resin cleaner. Avoid using dirty or reused IPA, as it can leave behind a white, cloudy residue.
-
Proper Curing Time. UV exposure should be just right—too little, and the resin stays soft; too much, and it gets cloudy. Cure underwater for an even, smooth finish.
-
Post-Processing Polish. If your clear resin 3D prints still look hazy, sand them with fine-grit wet sandpaper (start at 800 grit and go up to 3000 grit), then finish with a polishing compound.
For more advanced tips on improving your 3D print quality, including settings optimization, check out this expert guide on improving 3D print quality.
2. Clear Resin Turning Yellow: Preventing Resin Yellowing
Resin yellowing is a nightmare, especially if you want your print to stay clear over time. Over time, exposure to UV light from sunlight or even indoor lighting can degrade the resin, causing it to lose its clarity.
Some resins are more prone to aging and discoloration, turning yellow no matter how well they’re stored or post-processed.
Additionally, incorrect curing techniques, such as overexposure to UV light, can accelerate this process, leaving prints looking aged even when they’re brand new.
What is the solution for this?
Here are three things you can do to solve this clear resin problem:
-
Use UV-Resistant Resin. To keep your prints looking fresh and clear, using UV-resistant resin is key. Look for transparent 3D printer resin specifically labeled as "UV-stable" or "non-yellowing," as these formulations are designed to resist long-term discoloration.
-
Apply a UV-resistant clear Coat. This is another effective strategy. After sanding and polishing, spray your print with a UV-blocking clear coat to create an extra layer of protection against sun exposure.
-
Store Prints Properly. Lastly, proper storage can make a big difference—keeping finished prints in a cool, dark place when not in use will slow down the natural aging process and help maintain their transparency for longer.
3. Sticky Resin Surface Fix: When Your Print Won’t Fully Cure
Ever handled your print after curing, only to find it still sticky or tacky?
This is one of the most frustrating resin problems, and this issue usually results from under-curing, where the print hasn’t been exposed to enough UV light to fully harden.
In some cases, improper resin mixing can also lead to a sticky surface, especially when working with casting resins that require precise ratios of resin and hardener.
Additionally, leftover uncured resin on the surface can leave prints feeling tacky, even after proper UV exposure.
What is the solution for this?
Following these 3 steps can help solve this transparent resin problem:
-
Double-Check Mixing Ratios. To ensure a fully cured print, start by double-checking mixing ratios when working with castable resins—accuracy is key, so avoid guessing.
-
Increase UV Exposure Time. If you’re printing, increase UV exposure time slightly, but be careful not to overdo it, as excessive curing can lead to yellowing.
-
Rewash and Cure Again. If your print remains sticky after curing, rewash it in fresh IPA and place it back in the UV chamber for an additional cure session. This extra step can often eliminate any remaining tackiness and result in a smooth, fully hardened surface.
If you're new to resin 3D printing, understanding how your resin 3D printer works can also help troubleshoot many of these issues. Check out this detailed guide on how resin 3D printers work.
4. Air Bubbles: Resin Casting Air Bubble Solutions
Bubbles are another clear resin troubleshooting nightmare. Whether you’re 3D printing or casting, these bubbles often form when the resin isn’t mixed properly, trapping air inside the liquid before printing or casting.
Cold environments can also thicken the resin, making it harder for bubbles to escape naturally before curing.
Another common cause is pouring resin over porous materials, like wood or flowers, without sealing them first. These materials can release tiny air pockets, leading to trapped bubbles inside the cured print.
What is the solution for this?
Here are three things you can do to counter this issue:
-
Mix Slowly. The best way to prevent air bubbles is by mixing slowly and carefully. Stirring too aggressively introduces more air, so take your time and let the resin settle before use.
-
Warm the Resin. Slightly heating it before printing or casting can also help thin it out, allowing bubbles to escape more easily—placing the resin bottle in warm water for a few minutes (without overheating) works well.
-
Use a Vacuum Chamber. If you’re casting, degas your resin in a vacuum chamber before pouring. For 3D printing, letting the print sit for a bit before post-curing can help reduce trapped air.
5. Resin Crystallization Prevention: Dealing with Cold Weather Issues
Have you ever opened a bottle of resin only to find chunks or crystal-like formations inside? This occurs when resin gets too cold, causing it to partially crystallize, much like honey does when stored in a chilly environment. If left untreated, crystallized resin can create inconsistent prints and make mixing more difficult.
What is the solution for this?
You should consider the following steps:
-
Store Resin at Room Temperature. To prevent resin from crystallizing, store it at room temperature, ideally above 20°C (68°F), and avoid keeping it in cold environments like garages or basements.
-
Warm It Up Before Use. If crystallization has already occurred, gently warming the resin can help restore it to a usable state. Placing the bottle in a bowl of warm water for a few minutes will dissolve the crystals, making the resin smooth and pourable again. Be sure to mix it well before use to ensure consistency.
Best Practices for Clear Resin Success
Now that we’ve covered the most common problems with resin, let’s go over some best practices to make sure your projects turn out perfect every time.
-
Keep Your Work Area Clean. Dust and dirt will ruin your clear finish. Always work in a clean, controlled environment.
-
Measure Everything Accurately. Whether you’re mixing resin for casting or adjusting exposure settings for clear resin 3D printing, precision is key.
-
Take Your Time with Post-Processing. If you want optical clarity in your final print, sanding, polishing, and sealing are non-negotiable.
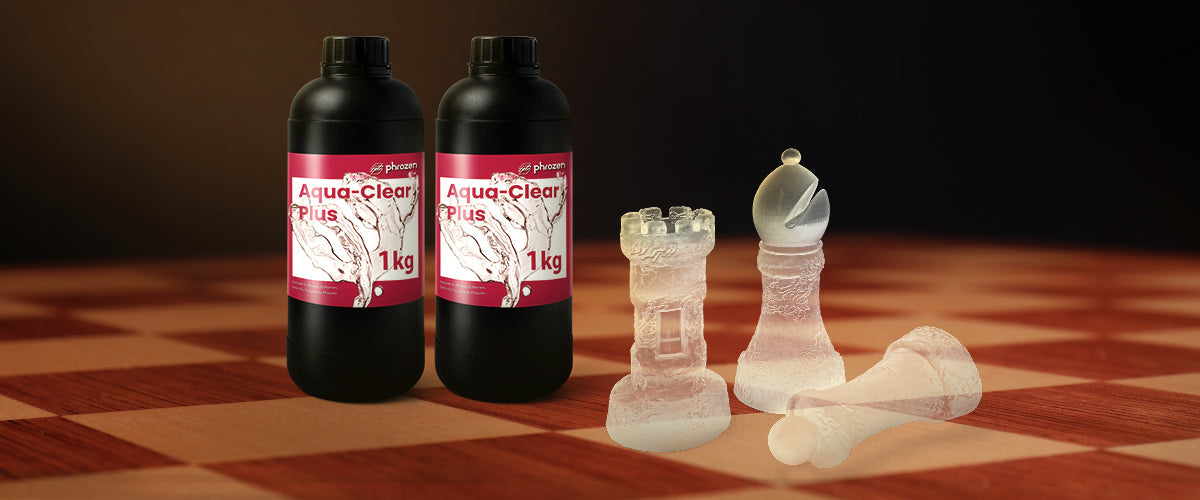
 Results after post-processing a 3D model created using the Aqua-Clear Plus Resin.
-
Use High-Quality Resin. Some transparent 3D printer resins naturally yellow faster than others. Investing in premium, UV-resistant resin will save you headaches in the long run.
One way to avoid many of these clear resin problems is by using a high-quality resin designed for better clarity, durability, and UV resistance.
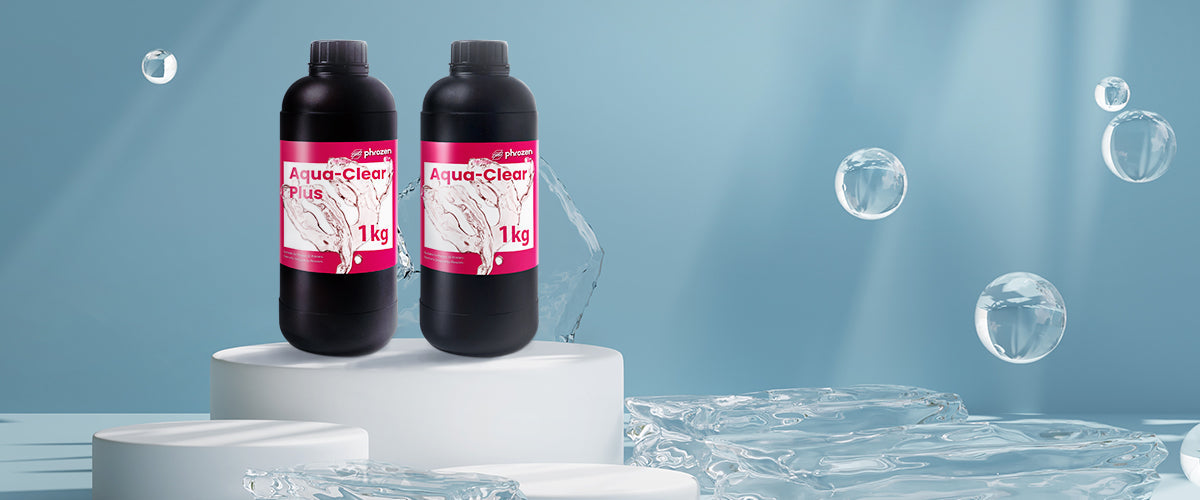
For example, Phrozen Aqua Clear Plus Resin is specifically formulated to resist yellowing, maintain optical transparency, and offer greater strength compared to standard clear resins. Its smoother surface finish also means less post-processing, making it easier to achieve crystal-clear results without extensive sanding or polishing.
Choosing the right resin from the start can significantly reduce common printing and curing issues, saving both time and effort in the long run.
Final Thoughts: Mastering Clear Resins the Right Way
Clear resin is tricky but rewarding. Whether you're casting jewelry, making transparent prototypes, or working on resin 3D printing problems and solutions, patience and technique make all the difference.
By following these troubleshooting tips—whether it's preventing resin yellowing, fixing cloudy resin, or dealing with bubbles—you’ll get crystal-clear, professional-looking prints every time.
If you're looking for inspiration for transparent 3D printing, check out our blog on cool 3D prints—from a mystical deer to anime figurines and more. It's packed with tons of 3D models perfect for transparent printing!
Now it’s your turn! What’s been your biggest challenge with clear resins? Drop a comment below, and let’s troubleshoot together!