
Most people assume that using clear resin is enough to get crystal-clear results, but the reality is different. Unlike injection-molded plastics, resin 3D printing builds models layer by layer, which creates tiny surface imperfections that scatter light, making prints appear hazy instead of truly transparent.
So, what’s the solution? Proper post-processing. With the right sanding, polishing, and coating techniques, you can achieve stunning clarity that rivals glass.
If you’re new to transparent resin printing or want a broader understanding of how different technologies, materials, and techniques impact clarity, check out this general guide on transparent 3D printing. It covers the basics of printing methods, material choices, and industry applications—a great starting point before diving into the fine details of post-processing.
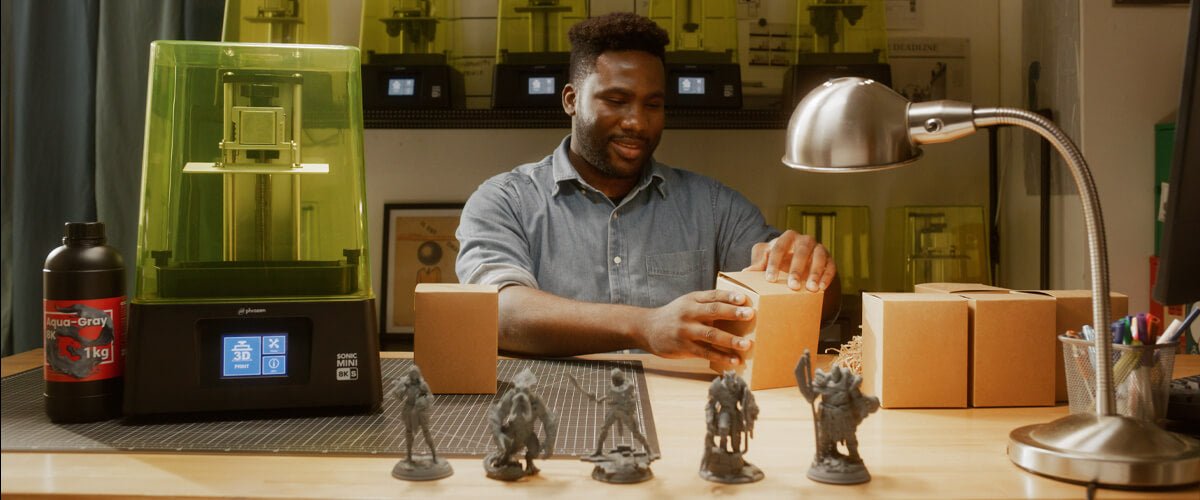
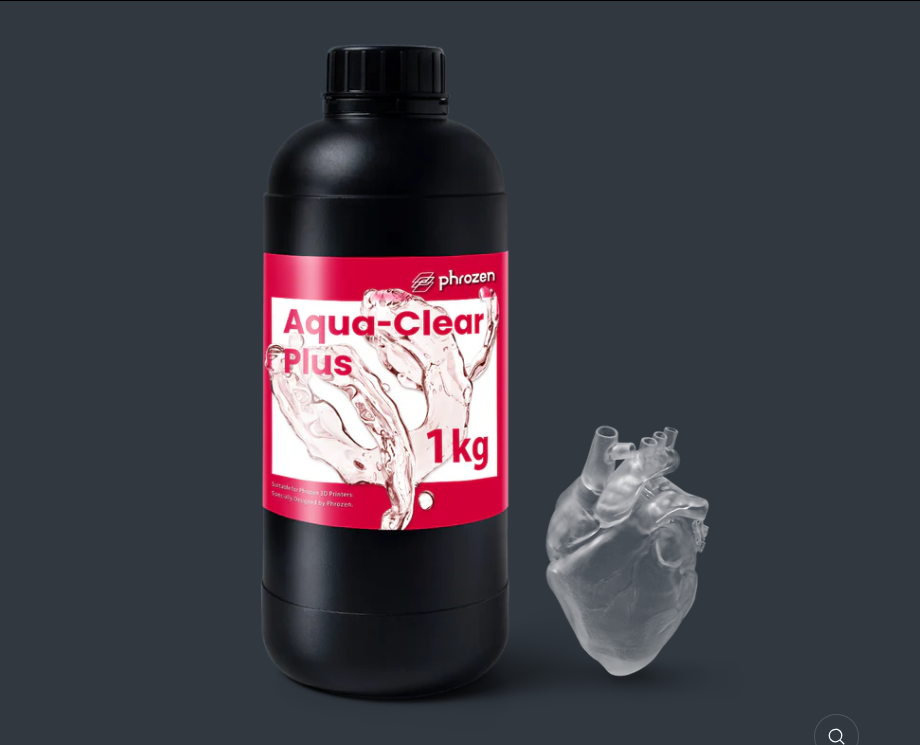
In this guide, we’ll show you a step-by-step method to turn your frosted resin prints into crystal-clear masterpieces. You’ll also learn which materials work best, including Phrozen Aqua-Clear Plus, a resin designed specifically for high transparency with reduced yellowing.
Why Fresh Prints Look Cloudy (And How to Fix It)
Even with high-quality resins, freshly printed models often look foggy and slightly rough. This happens because of:
-
Layer lines and micro-imperfections from the printing process.
-
Resin residue that sticks to the surface after washing.
-
Scattered light due to tiny scratches and rough surfaces.
To achieve true glass-like transparency, you’ll need to refine the surface through a 3-step post-processing method:
-
Sanding – Smooths out layer lines and imperfections.
-
Cleaning – Removes dust and sanding residue.
-
Clear Coating – Enhances clarity for a flawless finish.
If your prints still look cloudy despite following these steps, you may be dealing with common clear resin issues like improper curing, resin contamination, or material inconsistencies. To troubleshoot these problems, check out this detailed guide on transparent resin troubleshooting for expert solutions.
Up next, we’ll break down these steps in detail so you can get perfectly clear 3D prints every time.
How to Get Crystal Clear 3D Prints: A Step-by-Step Guide
Achieving true glass-like transparency in resin 3D prints isn’t just about using clear resin—it requires proper post-processing. The key to eliminating cloudiness and rough surfaces lies in a careful sanding, cleaning, and coating process. Follow these steps to transform your prints from frosted to flawless.
Things You'll Need:
-
Sanding sponges (320 to 3000 grit) – For smoothing out surface imperfections.
-
Pen sander or manual sanding tools – To make sanding more efficient.
-
Compressed air or soft brush – To remove dust after sanding.
-
Clear coat spray (e.g., Tamiya Clear Spray) – For a polished, glass-like finish.
-
Protective gloves and mask – To ensure safety while sanding and spraying.
Step 1: Sanding the Print for Maximum Clarity
The first and most important step to achieving glass-like clarity is sanding. Without proper sanding, no amount of polishing or coating will make your print completely transparent. The goal is to remove any layer lines and micro-imperfections that scatter light and create a cloudy effect.
Why Sanding is Crucial
Freshly printed transparent resin parts have a slightly rough or frosted surface due to the way light interacts with the microscopic ridges left by layer lines. Sanding gradually smooths out these imperfections, allowing light to pass through evenly.
Before sanding, it's essential to cure the print properly. We cured our print for 30 minutes before sanding. This ensures that the resin has fully hardened, making it easier to sand without deforming or leaving sticky residue.
Best Sanding Techniques for Clear Prints
For the best results, dry sanding was used in this process. While wet sanding is commonly recommended to reduce heat buildup, we achieved excellent clarity using a pen sander with dry sanding. Dry sanding offers more control and eliminates the need for water cleanup, making it a convenient and efficient method.
We used a pen sander to speed up the process and avoid the hassle of manual sanding. If you don’t have one, you can still sand manually, but it will require more effort and time.
Here’s the grit progression we followed to achieve the smoothest possible finish:
The right side is post-processed for clarity, while the left remains untreated and frosted.
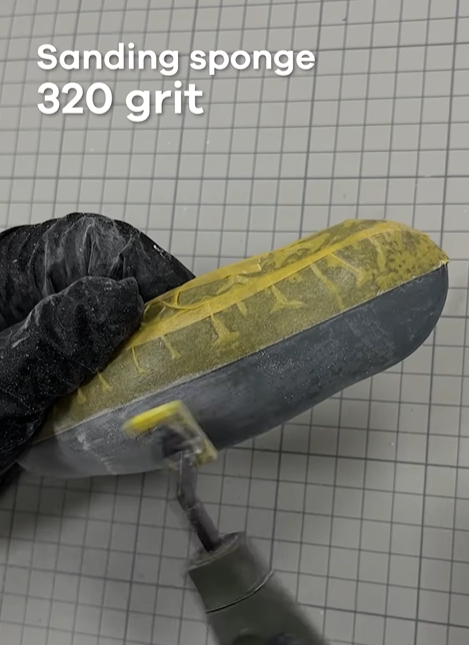
Starting with 320-grit sanding to remove imperfections and smooth the resin print for better clarity.
-
320-grit sanding sponge – Removes major imperfections and smooths the initial surface.
-
400-grit sanding sponge – Further refines rough edges and evens out the finish.
-
600-grit sanding sponge – Reduces the frosted effect and prepares for finer sanding.
-
800-grit sanding sponge – Begins creating a polished, semi-transparent surface.
-
1000-grit sanding sponge – Minimizes visible scratches and improves light transmission.

Finishing with 3000-grit sanding for maximum smoothness and near-glass clarity.
-
3000-grit sanding sponge – Achieves a near-glass finish, bringing out maximum clarity.
After finishing with 3000-grit, the print will already look significantly clearer. However, before applying a clear coat, it’s essential to thoroughly clean the surface to remove any sanding dust or residue. This ensures the final coating is applied smoothly for flawless transparency.
Step 2: Removing Sanding Residue
Once you’ve sanded the print thoroughly, you’ll notice a thin layer of residual dust left behind from the sanding process. If this dust isn’t removed properly, it can interfere with the next steps, reducing transparency.
How to Clean Your Print After Sanding
After sanding, the print will be covered in fine resin dust particles that cling to the surface. To remove them effectively, follow these steps:
-
Blow away dust with compressed air – This helps remove loose particles.
-
Wipe with a microfiber cloth – Avoid using paper towels as they may scratch the surface.
-
Rinse with clean isopropyl alcohol (IPA) – A quick dip in 99% IPA helps dissolve fine dust residue.
-
Let the model air dry completely – Any moisture left on the print can interfere with the next step.
At this stage, your print should be smooth and clean, but it may still have a slightly dull or frosted appearance. The final step—applying a clear coat—will enhance clarity and give it that flawless glass-like finish.
Step 3: Applying a Clear Coat for a Glass-Like Finish
Even after sanding, resin prints can still appear slightly hazy due to microscopic scratches. The secret to achieving true transparency? A clear coat.
We used Tamiya Clear Spray, which works wonders in filling in any remaining imperfections and allowing light to pass through smoothly.
How to Apply a Clear Coat the Right Way
-
Ensure the print is completely dry before applying the clear coat.
-
Shake the spray can well to prevent uneven application.
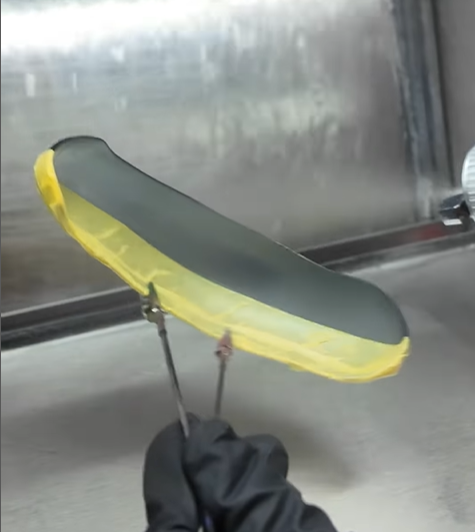
Applying a clear coat to the sanded resin print for a flawless, transparent finish.
-
Apply in thin, even layers—a heavy coat can create bubbles or streaks.
-
Let each layer dry fully before applying another—this helps prevent buildup.
-
Cure the coated print under UV light for added durability.
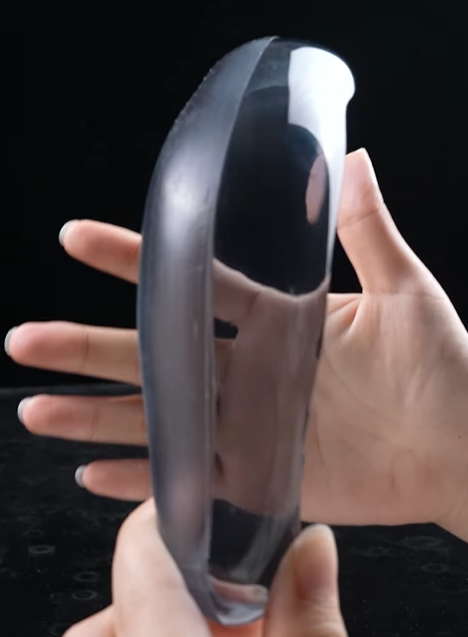
After applying a clear coat, you’ll immediately notice a dramatic improvement in transparency. The print will now allow light to pass through evenly, giving it a true glass-like effect.
Choosing the Right Transparent Resin for Maximum Clarity
Not all clear resins are created equal. Some are optimized for optical clarity, while others focus on durability or printability. If your goal is to achieve the clearest possible prints, your choice of resin matters.
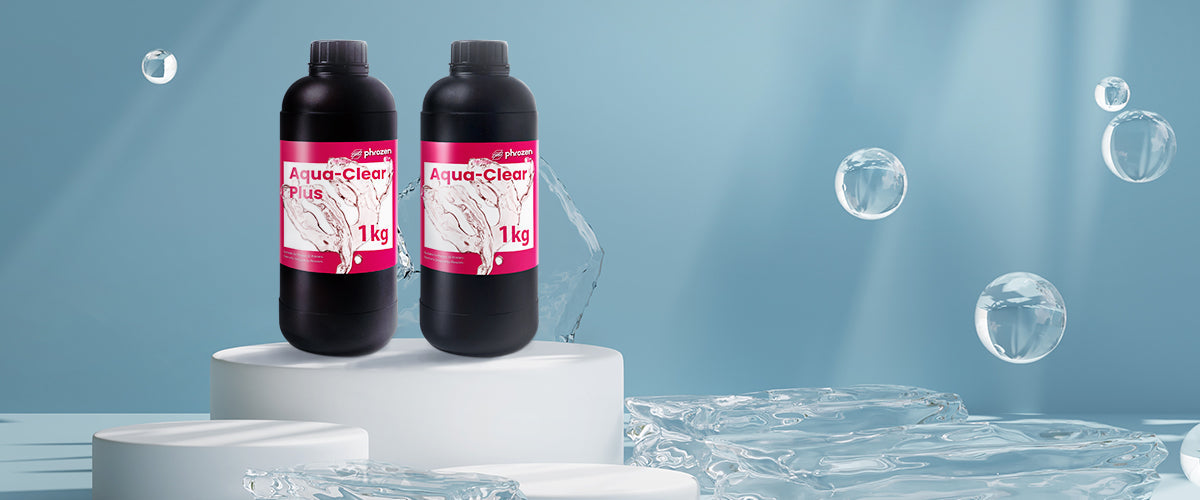
Why Aqua-Clear Plus is the Best Choice
Phronze Aqua-Clear Plus offers crustal-clear 3D prints.
One of the best transparent resins available is Phrozen Aqua-Clear Plus, which is designed specifically to offer high clarity with minimal post-processing effort. Here’s why it stands out:
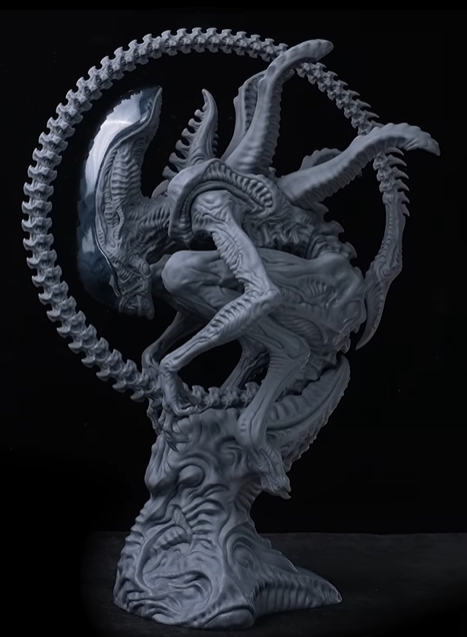
The top of this alien 3D model was created using Aqua-Clear Plus Resin for a dramatic effect. (3D Model by et_modelstudio)
Aqua-Clear Plus resin delivers exceptional glass-like transparency, making it possible to achieve crystal-clear 3D prints with the right post-processing. When properly sanded and polished, prints can rival the clarity of real glass, making this resin a top choice for projects that require a sleek, transparent finish.
Beyond its aesthetics, Aqua-Clear Plus is easy to print, making it suitable for both beginners and professionals. Unlike many clear resins that tend to be brittle, this formulation offers slight flexibility, reducing the risk of cracks while maintaining structural integrity.
Aqua-Clear Plus Resin + dye = Stunning life-like results!
Designed for a smooth printing experience, this resin has moderate viscosity and low odor, ensuring better printability without excessive fumes. Additionally, it is engineered to resist yellowing over time, a common issue with transparent resins exposed to UV light. With Aqua-Clear Plus, you get long-lasting clarity for high-quality, professional prints.
Final Thoughts: Is It Worth the Effort?
Transparent resin 3D printing has the potential to create stunning, glass-like models, but achieving true clarity requires more than just using clear resin. As we’ve covered, fresh prints often appear cloudy and frosted due to layer lines, resin residue, and micro-imperfections. However, with the right sanding, cleaning, and clear-coating techniques, you can turn a dull print into a crystal-clear masterpiece.
If you’re looking for the best results with minimal post-processing, using a high-quality transparent resin like Phrozen Aqua-Clear Plus is key. Its low yellowing, smooth printability, and slight flexibility make it an excellent choice for projects that require optical clarity and durability.
That said, achieving perfect transparency does take time and effort. If you want instant clarity with no post-processing, alternative manufacturing methods like injection molding or CNC machining might be better suited for your needs. But for those willing to put in the work, 3D-printed transparent resin parts can be just as impressive as glass or acrylic.
Still wondering when transparent resin is the right choice? Check out this detailed guide on the best and worst use cases for transparent resin 3D printing: