Let’s face it—figuring out how to create a 3D model for 3D printing can be overwhelming, especially when you’re new to the world of 3D design.
You’ve got a great idea, but turning that idea into a physical object often feels like navigating a maze without a map.
The frustration of not knowing where to start or how to ensure your model is print-ready is a common roadblock for beginners and even seasoned designers.
The good news? This guide is your ultimate solution and you'll know everything you need to master the art of 3d modeling.
By the end, you’ll not only know how to create a 3D model for 3D printing, but you’ll also have the confidence to tackle any project, no matter how complex.
The Essential Role of 3D Model Design in 3D Printing

The art of creating 3D models is essential in a wide range of industries.
In 3D printing, the ability to design your own models is more than just a skill—it’s a competitive advantage. When you know how to create a 3D model for 3D printing, you’re not limited to pre-made designs.
You can customize, innovate, and bring your unique ideas to life. This capability is crucial whether you’re working on a one-off prototype, crafting custom jewelry, or developing complex mechanical parts.
In industries like healthcare, automotive, and aerospace, the ability to create precise and functional 3D models is revolutionizing product development and manufacturing processes.
For instance, custom medical devices and prosthetics, tailored to individual patients, are now a reality thanks to advancements in 3D printing. In consumer goods, personalized products—from phone cases to fashion accessories—are becoming increasingly popular, driven by the customization capabilities of 3D printing.
But it all starts with knowing how to create a 3D model for 3D printing that is not only functional but also optimized for the printing process. This guide will equip you with the knowledge and tools you need to succeed.
Common Use Cases for 3D Printing: Why Knowing How to Design Matters

Before diving into the technical details of how to create a 3D model for 3D printing, let’s explore the common use cases where this skill is invaluable. Understanding the applications of 3D printing can help you design better models that meet specific needs and requirements.
Prototyping and Product Development

Photo by Jakub Żerdzicki on Unsplash
3D printing has revolutionized the prototyping process. Engineers and designers can quickly produce physical prototypes to test their designs in the real world. This process significantly reduces the time and cost associated with traditional prototyping methods.
- Real-World Example: Imagine you’re designing a new product and need to test multiple iterations. 3D printing allows you to quickly create physical prototypes, test them, and iterate on the design—all in a matter of days rather than weeks.
Custom Jewelry and Artistic Creations
3D printing enables artists and designers to create intricate, custom jewelry designs that would be impossible or prohibitively expensive using traditional manufacturing methods. This capability is particularly valuable for creating one-of-a-kind pieces.
- Real-World Example: A jewelry designer can use 3D printing to create complex lattice structures or organic shapes that are difficult to achieve with conventional casting techniques.
Entertainment and Media
In the film and video game industries, 3D printing is used to create detailed models, props, and sets. The ability to quickly prototype and modify designs allows creators to bring their visions to life with greater speed and accuracy.
- Real-World Example: A movie studio can use 3D printing to create lifelike props or miniature models for set design, which can be quickly adjusted or replicated as needed.
Industrial Tooling and Manufacturing
In industrial settings, 3D printers are used to create custom tools, jigs, and fixtures that are essential for the manufacturing process. These tools must be both precise and durable, capable of withstanding the rigors of production.
- Real-World Example: A manufacturing company can design and print custom tools tailored to specific production needs, improving efficiency and reducing costs.
Medical Devices and Prosthetics
One of the most impactful uses of 3D printing is in the medical field, where custom prosthetics and medical devices can be tailored to fit individual patients. This personalization improves comfort, functionality, and outcomes.
- Real-World Example: A prosthetist can design and print a custom prosthetic limb that perfectly fits the patient’s anatomy, improving comfort and usability.
Understanding these use cases highlights the importance of learning how to create a 3D model for 3D printing that meets the specific demands of your project, whether it’s a prototype, a piece of art, or a functional medical device.
Step-by-Step Guide: How to Create a 3D Model for 3D Printing
Ready to dive into the details of how to create a 3D model for 3D printing? Here’s a step-by-step guide that will take you from concept to creation.
Start with a Solid Concept
The first step in designing models for 3D printing is to have a clear concept in mind. Whether you’re creating something functional, like a tool or prototype, or something artistic, like a sculpture or piece of jewelry, starting with a concept will guide your design process.
- Sketch It Out: Before you even open your design software, sketch your idea on paper. This will help you visualize the final product and consider important factors like size, shape, and material. Don’t worry if you’re not an artist—simple sketches are enough to guide your design.
- Define the Purpose: Consider the purpose of your model. Is it meant to be functional, decorative, or both? The purpose will influence your design decisions, such as material choice and structural integrity.
Pro Tip: If you’re looking for inspiration or need high-quality models to use as a starting point, check out Pixup3D, where you can download a wide variety of 3D models.
Choose the Right Software

Image by DC Studio on Freepik.
Selecting the right software is crucial to successfully designing models for 3D printing. Different software caters to different skill levels and design needs. Here’s a rundown of popular options:
- Tinkercad: Ideal for beginners, Tinkercad offers a user-friendly, browser-based platform with drag-and-drop functionality. It’s perfect for creating simple models and learning the basics of 3D design.
- SketchUp Free: Another browser-based tool, SketchUp Free is great for creating 3D models that are stored in the cloud, making it easy to access your designs from multiple devices.
- Fusion 360: A more advanced option, Fusion 360 is a professional-grade tool that offers both direct and parametric modeling capabilities. It’s ideal for creating complex, mechanical designs.
- Blender: While not a traditional CAD tool, Blender is a powerful, open-source software popular among animators and game designers. It’s particularly useful for creating organic shapes and artistic designs.
- SolidWorks and Autodesk Inventor: These are industry-standard tools for professional engineers and designers. They offer advanced features for creating precise, parametric models that are ready for manufacturing.
Key Considerations When Choosing Software:
-
Ease of Use: For beginners, ease of use is critical. Tools like Tinkercad and SketchUp Free are designed to be intuitive, even for those with no prior experience in 3D modeling.
-
Capabilities: If you’re designing complex or mechanical parts, you’ll need software that offers advanced modeling capabilities, such as Fusion 360 or SolidWorks.
-
Cost: Some professional tools come with a hefty price tag. However, many offer free versions for non-commercial use, like Fusion 360’s free license for hobbyists.
Design with 3D Printing in Mind
When you begin designing models for 3D printing, it’s essential to consider the specific requirements and limitations of 3D printers. Not all designs that look good on screen will print well. Here are some key design principles to keep in mind:
- Wall Thickness: Ensure that your model’s walls are thick enough to be durable but not so thick that they waste material or increase print time unnecessarily. A good rule of thumb is a minimum thickness of 1-2 mm, but this can vary depending on the material and printer.
- Overhangs and Bridges: 3D printers struggle with overhangs and bridges—parts of the model that protrude horizontally without support. Design these areas with care, and consider adding supports where necessary.
- Detail Level: While 3D printing can achieve impressive detail, extremely fine features may not print well, especially on lower-resolution printers. Simplify intricate details or use a higher-resolution printer for detailed work.
- Support Structures: If your model has overhangs or complex geometry, you’ll need to add support structures to prevent sagging or collapsing during printing. These supports can be removed after printing, but they must be included in your design or generated by your slicing software.
Pro Tip: If you’re looking to optimize your prints and speed up the process, this guide on how to print faster offers valuable insights. From adjusting print settings to modifying your design, there are several ways to reduce print time without sacrificing quality.
Ensure Printability
Before you export your model, it’s crucial to ensure that it’s fully printable. This step involves checking for common issues that can cause print failures, such as unclosed edges, intersecting elements, or non-manifold geometry.
- Use Mesh Repair Tools: Software like Meshmixer or Netfabb can automatically detect and fix common issues in your 3D model. These tools ensure that your model is watertight and free of defects that could cause printing problems.
- Check for Thin Walls and Unsupported Areas: Go through your design and check for any areas that might be too thin to print or that require additional support. Adjust these areas before moving on to the next step.
- Optimize for Your Printer: Consider the specific capabilities and limitations of your 3D printer. For example, if your printer has a smaller build volume, you may need to resize your model or print it in sections.
Export and Slice Your Model
Once your model is finalized and free of errors, it’s time to export it as an STL file, the standard format for 3D printing. After exporting, the next step is to slice your model using slicing software.
- Slicing Software: The slicer converts your STL file into G-code, which contains the instructions your printer needs to create the model layer by layer. Popular slicing software includes Chitubox, Cura, Slic3r, and PrusaSlicer.

- Adjust Print Settings: In your slicer, you can adjust settings such as layer height, print speed, and infill density to optimize your print. For example, reducing layer height can improve detail but will increase print time, while increasing infill density will make the model stronger but also use more material.
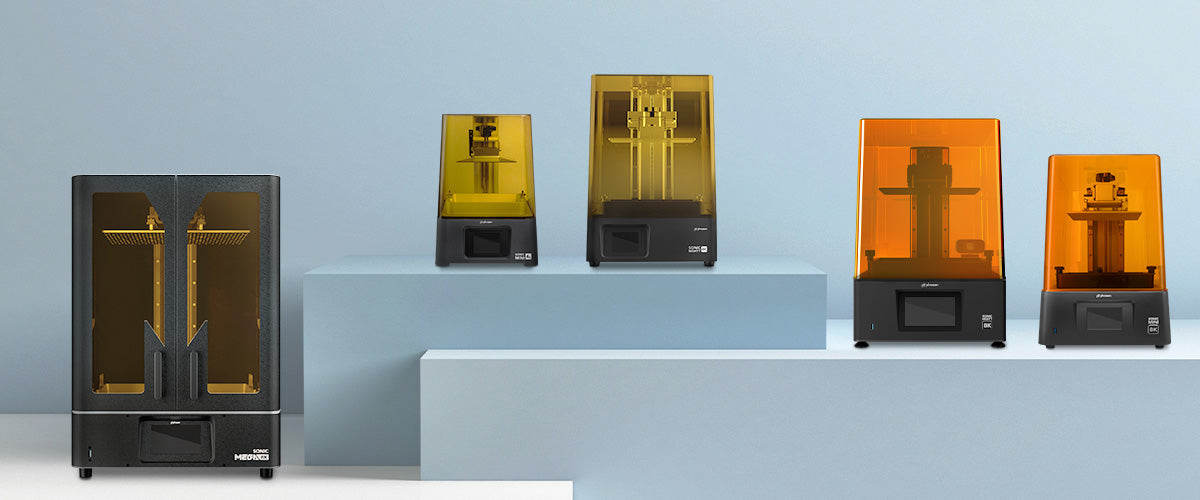
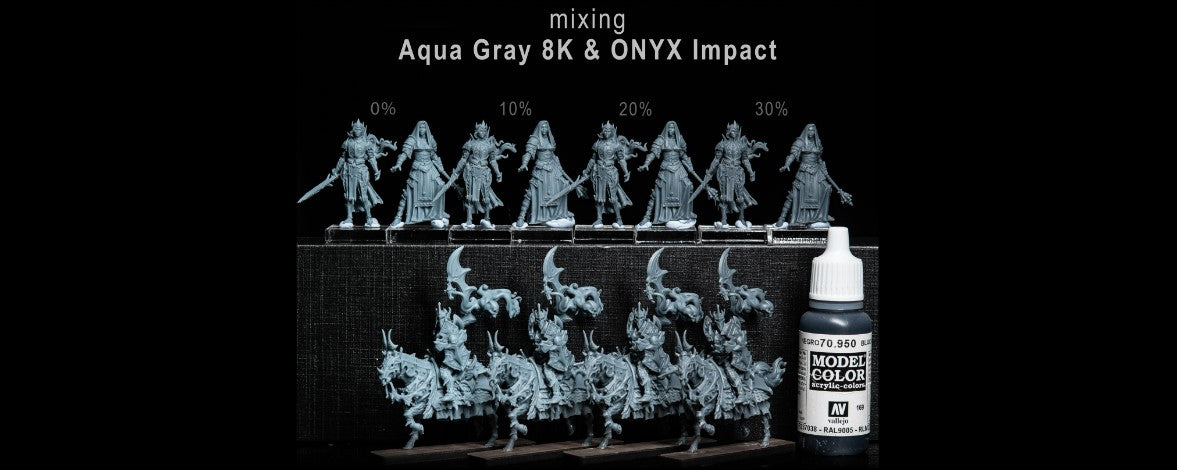
If you're using Phrozen resins, you can check their profiles for the best print results.
- Preview the Print: Most slicing software allows you to preview the print before starting. This preview can show you where supports will be placed and how the layers will be built up, allowing you to catch any potential issues before printing.
Preparing Your 3D Printer
With your G-code ready, it’s time to prepare your printer. Proper preparation is key to a successful print.
- Bed Adhesion: Ensure that your print bed is clean and properly leveled. Good bed adhesion is critical for preventing the model from shifting during printing, which can lead to print failures.
- Temperature Settings: Set the nozzle and bed temperatures according to the material you’re using. For example, PLA typically prints well at a nozzle temperature of 190-210°C and a bed temperature of 50-60°C.
- Load Filament: Make sure you have enough filament loaded to complete the print. Check the filament for any knots or tangles that could cause feeding issues during printing.
Printing Your Model
Now comes the exciting part—printing your design! Depending on the complexity of your model, the print can take anywhere from a few minutes to several hours. During this time, it’s important to monitor the print to ensure everything is running smoothly.
- Monitor the First Layer: The first layer is the most critical part of the print. If the first layer doesn’t adhere well to the bed, the rest of the print is likely to fail. Watch the first few layers to ensure they’re going down smoothly.
- Check for Issues: Throughout the print, keep an eye out for common issues like warping, under-extrusion, or layer shifting. Address these issues as soon as they arise to avoid wasting time and filament.
Pro Tip: If you’re looking for tools to make your printing and post-processing easier, this guide on essential 3D printing tools covers everything from sanders to finishing tools.
Post-Processing Your Print
Once your print is complete, it may require post-processing to achieve the desired finish. This step is often overlooked but is crucial for producing professional-quality results.

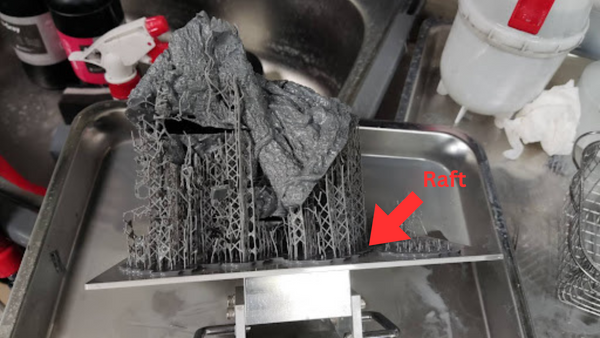
After you're done printing, make sure to remove the supports and raft.
- Remove Supports: Carefully remove any support structures added during the slicing process. Use pliers or a knife to cut away supports without damaging the model. You can also use tools like the Phrozen Sonic Saber to efficiently and quickly remove your supports without any marks left behind.
- Sanding and Finishing: Use sandpaper or a rotary tool to smooth out rough edges and layer lines. This step is particularly important for models that will be painted or displayed.
- Painting: If your model requires painting, start with a primer to ensure the paint adheres well. Use acrylic paints for a durable finish, and consider adding a clear coat for protection.
- Assembly: If your model was printed in multiple parts, assemble them using adhesive or fasteners. Make sure all parts fit together smoothly and securely.
Advanced Tips for Designing 3D Models
Once you’ve mastered the basics of how to create a 3D model for 3D printing, you can start exploring more advanced techniques to improve your designs and prints.
- Design for Assembly: For complex models, consider breaking them into smaller parts that can be printed separately and assembled later. This approach can improve print quality, reduce the need for supports, and make large models more manageable.
- Material Selection: The material you choose has a significant impact on the final product. PLA is easy to print but can be brittle, while ABS is more durable and heat-resistant but requires higher temperatures and better bed adhesion. PETG offers a good balance between strength and ease of printing, while TPU is flexible and great for parts that need to bend or stretch.
- Iterate and Improve: Don’t be discouraged if your first print isn’t perfect. Use each print as an opportunity to learn and refine your design. Make small adjustments, reprint, and compare the results. Over time, you’ll develop a deep understanding of how to optimize your models for 3D printing.
- Experiment with Advanced Features: Once you’re comfortable with basic design and printing, start experimenting with advanced features in your design software and slicer. For example, you can try using variable layer heights for better detail in specific areas, or explore dual-extrusion printers to create models with multiple materials or colors.
Monetizing Your 3D Printing Skills
Once you’ve mastered how to create a 3D model for 3D printing, you might want to explore ways to monetize your skills. There are several avenues for making money with 3D printing:
- Selling Custom Designs: Create custom designs and sell them on platforms like Etsy or Shapeways. Unique, personalized items are always in demand, especially in niches like jewelry, home decor, and gadgets.
- Offering Printing Services: If you have a reliable printer and a good understanding of the 3D printing process, you can offer printing services to others. This could include printing models for local businesses, artists, or hobbyists who don’t have their own printers.
- Teaching and Consulting: If you’re experienced with 3D modeling and printing, consider offering consulting services or teaching classes. There’s a growing demand for education in this field, especially as more people and businesses become interested in 3D printing.
Did you know that you can earn money through 3D printing? If you're interested in learning about the various side hustles to generate a generous amount of passive income through 3D printing, go through our blog on How to Make Money Through 3D Printing.
Conclusion: Your Path to Mastering 3D Model Design
Learning how to create a 3D model for 3D printing is a journey that opens up endless possibilities for innovation, creativity, and even profit. Whether you’re a beginner just starting out or a seasoned designer looking to refine your skills, mastering the art of designing models for 3D printing will give you the tools you need to bring your ideas to life.
Remember, the key to success in 3D printing is practice, experimentation, and continuous learning. The more you design and print, the better you’ll understand the nuances of the process, from choosing the right software to optimizing your models for specific printers and materials.
Don’t forget to explore resources like Pixup3D for high-quality models and Phrozen’s blog for tips on optimizing your 3D printing process. With the knowledge and skills you’ve gained from this guide, you’re well on your way to becoming a 3D printing expert.


1條評論
Donald
“By the end, you’ll not only know how to create a 3D model for 3D printing, but you’ll also have the confidence to tackle any project, no matter how complex.”
This absolutely does NOT teach a thing about 3D modeling and very vague at best. Talking about it and actually showing someone is two completely different actions. Obviously all you chose was to talk about it. This article was therefore used to draw attention to this online store.