The new Phrozen ACF film is designed with a non-stick and smoother film surface for more efficient 3D printing. Compared to FEP and PFA (nFEP) film, the ACF film features a better release, significantly reducing the printing time and increasing success rate.
Before Installing the New ACF Release Film
Before starting this tutorial, there are two things you need to know:
- This tutorial can also be a reference for Sonic Mighty 8K and/or other resin 3D printers that use a similar type of resin vat.
- To protect your 3D printer from damage and reduce print failures, we recommend using Isopropyl alcohol (IPA) or 95% sanitizing alcohol to remove any residual resin on the film.
You can also read our warranty policy for ACF film.
How to Remove the Old PFA (nFEP) Film
Step 1: Clean the entire resin vat with Isopropyl alcohol (IPA) or 95% sanitizing alcohol. Please clear out the junction between the screws thoroughly.
Step 2: Use the 3 mm Allen wrench to remove the 4 corner screws. Then use the 2.5 mm Allen wrench to remove the remaining screws on the bottom.

Step 3: Put the resin vat aside and flip the metal frame.
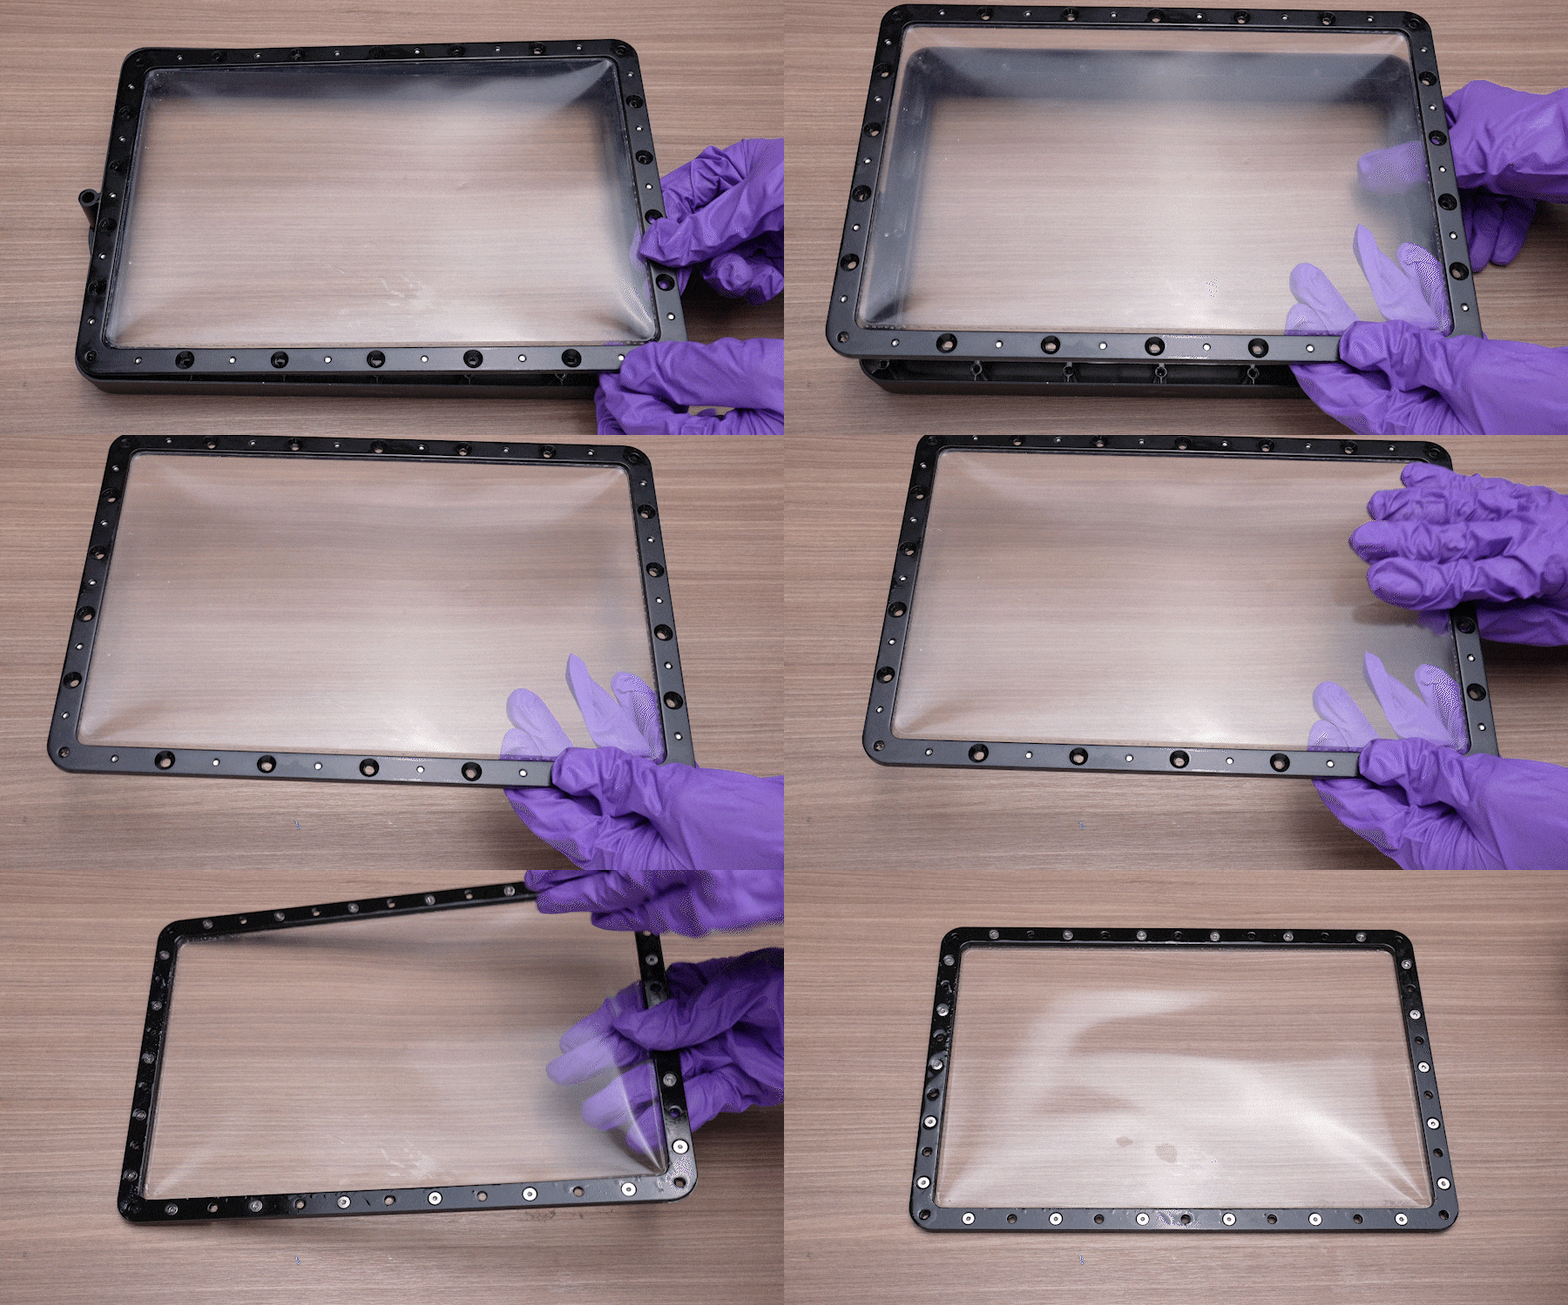 Step 4: Use the 2 mm Allen wrench to remove all the remaining screws.
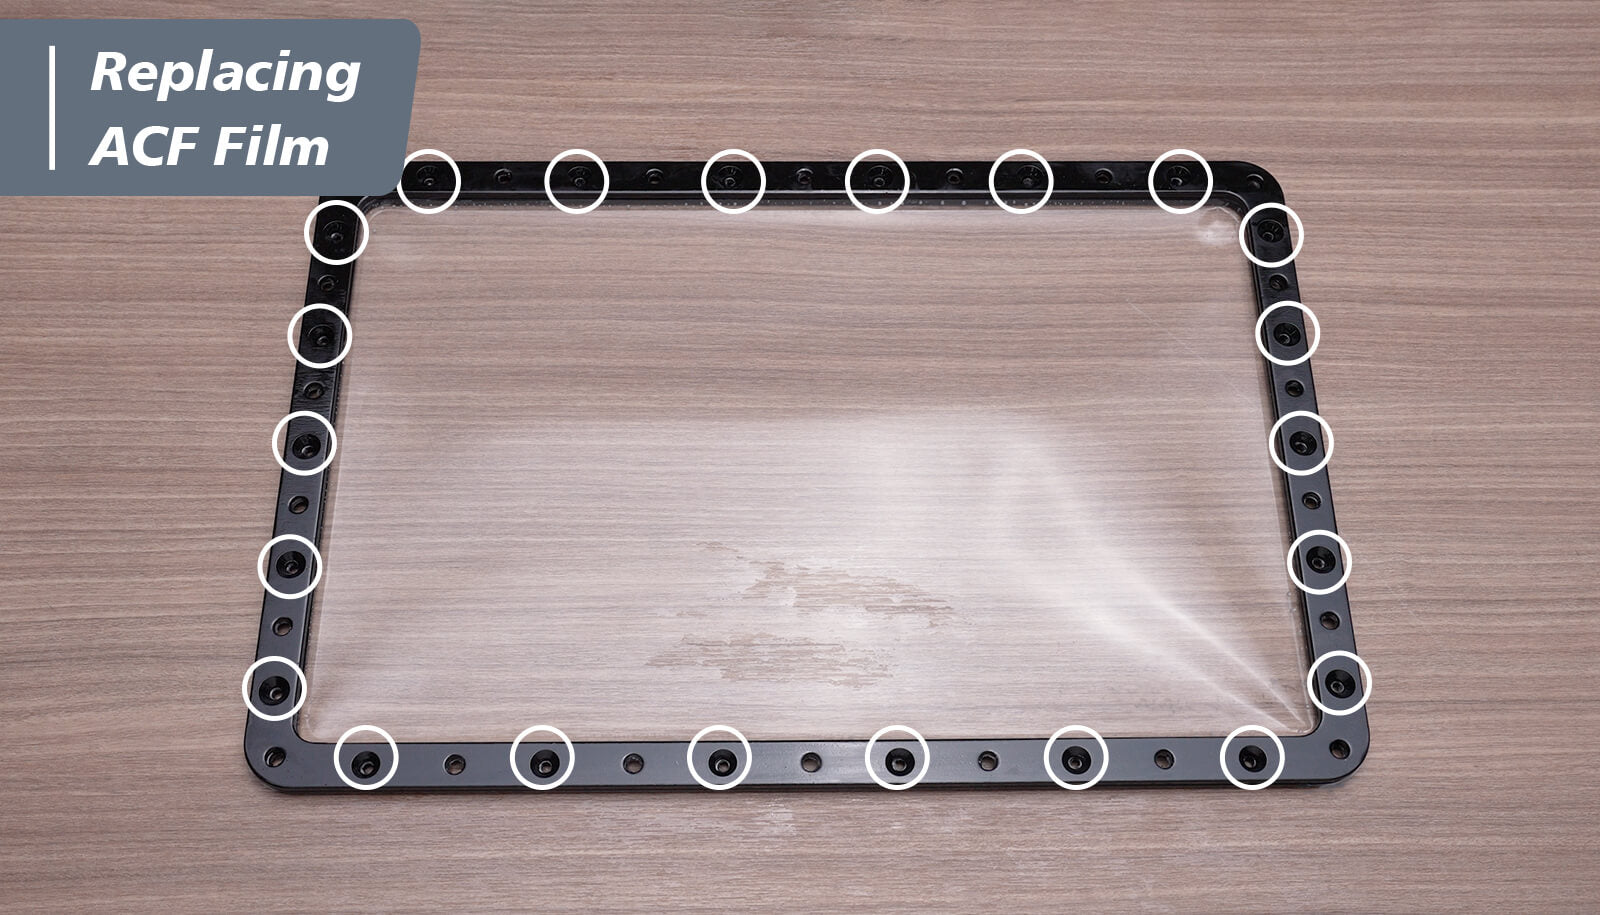
Step 5: After removing all screws, the metal frame can be removed. Remove the old PFA (nFEP) film from between the metal frames.
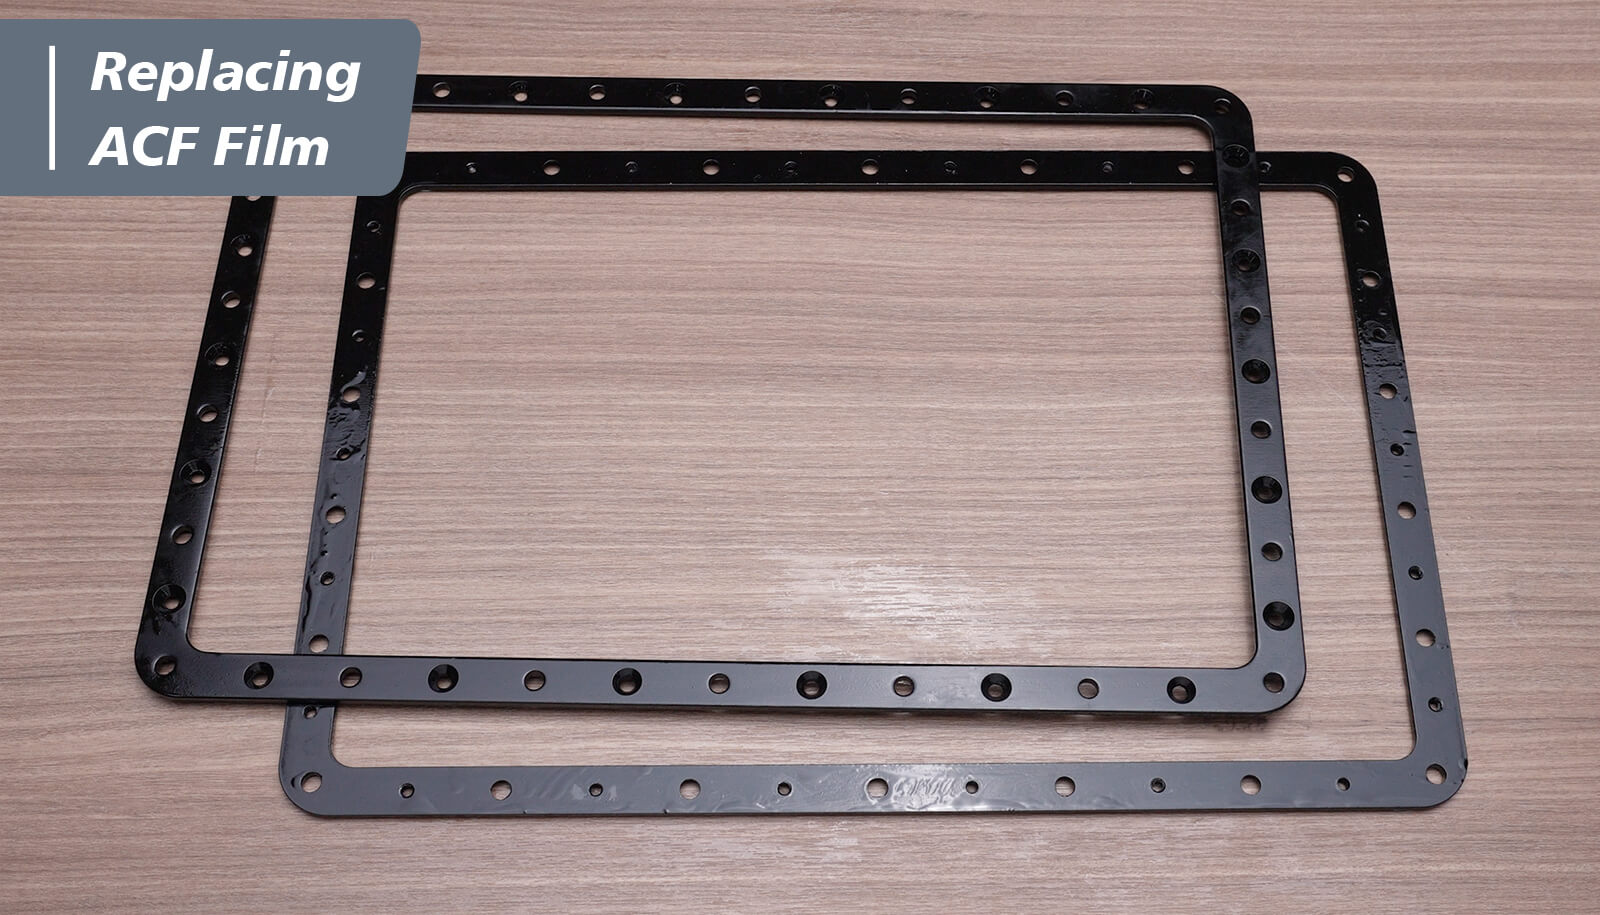
How to Install the New ACF Film
Step 1: Use 95% sanitizing alcohol to clean up the residual resin on the resin vat.

Step 2: Put the ACF film on a table and slowly peel off the protective film. When installing the new film, make sure that the glossy surface of the ACF Film is going to be in the resin vat, while the matte surface will face the LCD screen.
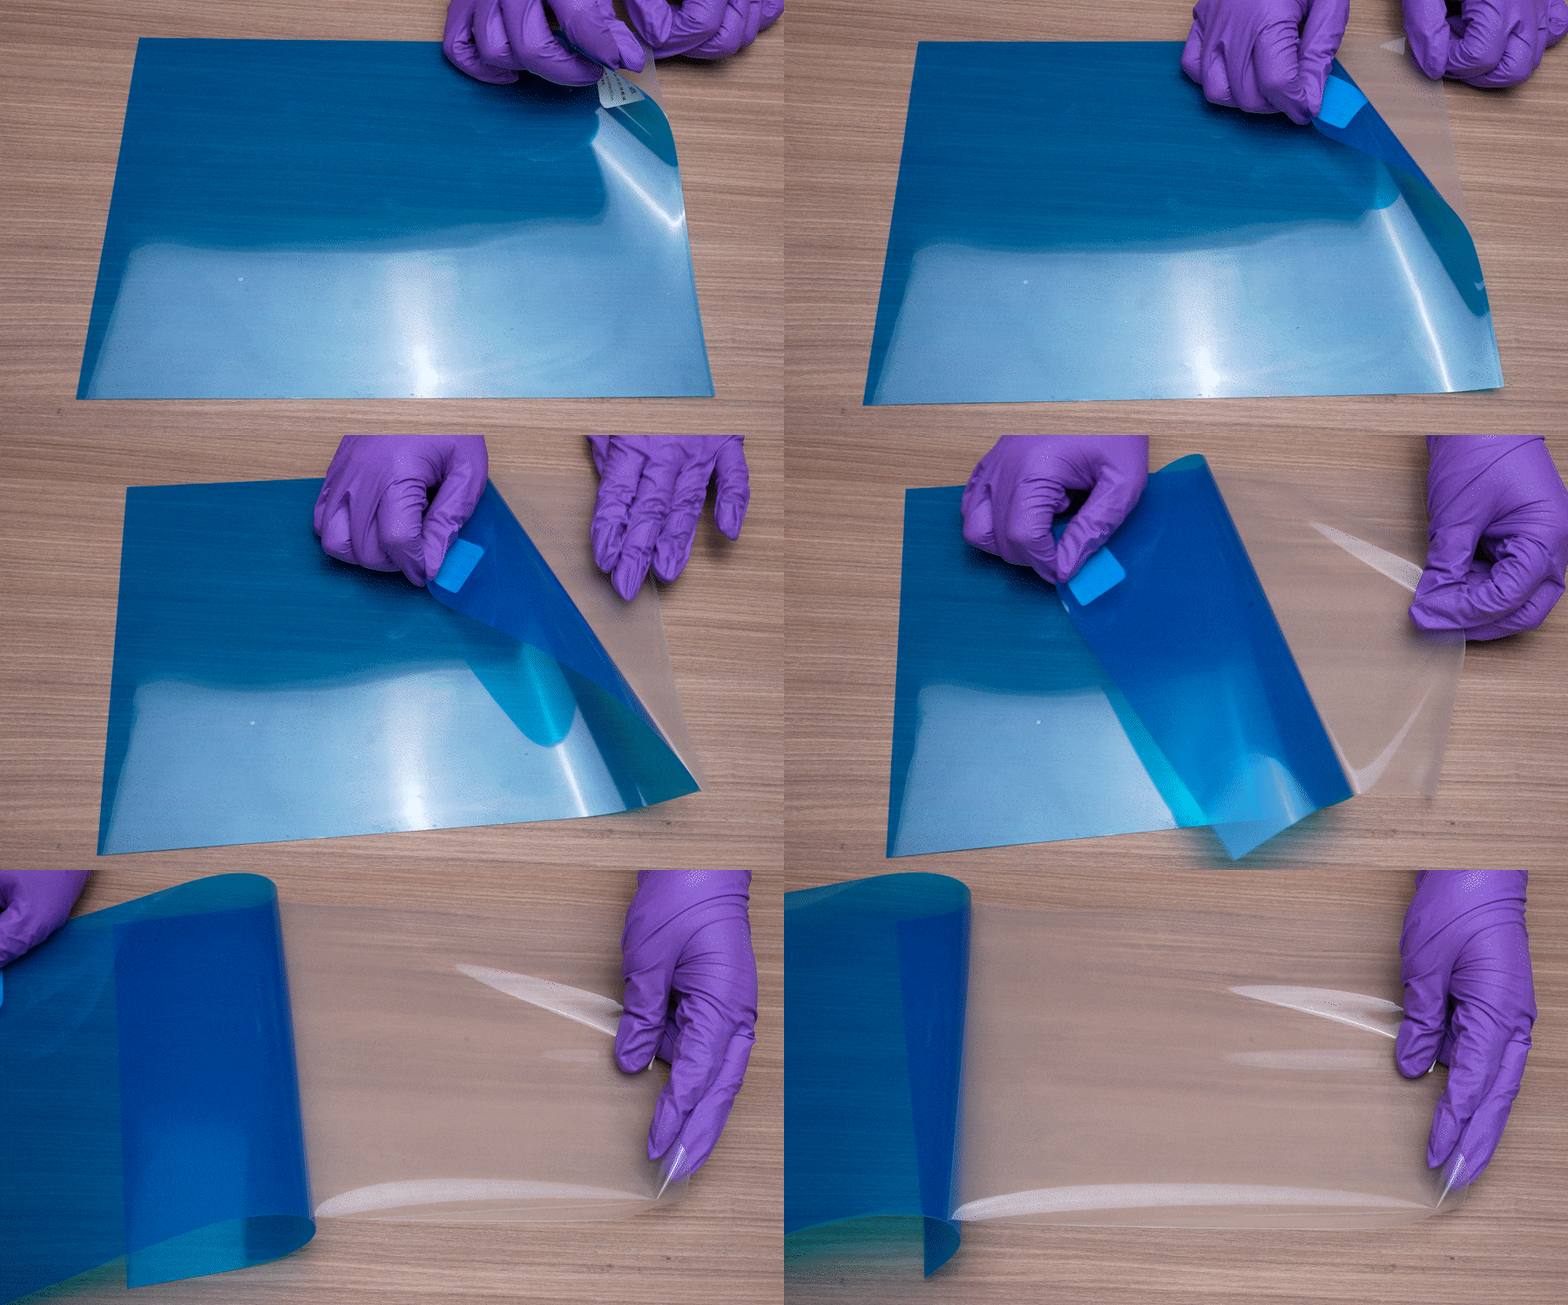
Step 3: Install the new ACF film in the following order:
- One of the metal frames.
- The new ACF film with glossy surface on top.
- The other metal frame.
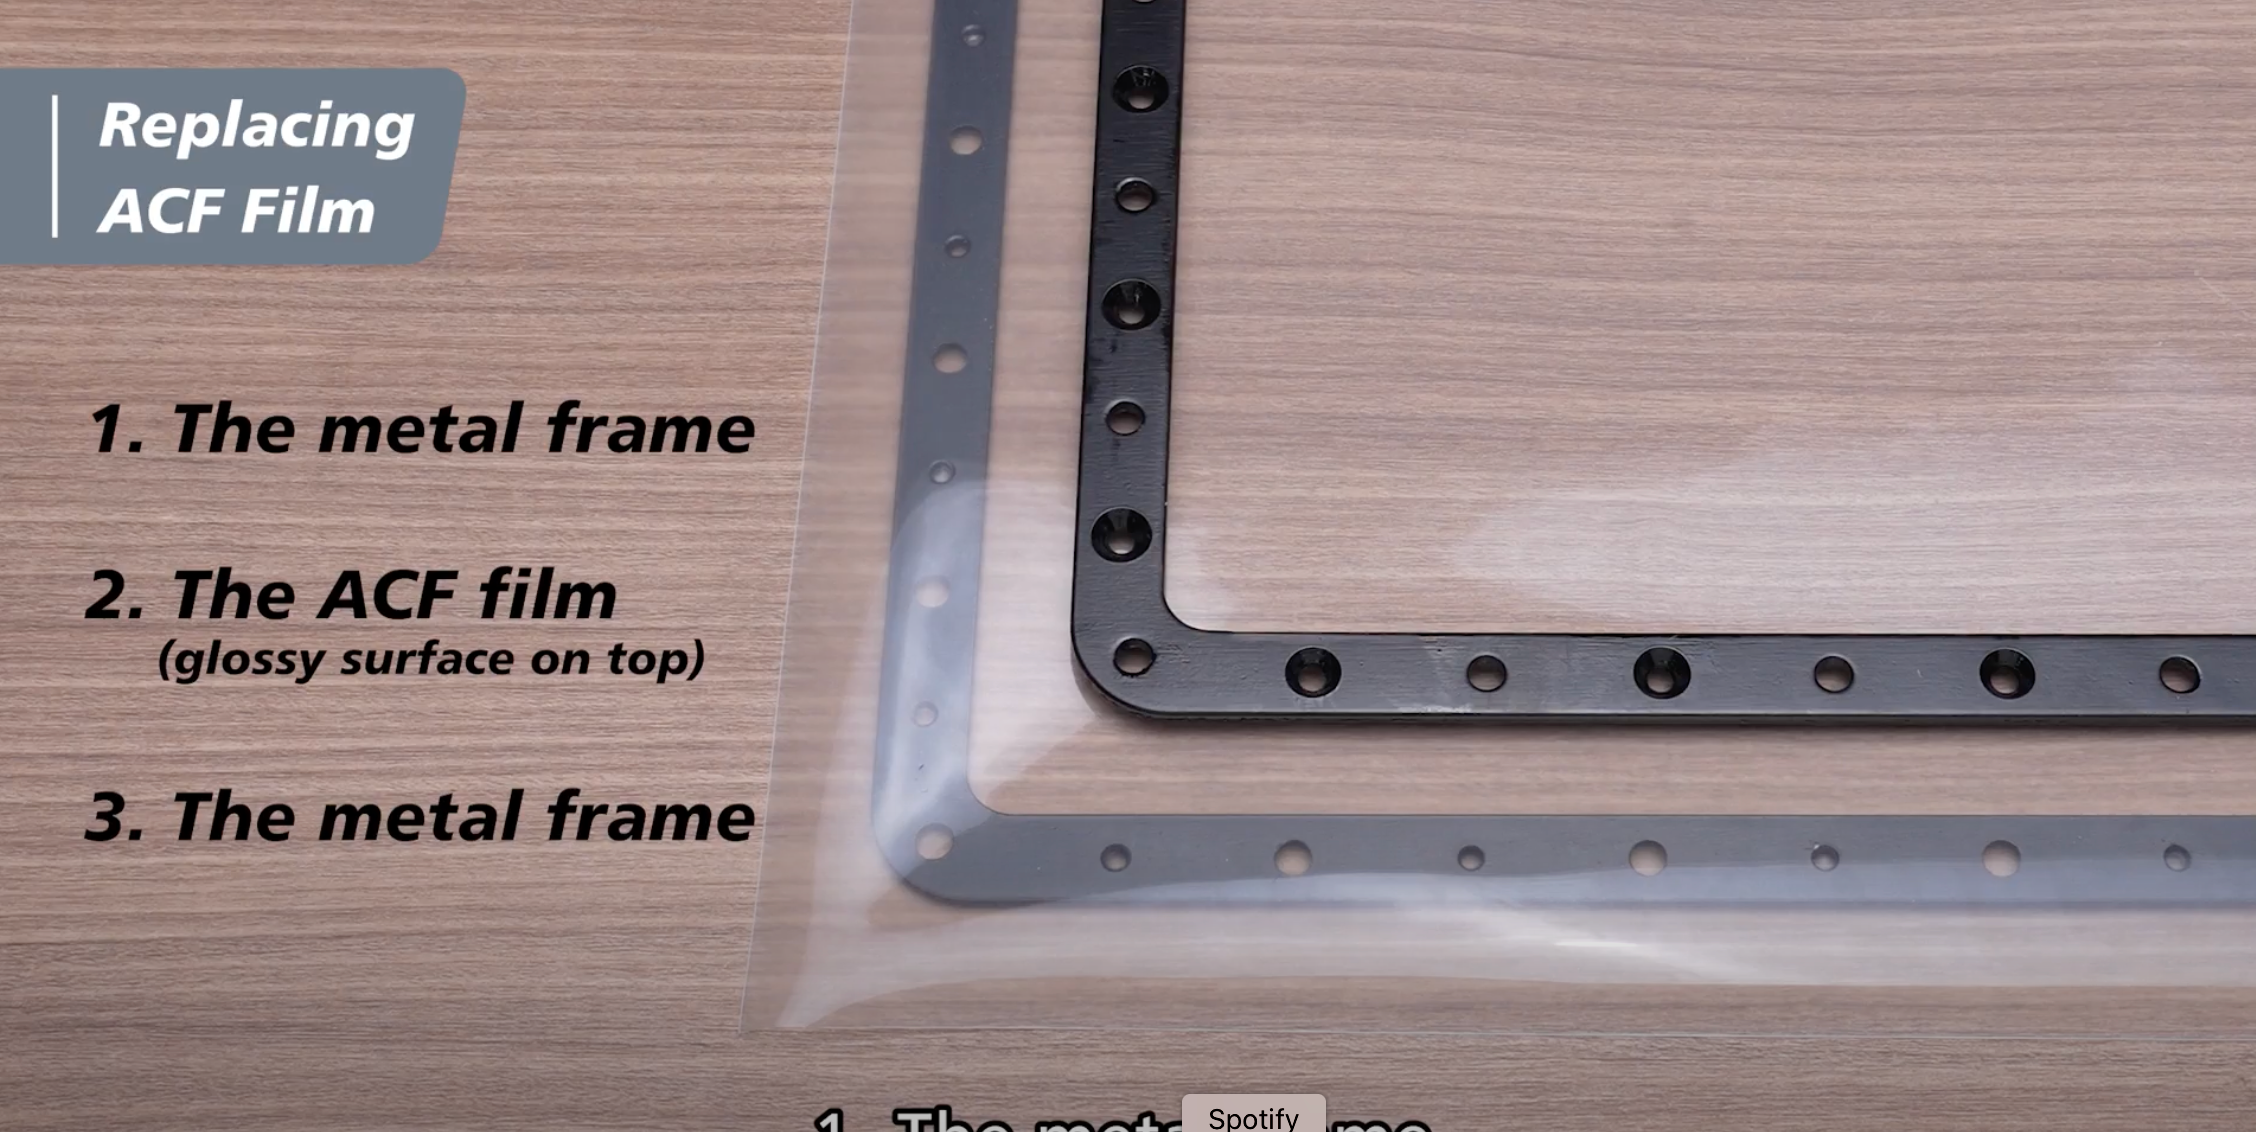
Step 4: Use the 2 mm Allen wrench to tighten the 8 screws in the corners diagonally. Then tighten the rest of the screws. You can also poke the ACF film with Allen keys before tightening the screw, so it’s easier to screw in.

How to Install the New ACF Film Onto the Resin Vat
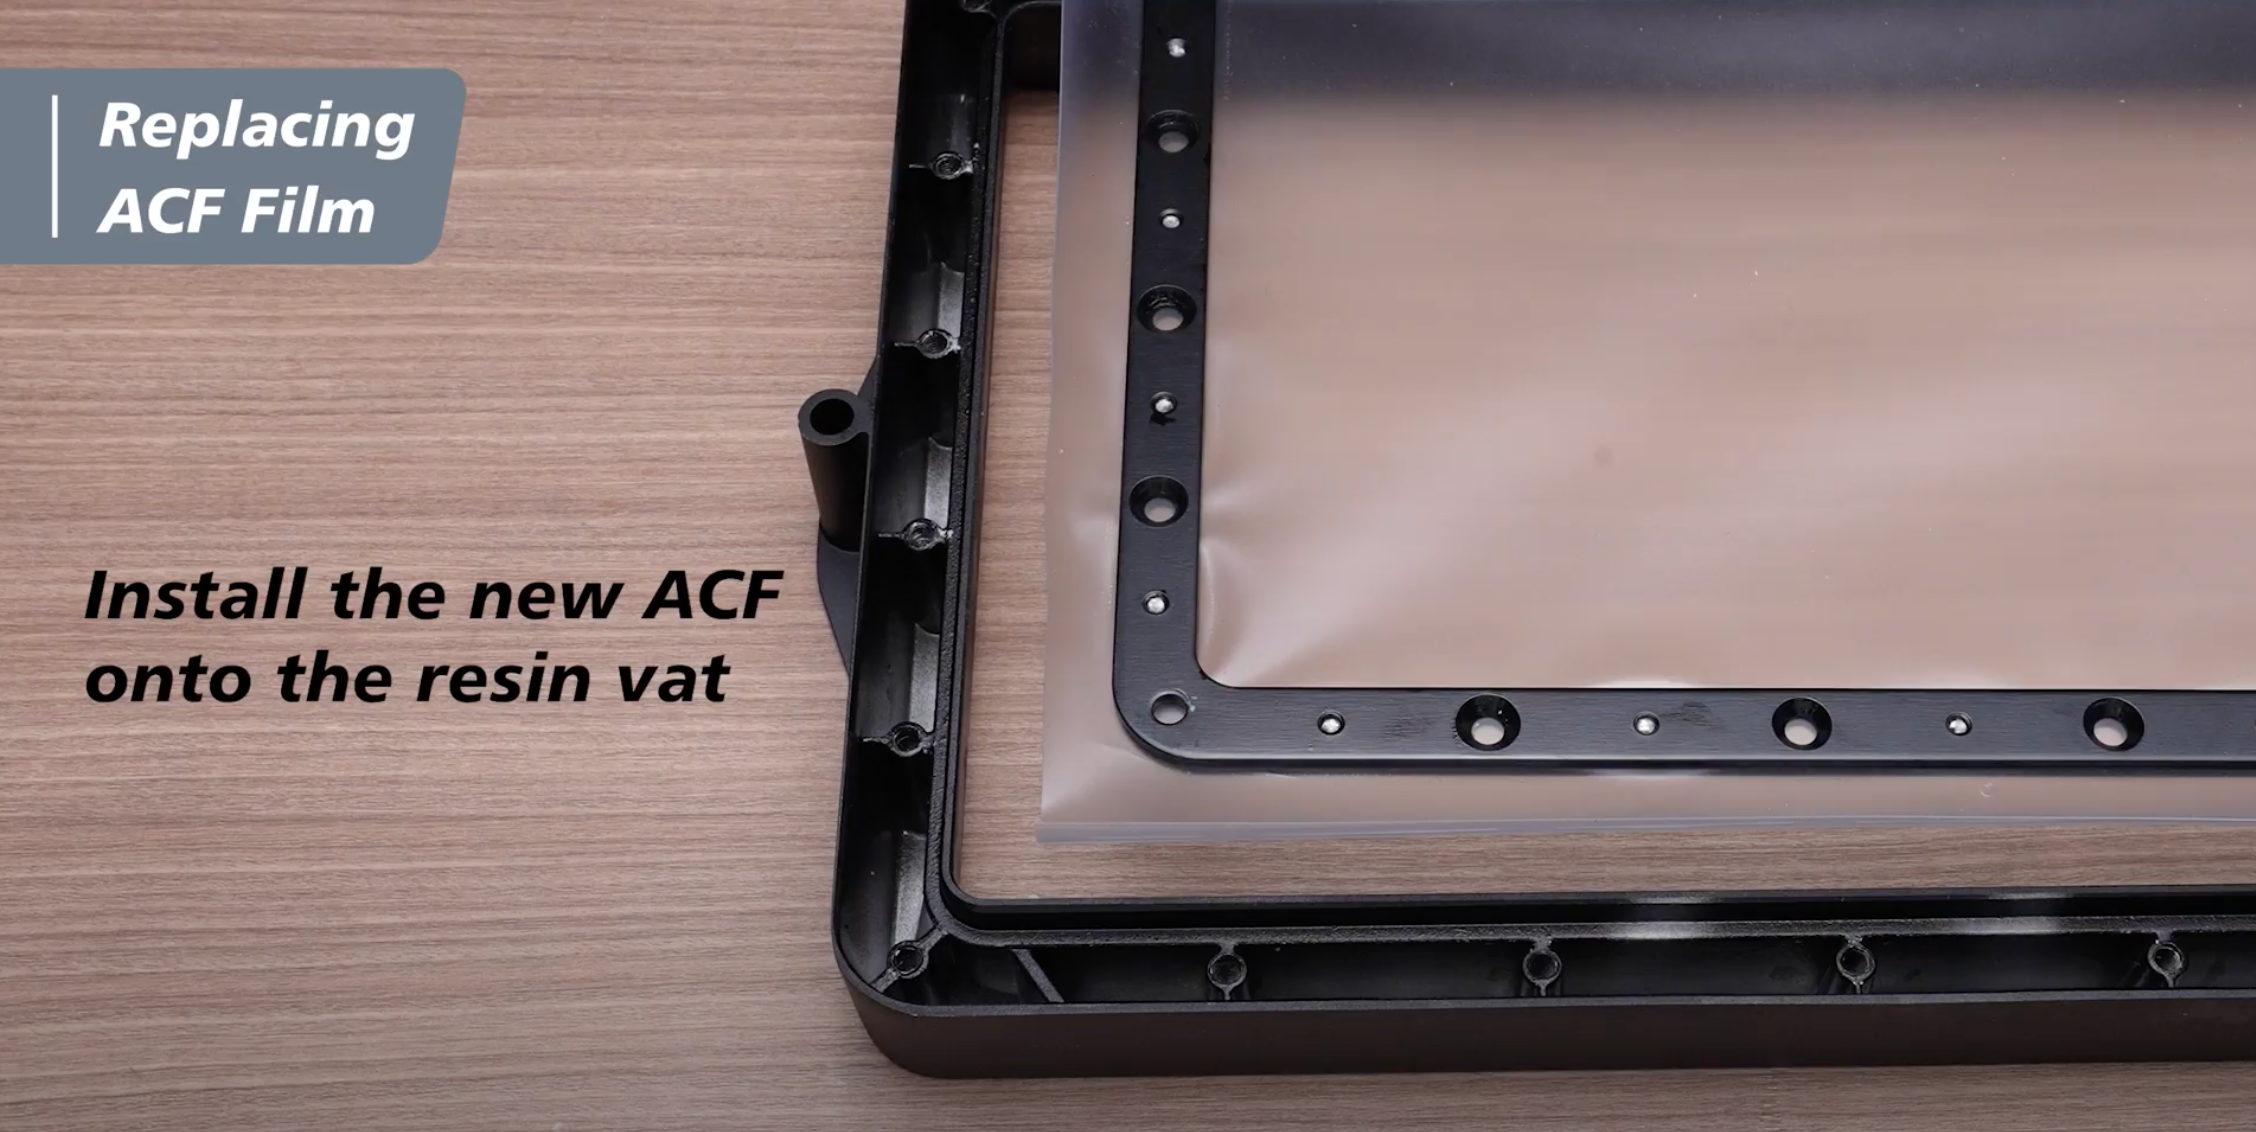
Step 1: Install the new ACF film onto the resin vat according to the following sequence:
- Turn the resin vat upside down
- Place the new ACF film with metal frame and make sure that the matte surface is facing up.
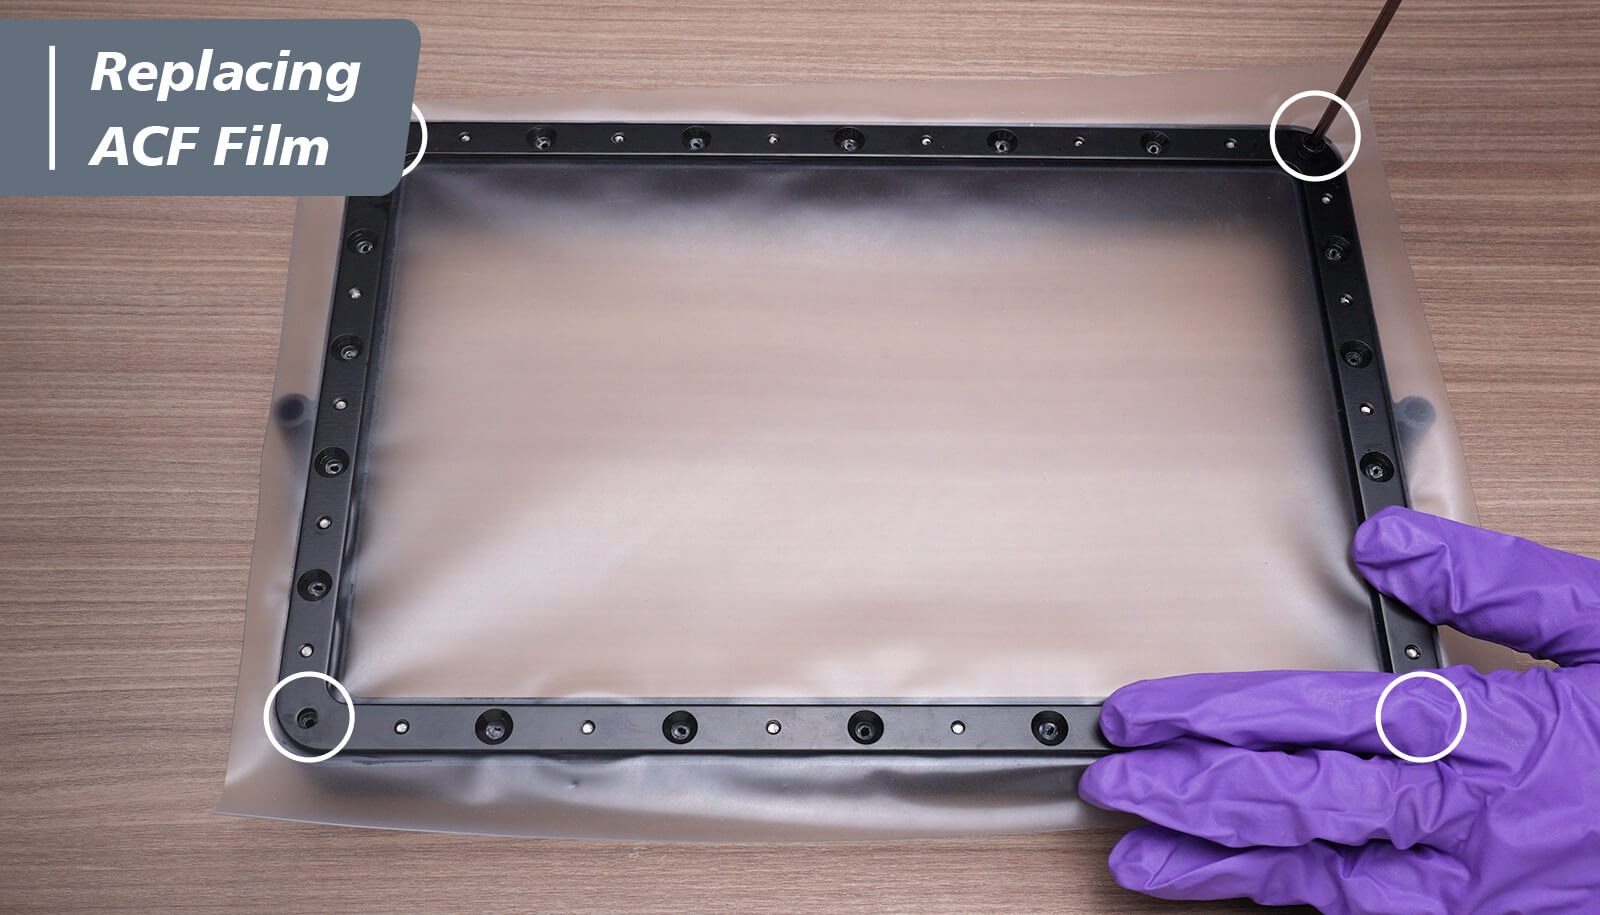
Step 2: Use a 3 mm Allen wrench to tighten the 4 screws on the corners of the vat diagonally.
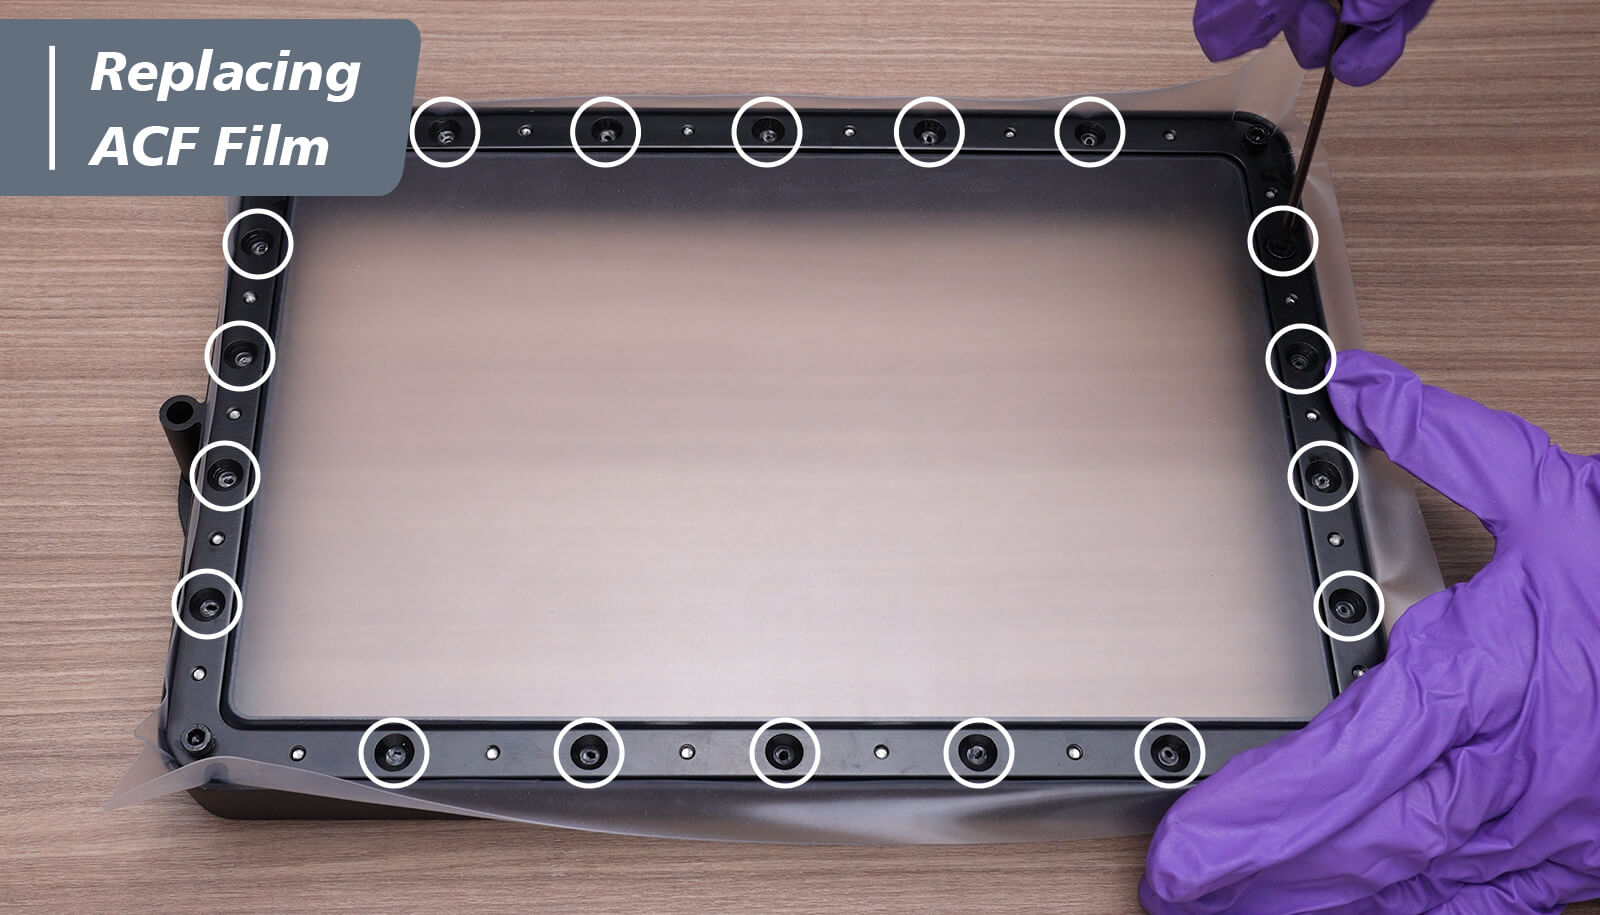
Step 3: Then, use the 2.5 mm Allen wrench to tighten the rest of the screws diagonally. Make sure all the screws have been installed properly.
Step 4: Make sure to cut off any excess ACF film around the vat.
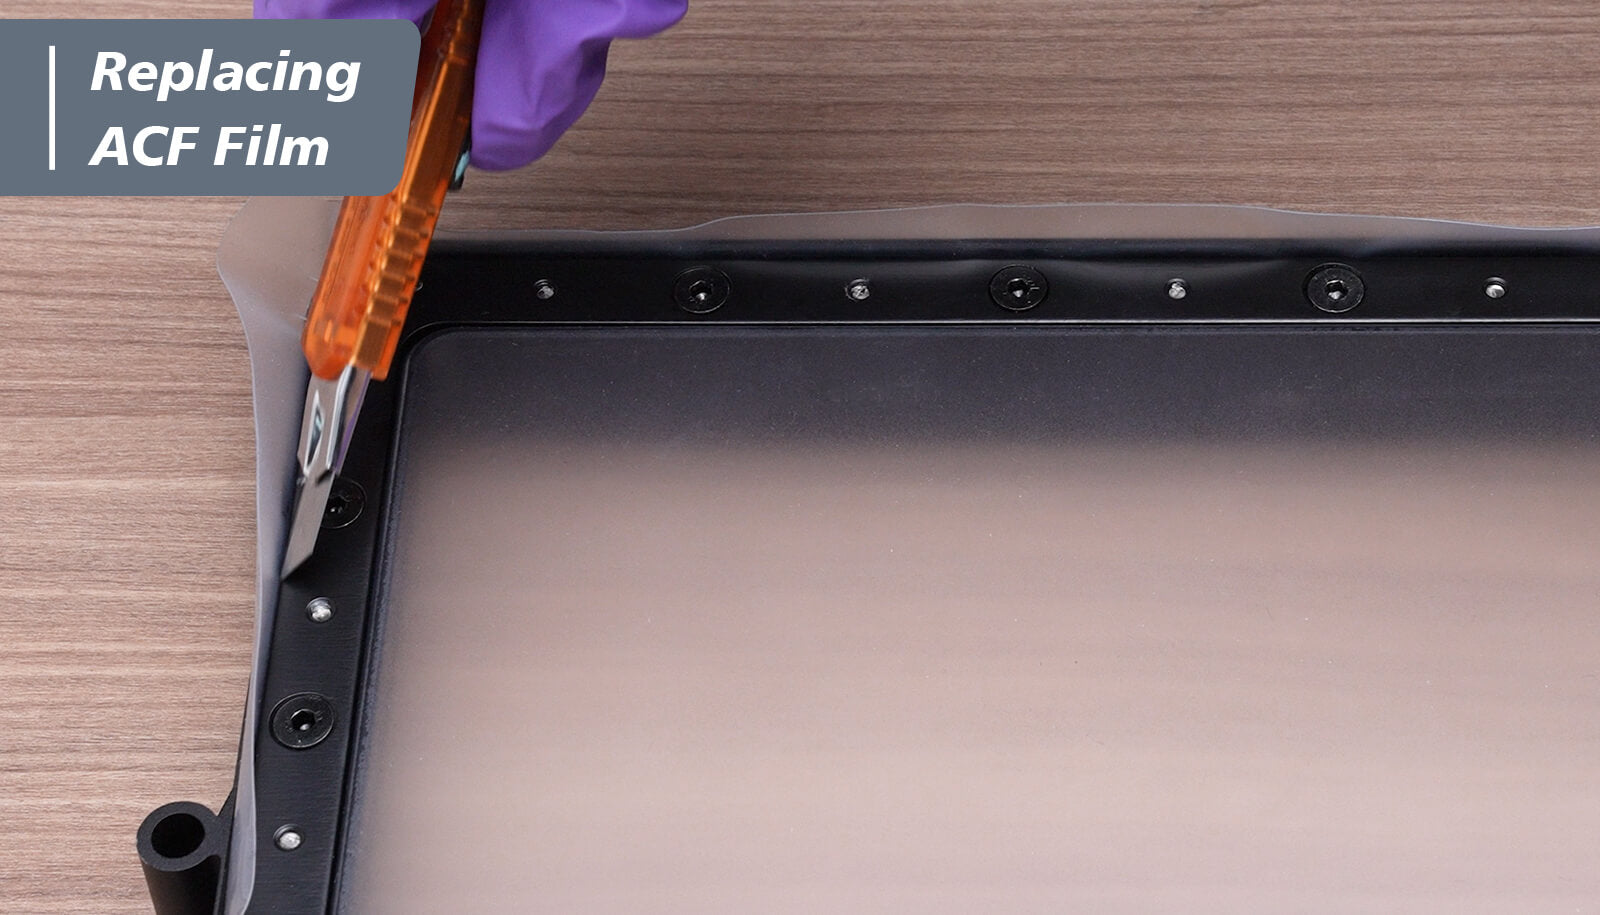
Step 5: Your ACF film replacement is now complete!
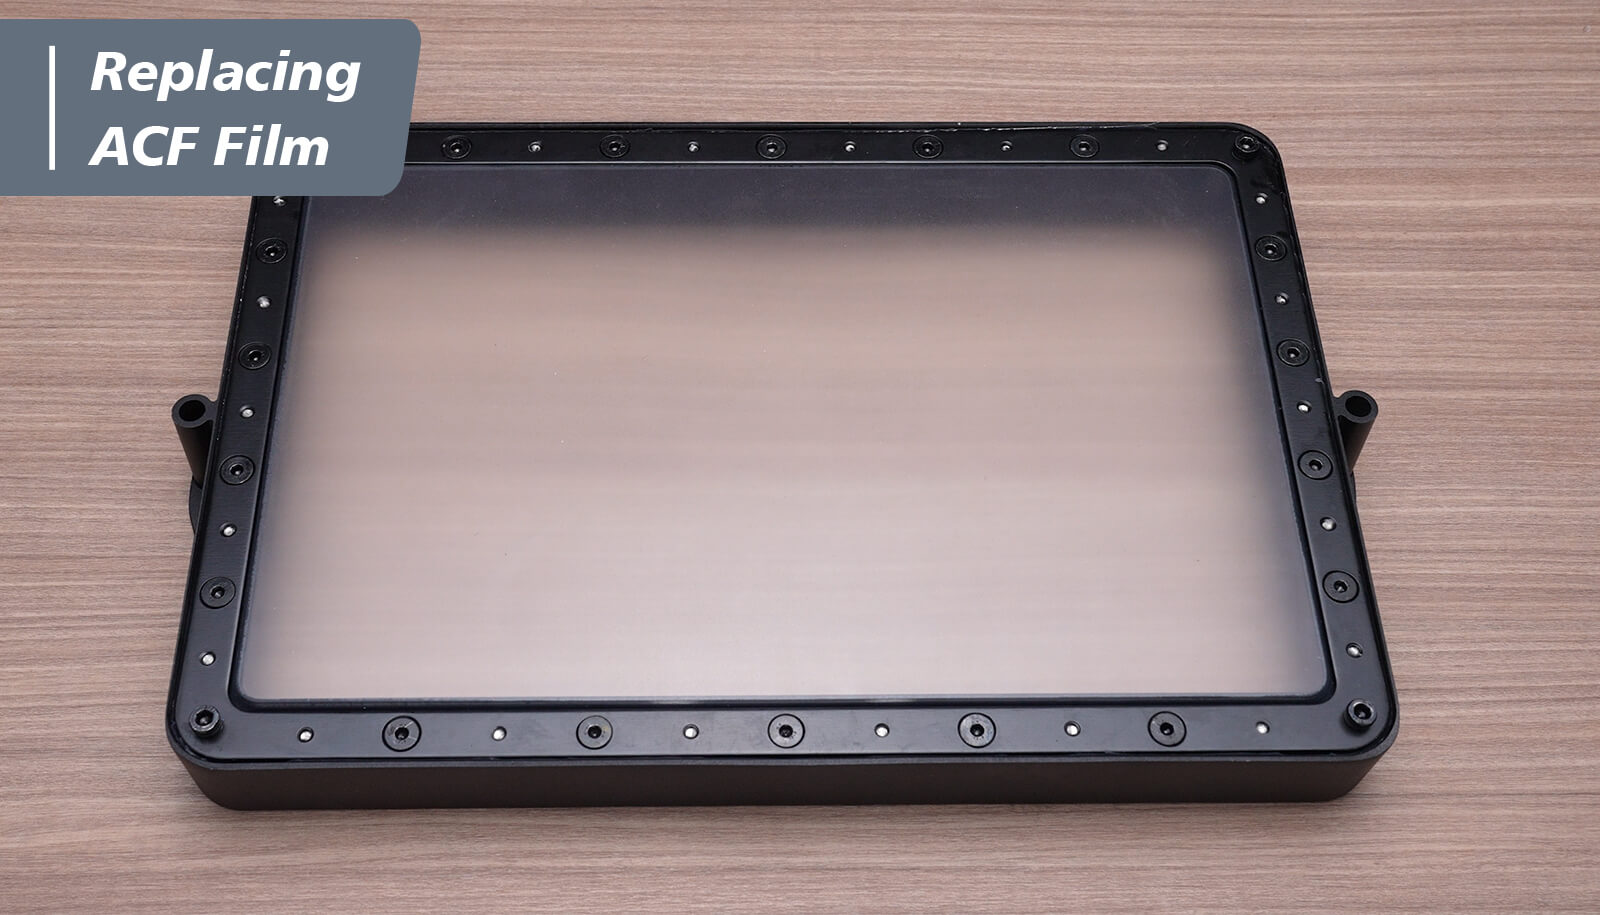
Congratulations!
You've complete the installation of your new ACF film. Now you are ready for faster and more stable printing ! You can also watch the tutorial video here for more visual demonstration:

5條評論
selim
If I replace the Mighty Revo film with ACF film, do I need to change my exposure time?
———
Phrozen Technology replied:
Hello selim, Thank you for commenting.
You usually don’t need to adjust the exposure timing when replacing the releasing film of your printer. But if you have any hesitation, just run a XPFinder print to check if anything is doing well, and adjust the settings accordingly.
Hope this helps.
Best, Phrozen Team
>
T
I’ve upgraded my mighty 8k to with 12k screen with acf. 2 questions. When updating firmware do I choose 12k mighty option? 2nd question is do you have tips/parameters with the acf film?
———
Phrozen Technology replied:
Hello T, Thank you for commenting.
After upgrading your Sonic Mighty 8K to the 12K, it become the same printer as the Sonic Mighty 12K. So choose the firmware for Sonic Mighty 12K/Mighty 12K Upgrade Kit, otherwise your update will fail and get issues for installing the firmware for Sonic Mighty 8K.
For the resin settings, you can now follow the suggested setting we’ve listed on our website for Sonic Mighty 12K, dial the exposure time from there as usual, and adjust other parameters only after you get a consistent successful printing result.
Hope this helps.
Best, Phrozen Team
Richard Rojas
buenas tardes, desde Chile.
Quisiera ayuda para conseguir e instalar el firmware que se requiere al cambiar a un ACF film, por favor si me dejan la ruta de este, se los agradezco desde ya, saludos.
———
Phrozen Technology replied:
Hello Richard, Thank you for commenting.
Please check this page for downloading the latest version of firmware for your printer: https://helpcenter.phrozen3d.com/hc/en-us/articles/6369983852569-Firmware-downloads-and-release-notes
Please make sure to follow the instructions carefully when updating the firmware, thank you.
Hope this helps.
Best, Phrozen Team
>
Ryan Brundle
Is there an option to have ACF FILM ON THE MEGA 8K? What about firmware update?
———
Phrozen Technology replied:
Hello Rayn, Thank you for commenting.
The ACF film fits the Mega 8K S will also fits to the Mega 8K. But the firmware for the Mega 8K is not compatible with Mega 8K S.
Hope this helps.
Best, Phrozen Team
>
Dmitrii Grabarchuk
Hi!
Could you please help me? If I installed this new ASF film, how should I do table calibration in this case? How many lists of A4 paper should I use?
Best regards,
Dmitrii Grabarchuk
———
Phrozen Technology replied:
Hello Dmitrii,
Thank you for your comment. Please check this article about calibrating the Z-axis of your printer. This article uses Sonic Mini 8K S as an example, other printers should be more or less the same. Please search ‘Calibration’ in our Help Centre for articles of the other models.
https://reurl.cc/eDjQnm
I hope this helps!
Best, Phrozen Team
>