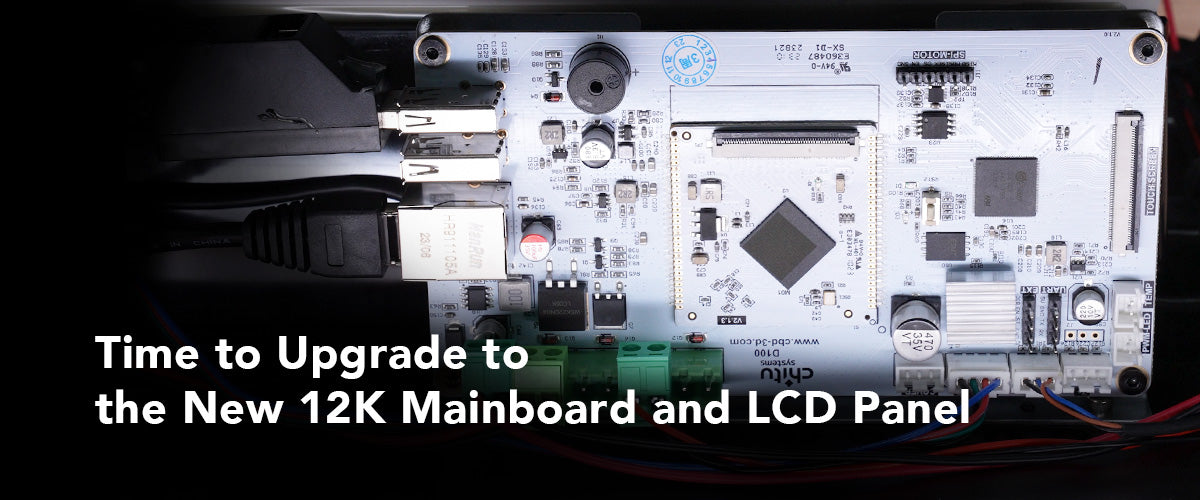
After changing to the new 12K LED driver, it’s finally time to upgrade to the new 12K mainboard and LCD panel. In this step, we will go through:
In this article, we will guide you through changing the mainboard and LCD panel of your Sonic Mighty 8K to 12K.
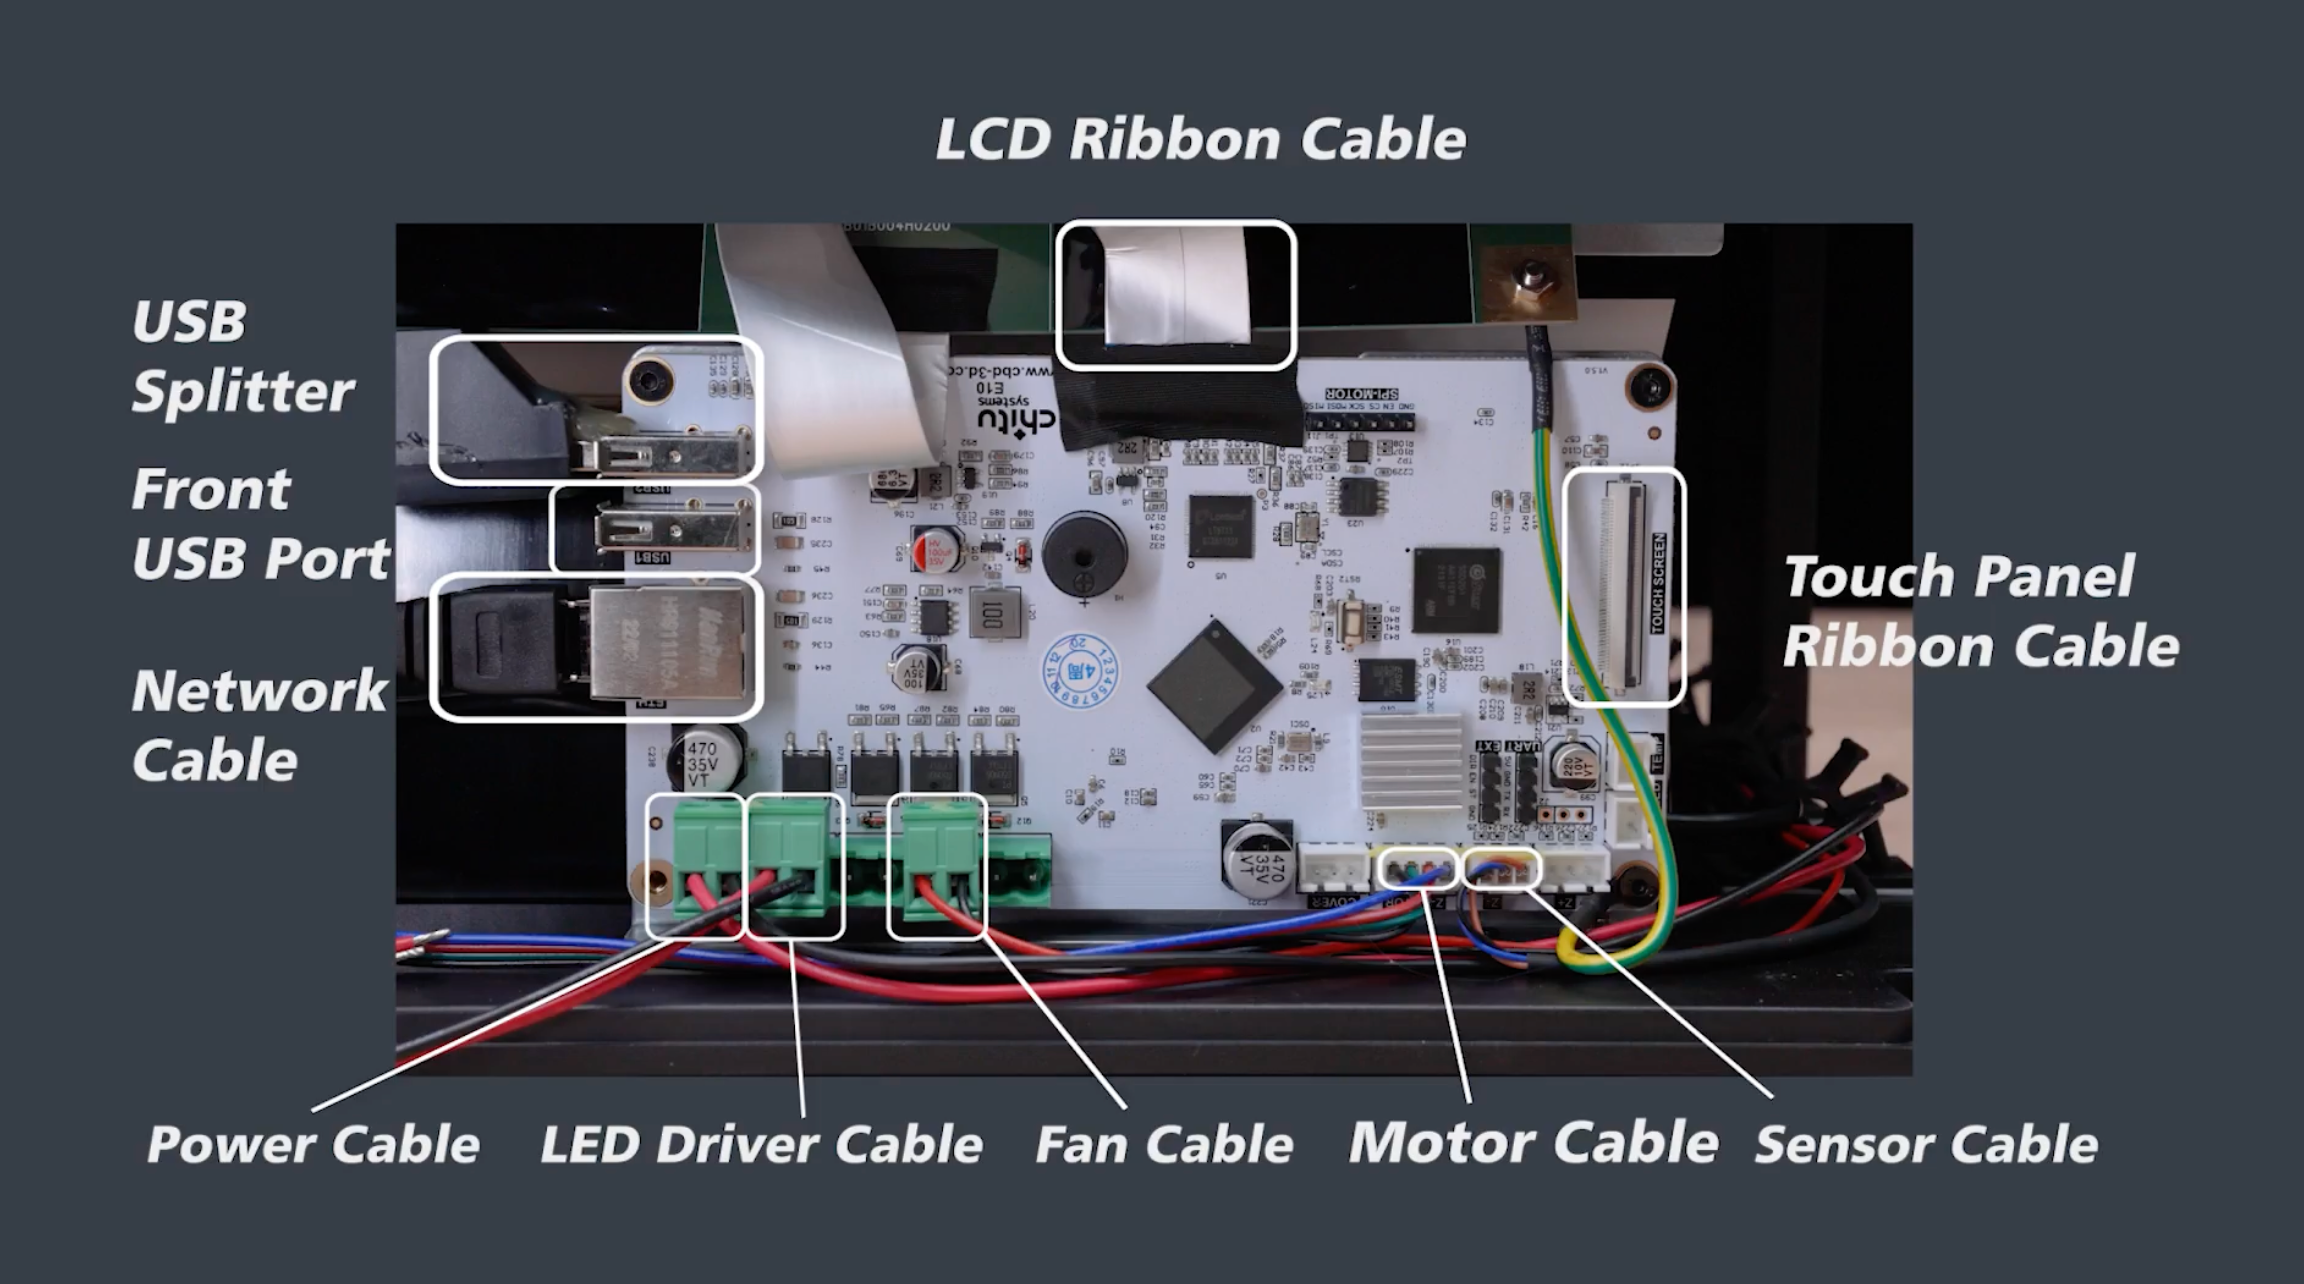
Before we proceed with the next steps, please pay attention to these crucial parts of the mainboard first to avoid confusion in the installing process.
Please note that the serial number of Mighty 12K Upgrade Kit is D100.
Remove the Old 8K Parts
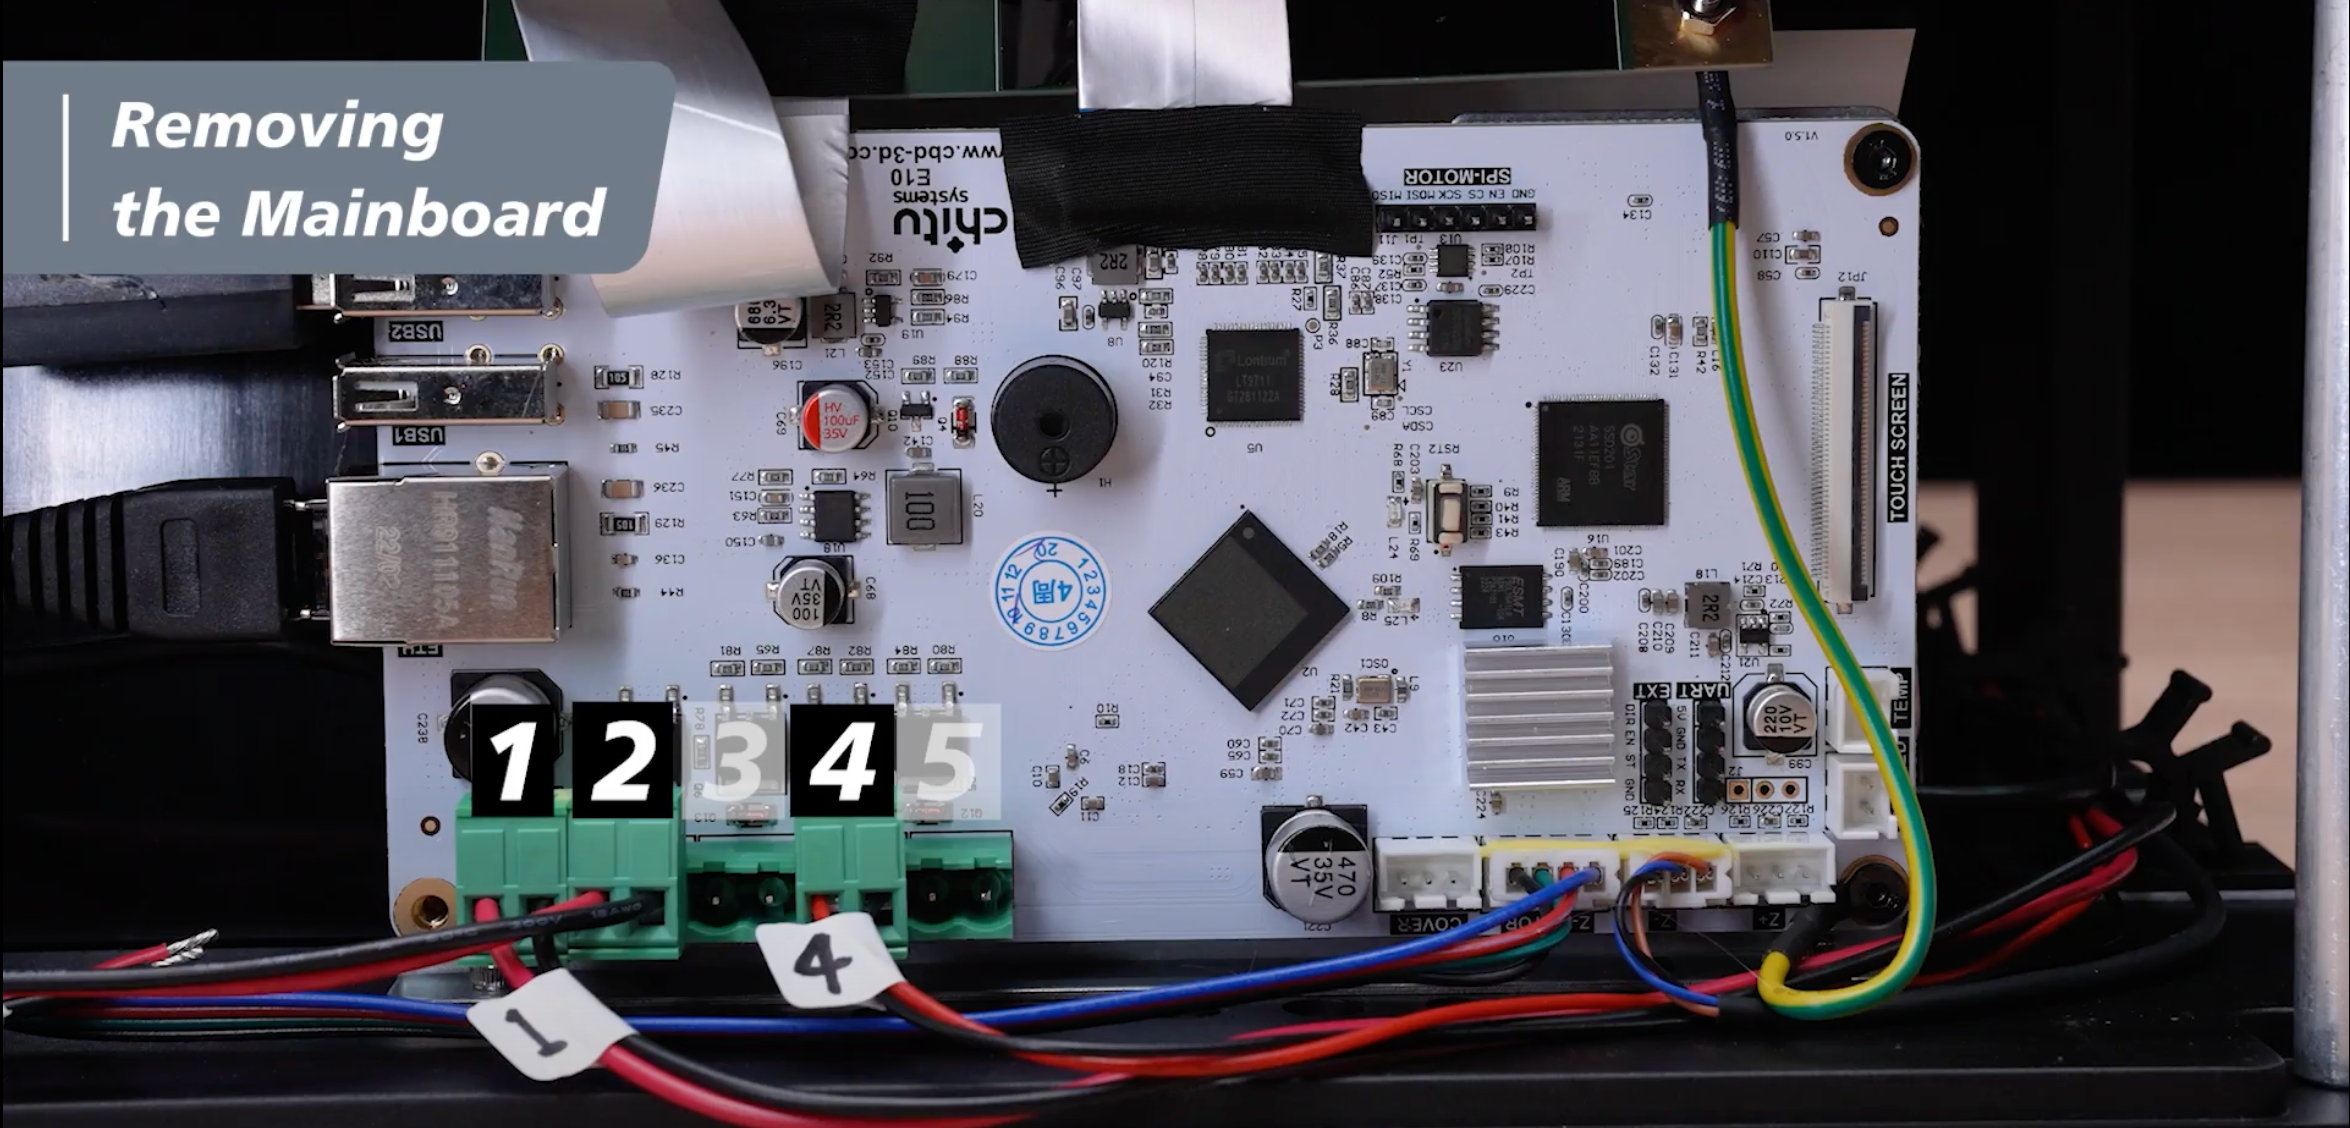
Removing the Mainboard
Step 1: There are 5 green terminals at the bottom of the mainboard. Use the label stickers prepared earlier to mark the first power supply and the fourth LED driver board with No.1 and No.4 respectively.
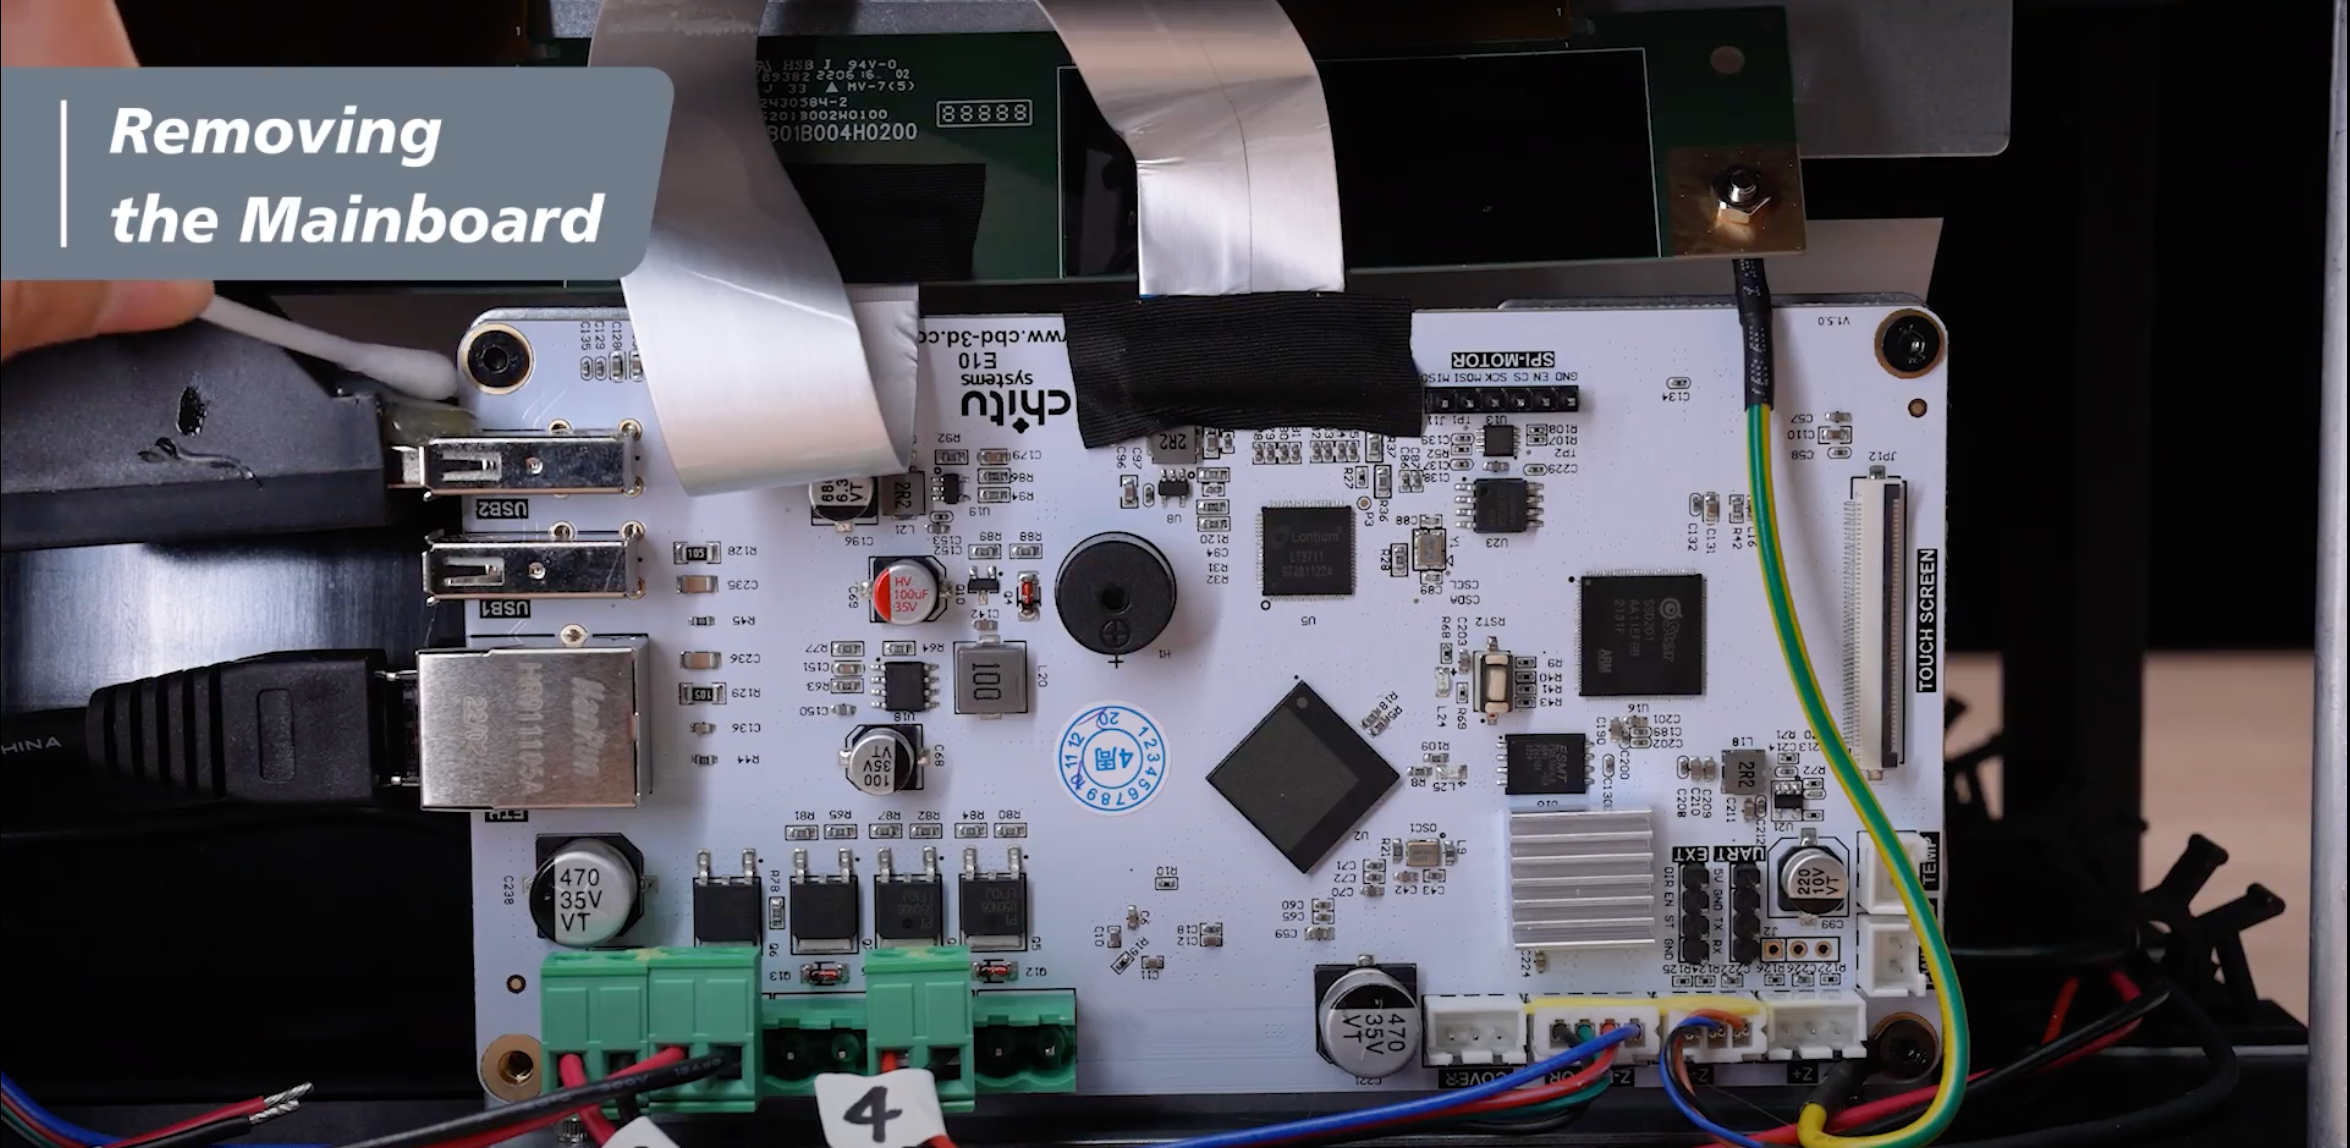
Step 2: Remove the hot glue adhesive on the USB splitter. If you find it difficult to remove the glue, you can also soften it with alcohol. Repeat this step a few more times if the hot glue adhesive is* still difficult to remove.
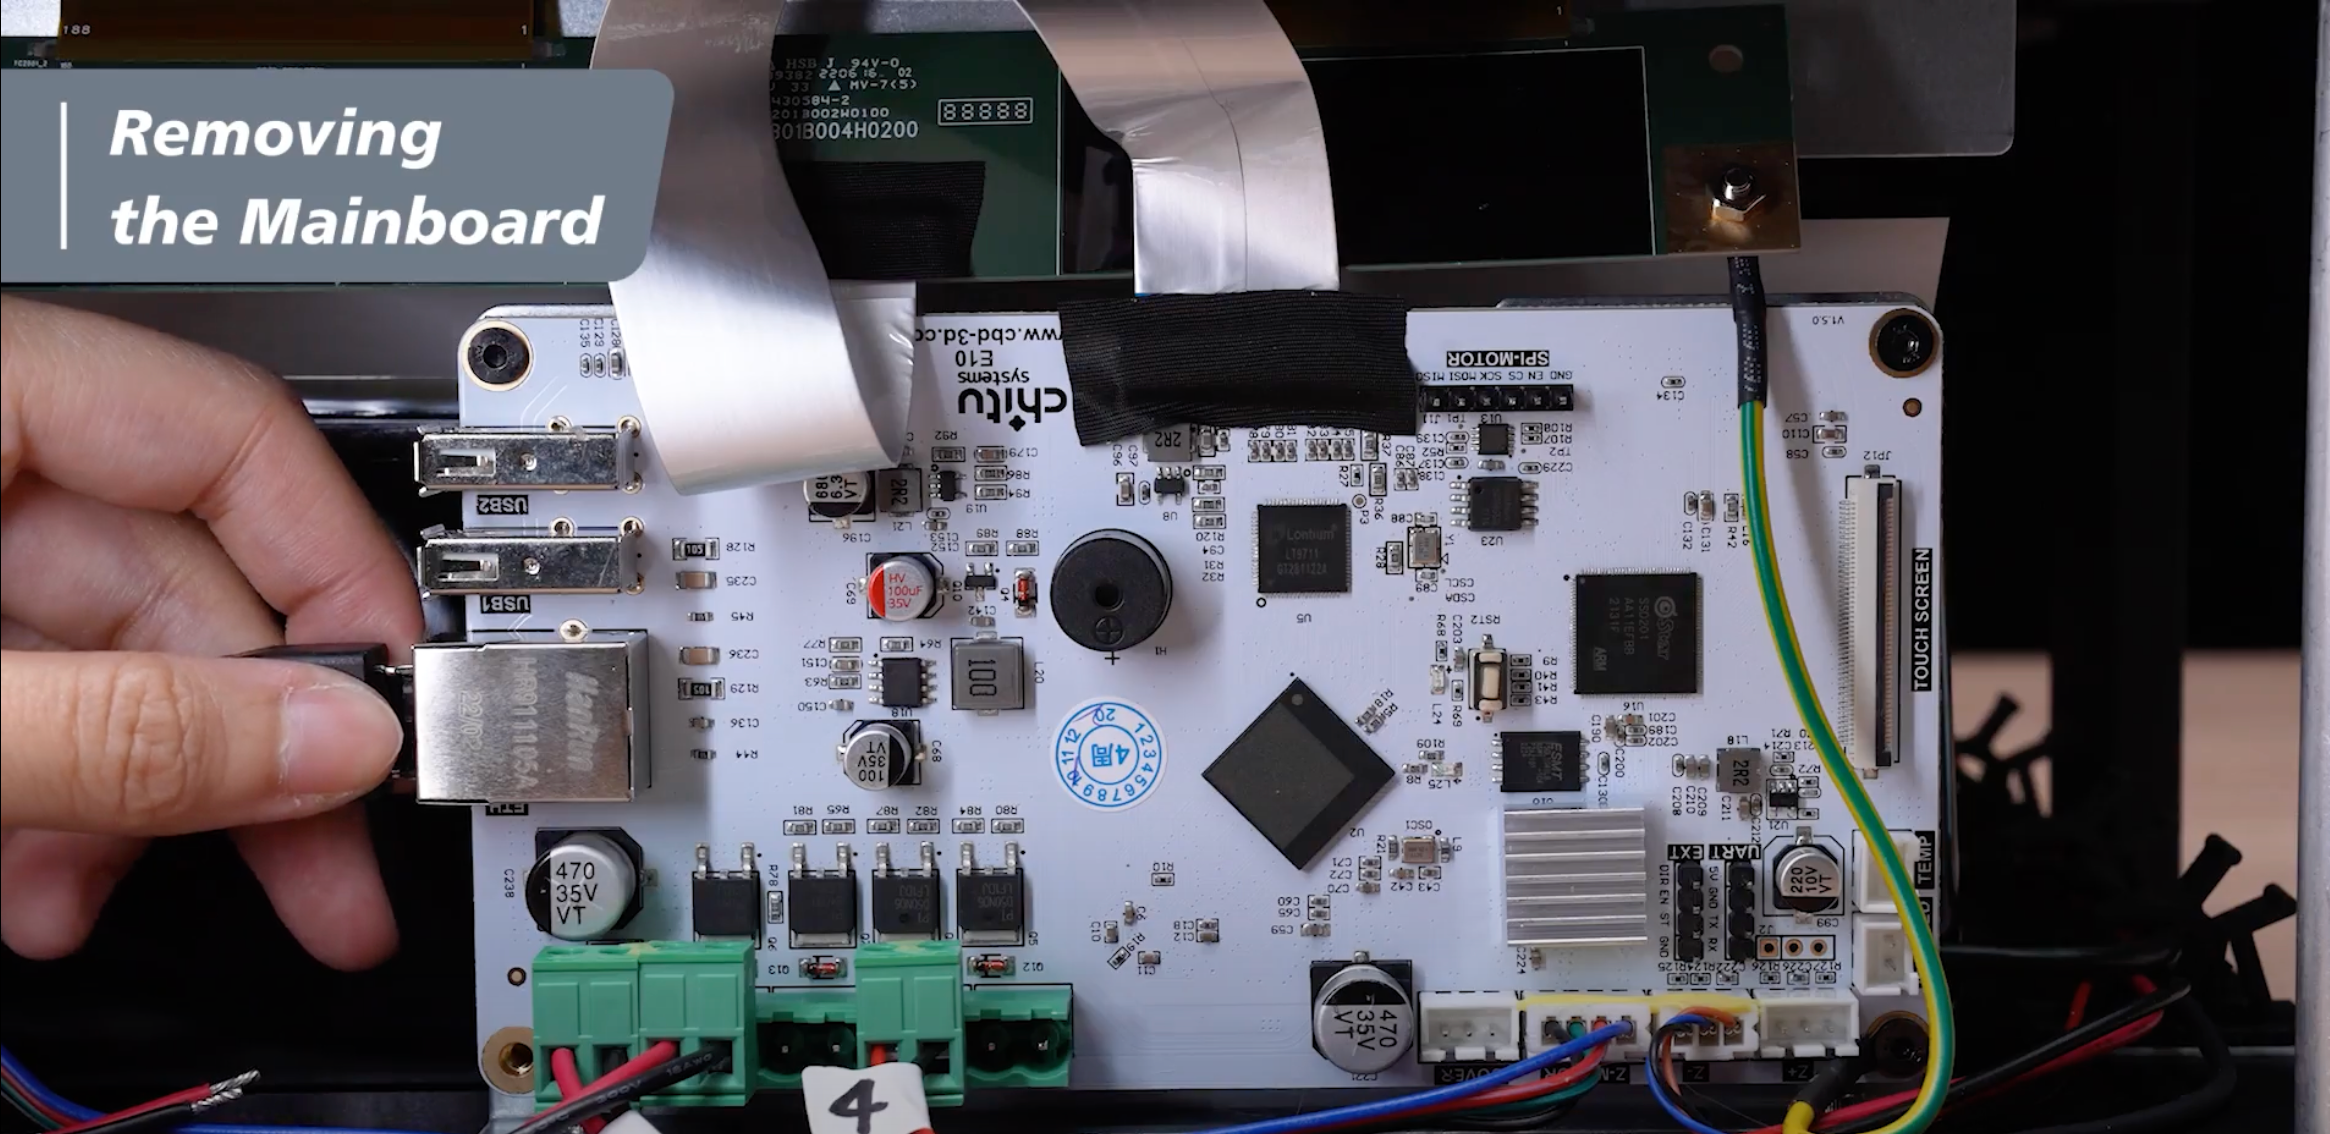
Step 3: Press the buckle on the back of the network cable to pull it out.
Step 4: Remove the screw on the sides of the mainboard, then pull it out a little.

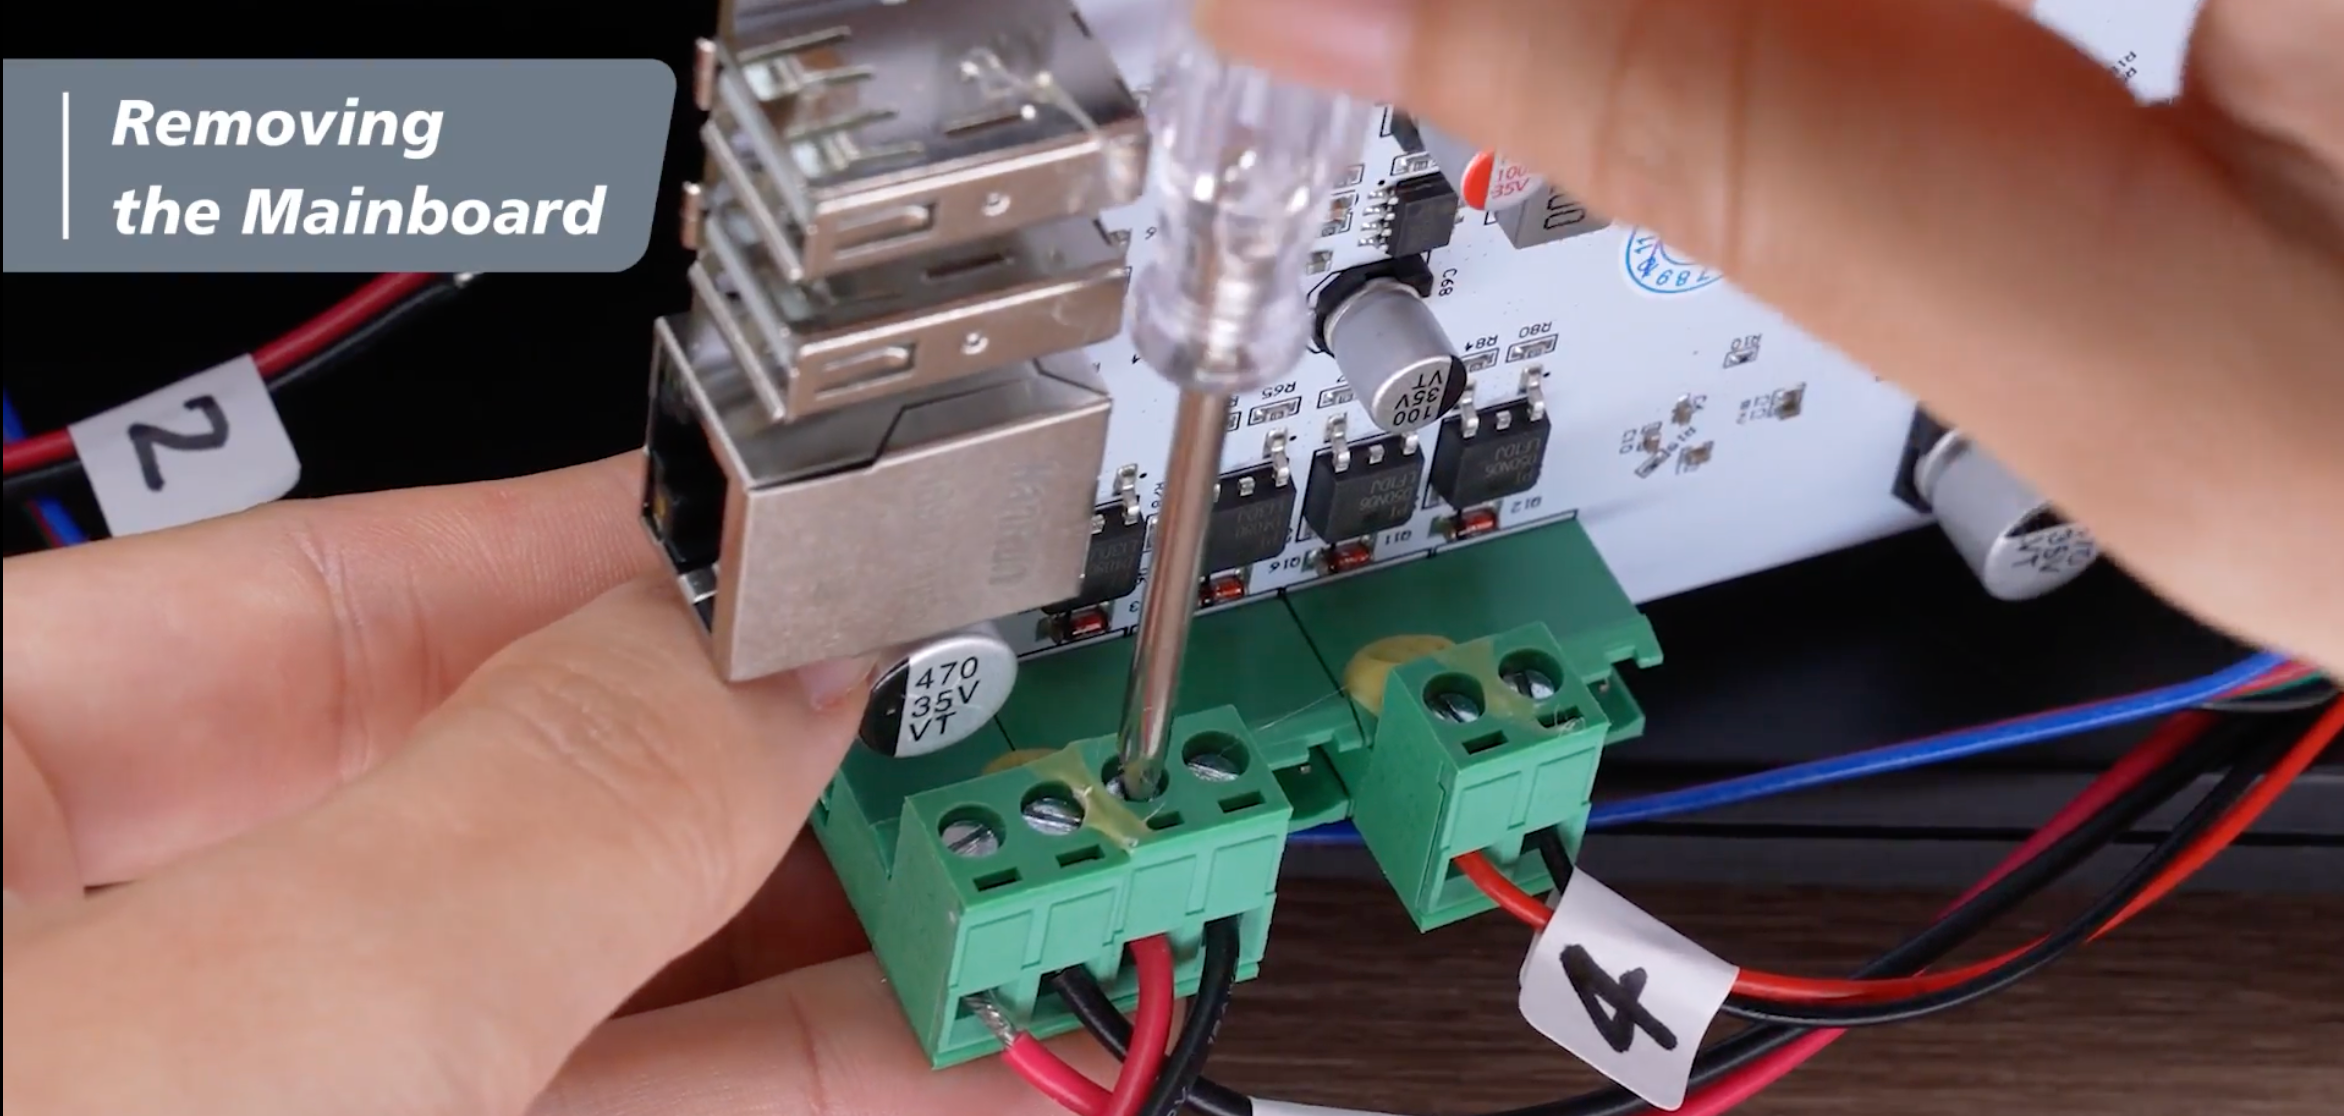
Step 5: Loosen the green terminal block from left to right with the flathead screwdriver.
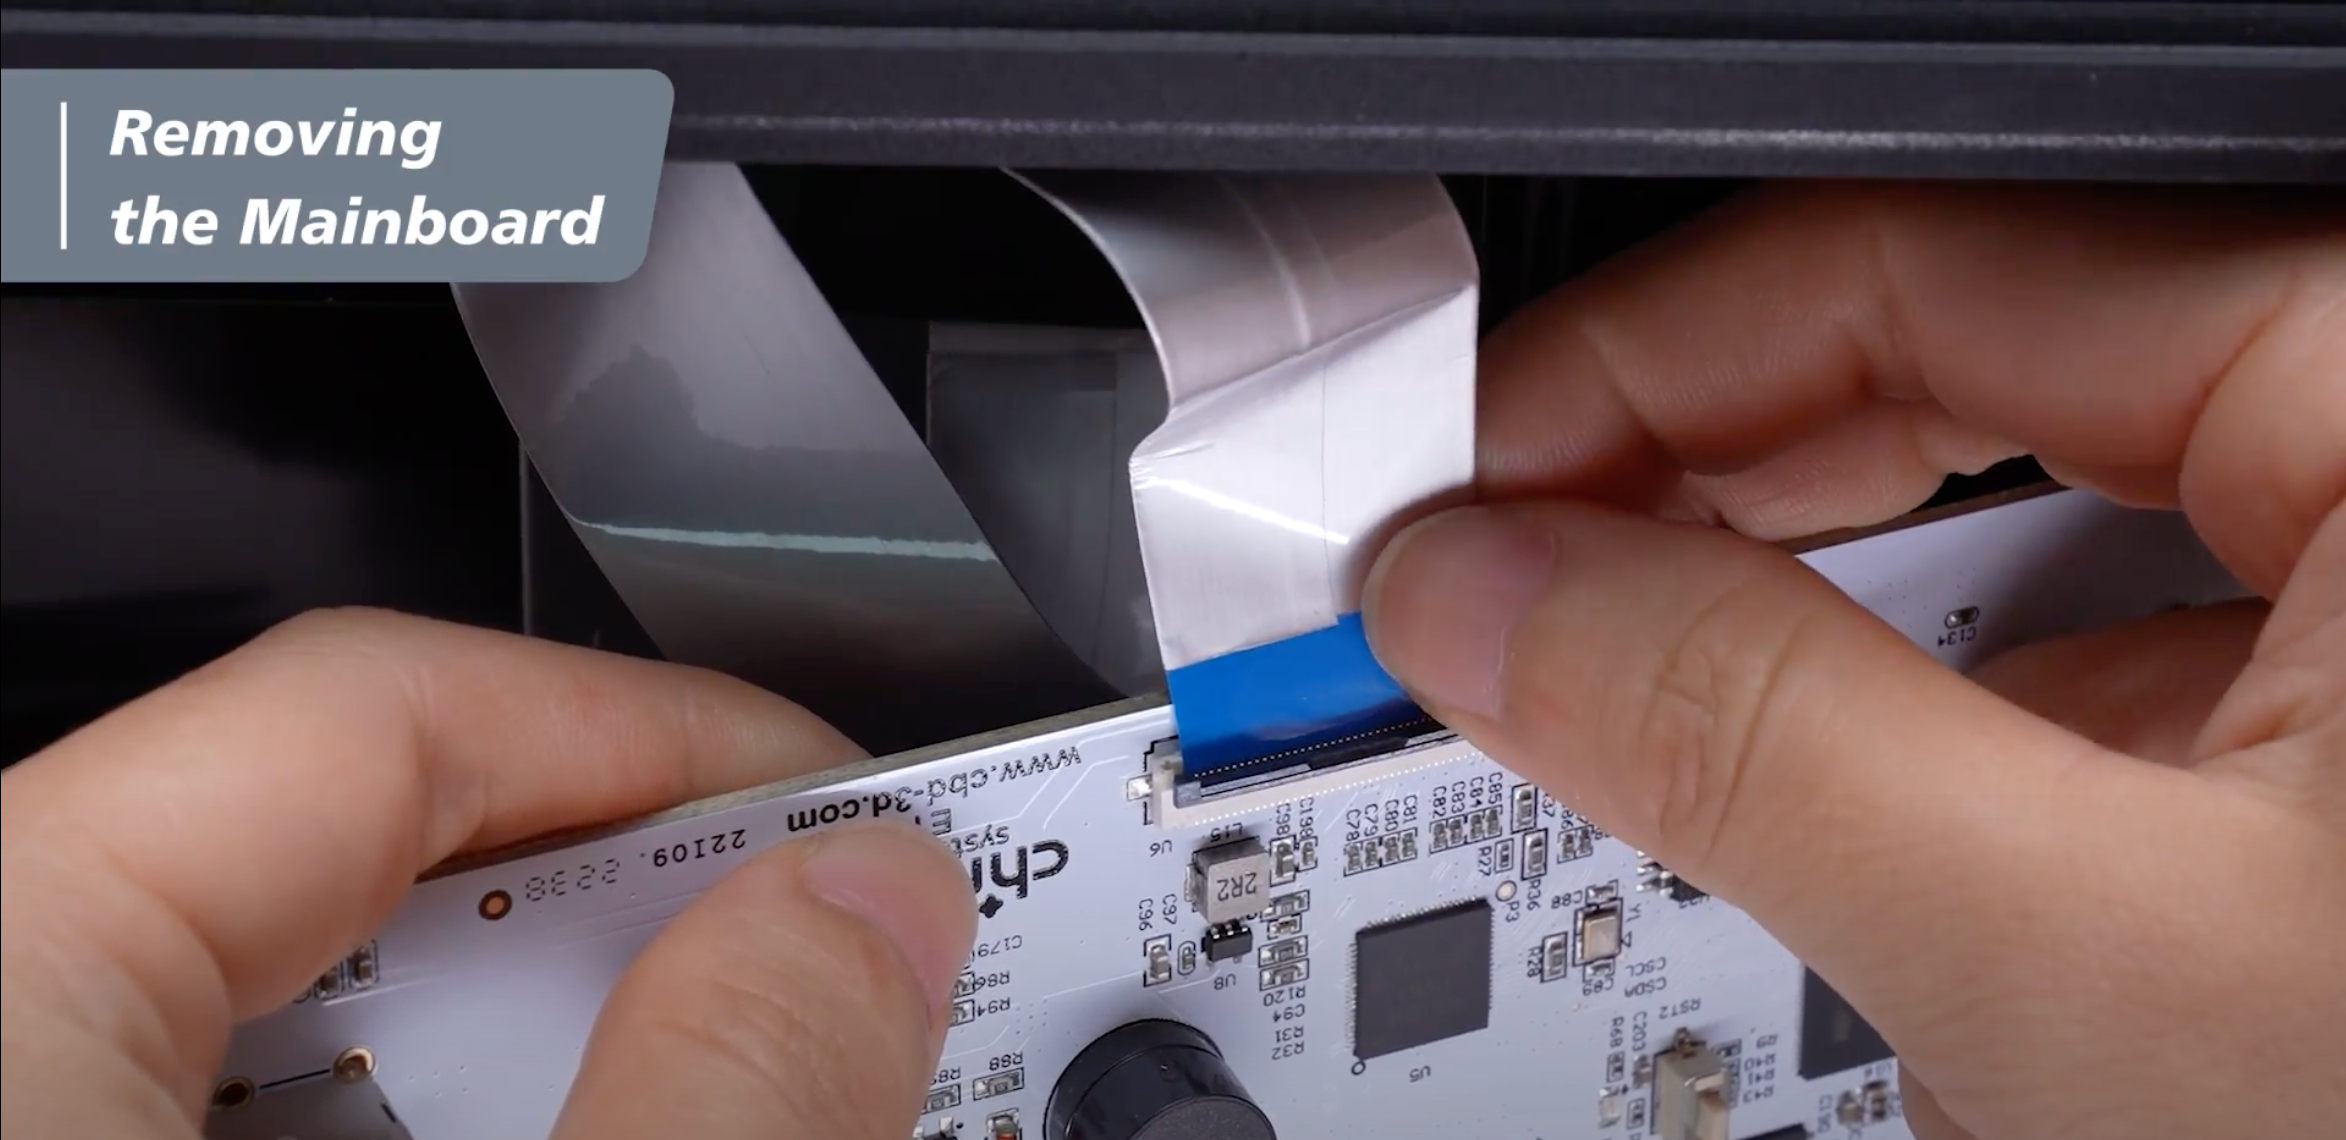
 Step 6: Remove the acetate cloth tape, unclip the buckle, and remove the LCD ribbon cable.
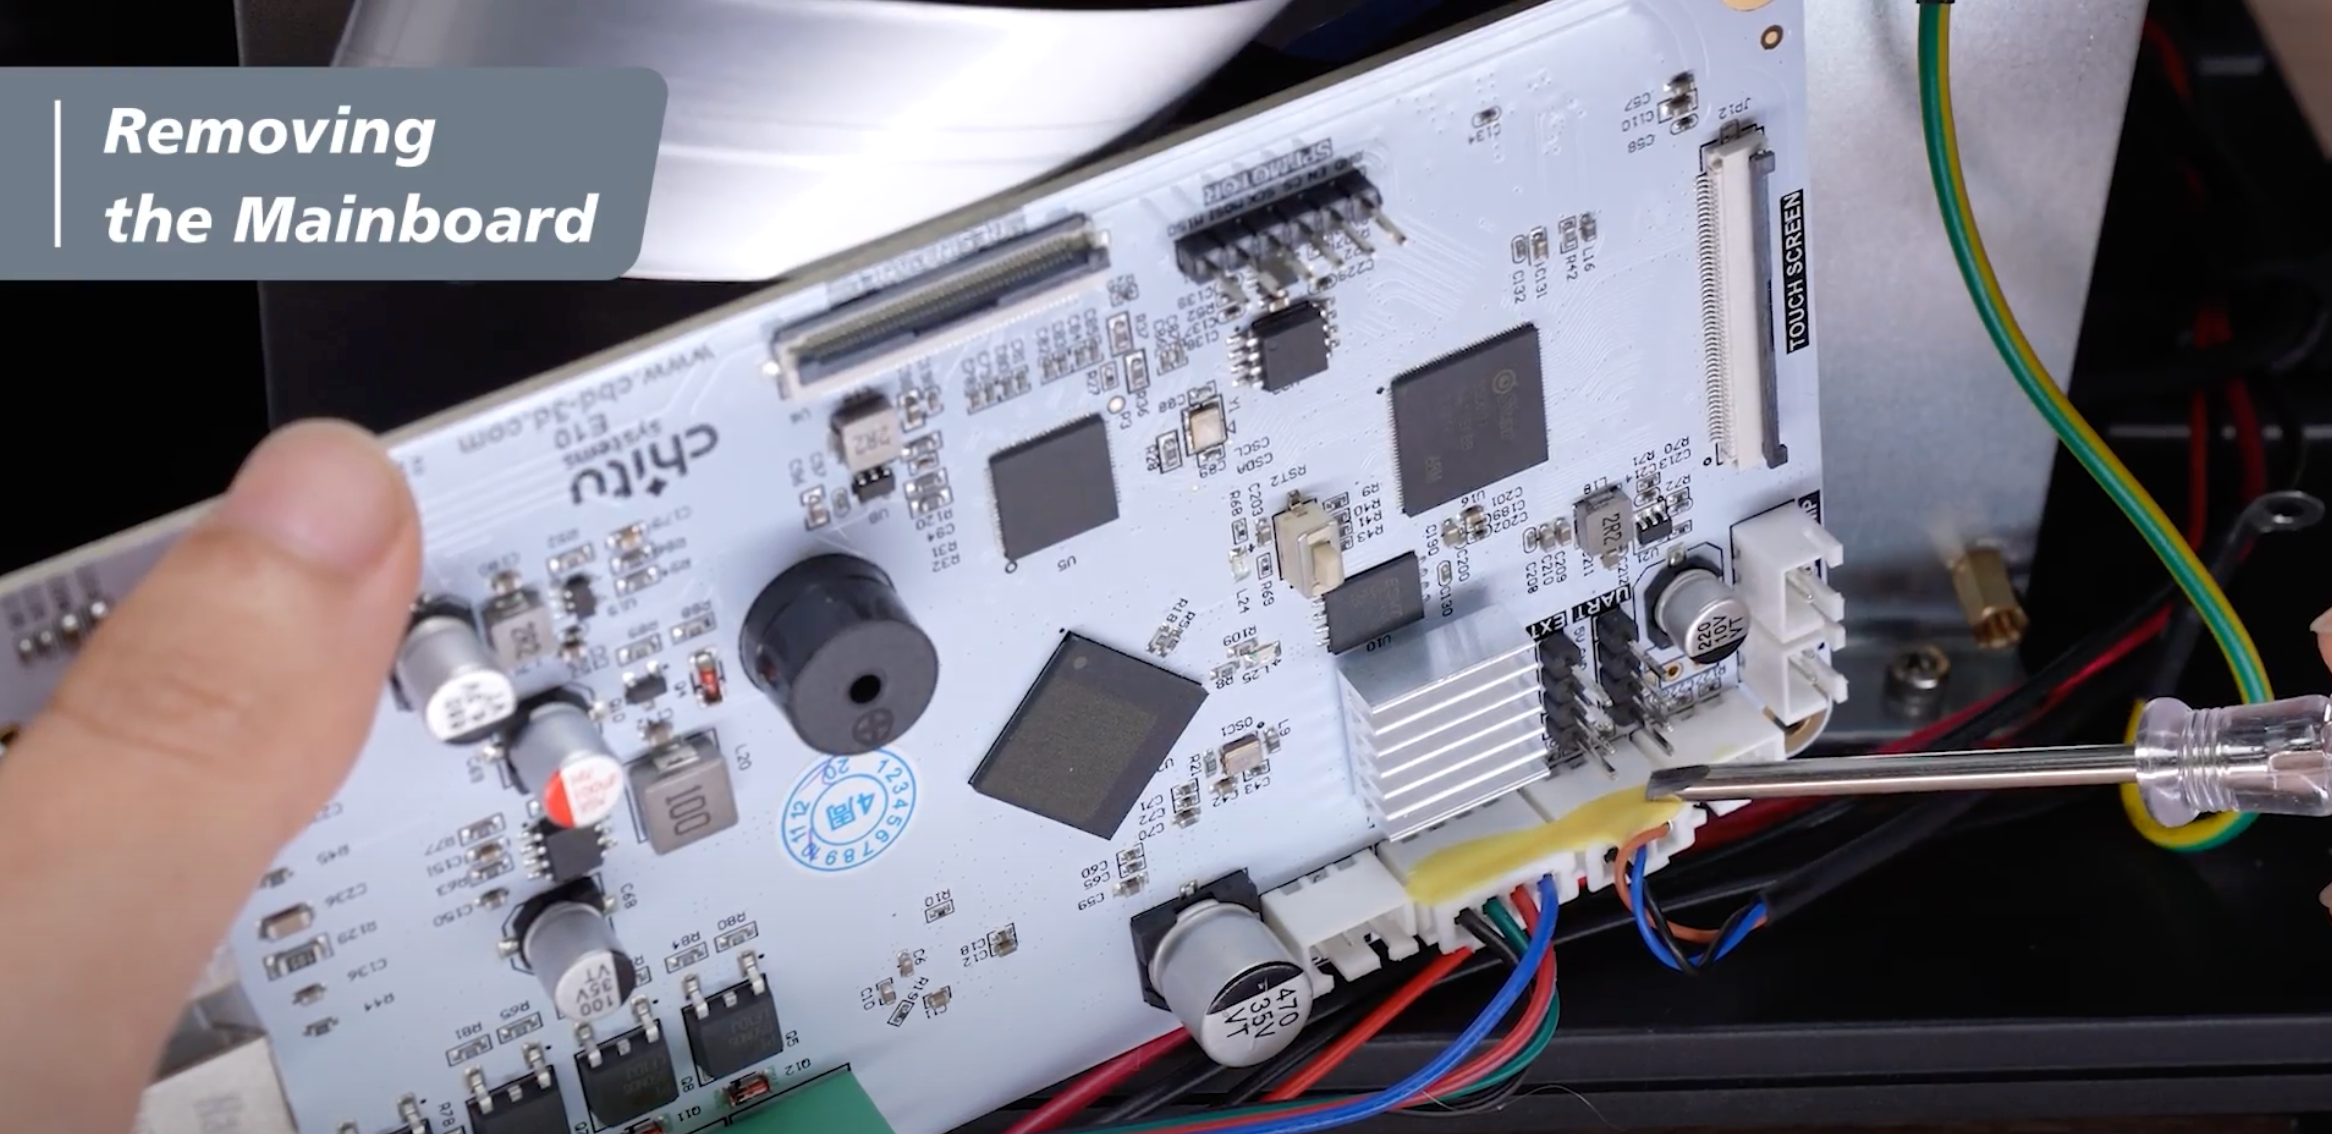
Step 7: Pull out the mainboard and flip it over. There’s a yellow glue on the cable, preventing it from falling off when shipping.
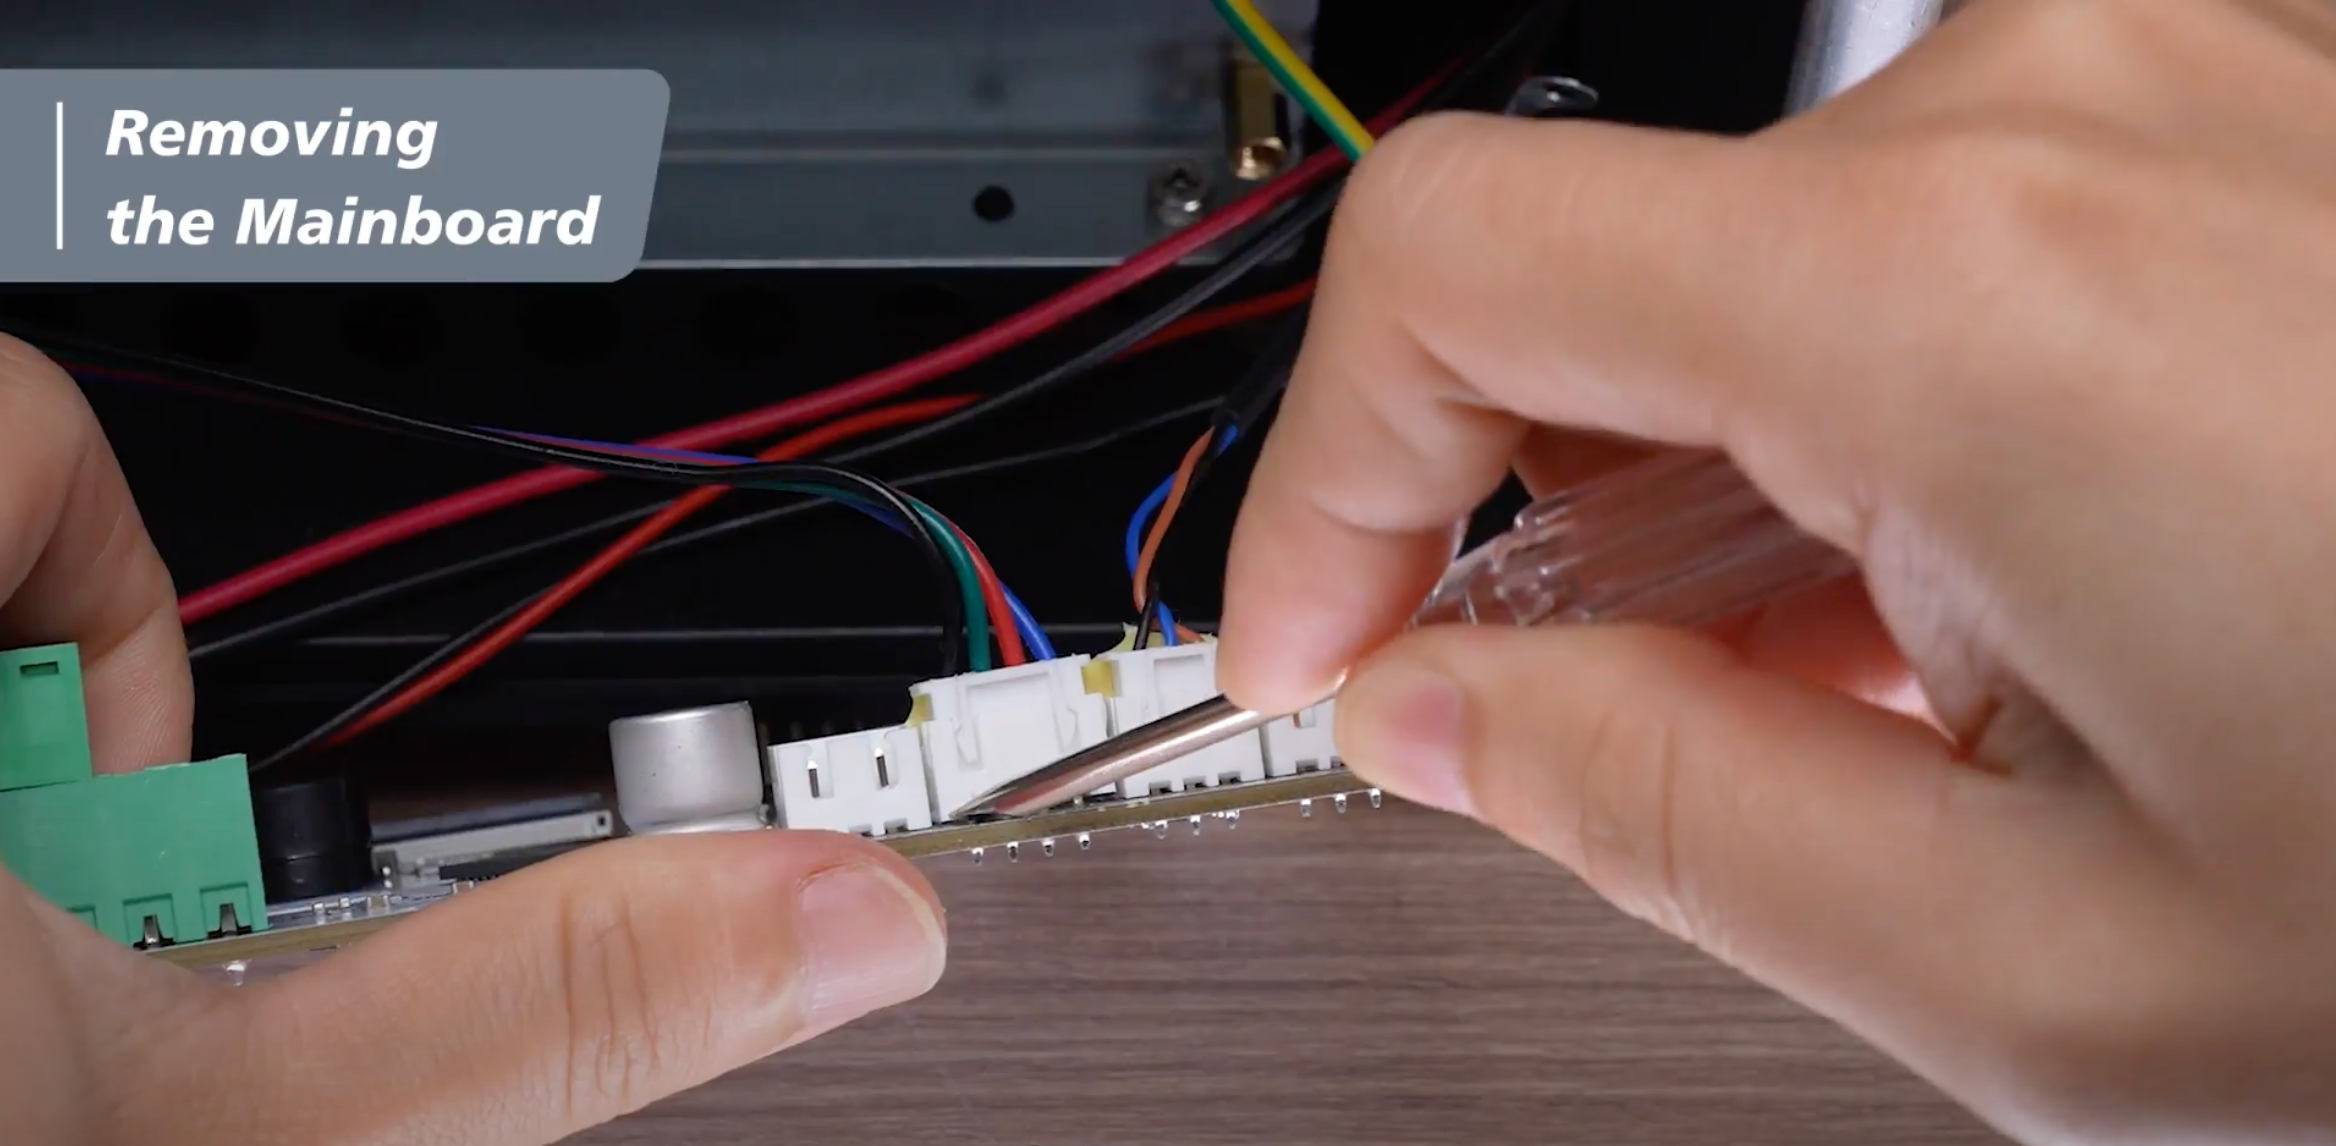
Step 8: Carefully pry open the middle two white terminal blocks from the gap using a flathead screwdriver. Just in case you lose any of the white terminal blocks, there’re extra pieces in the upgrade kit.
The mainboard is now completely removed.
Removing the LCD Panel
Now, we are ready to remove the LCD Panel.
Step 1: Use one hand to press on the backside of the screw of the ground wire and the other hand to loosen the screw and remove the ground wire. We don't need the ground wire after upgrade to 12K.

Step 2: Remove the LCD frame tape.
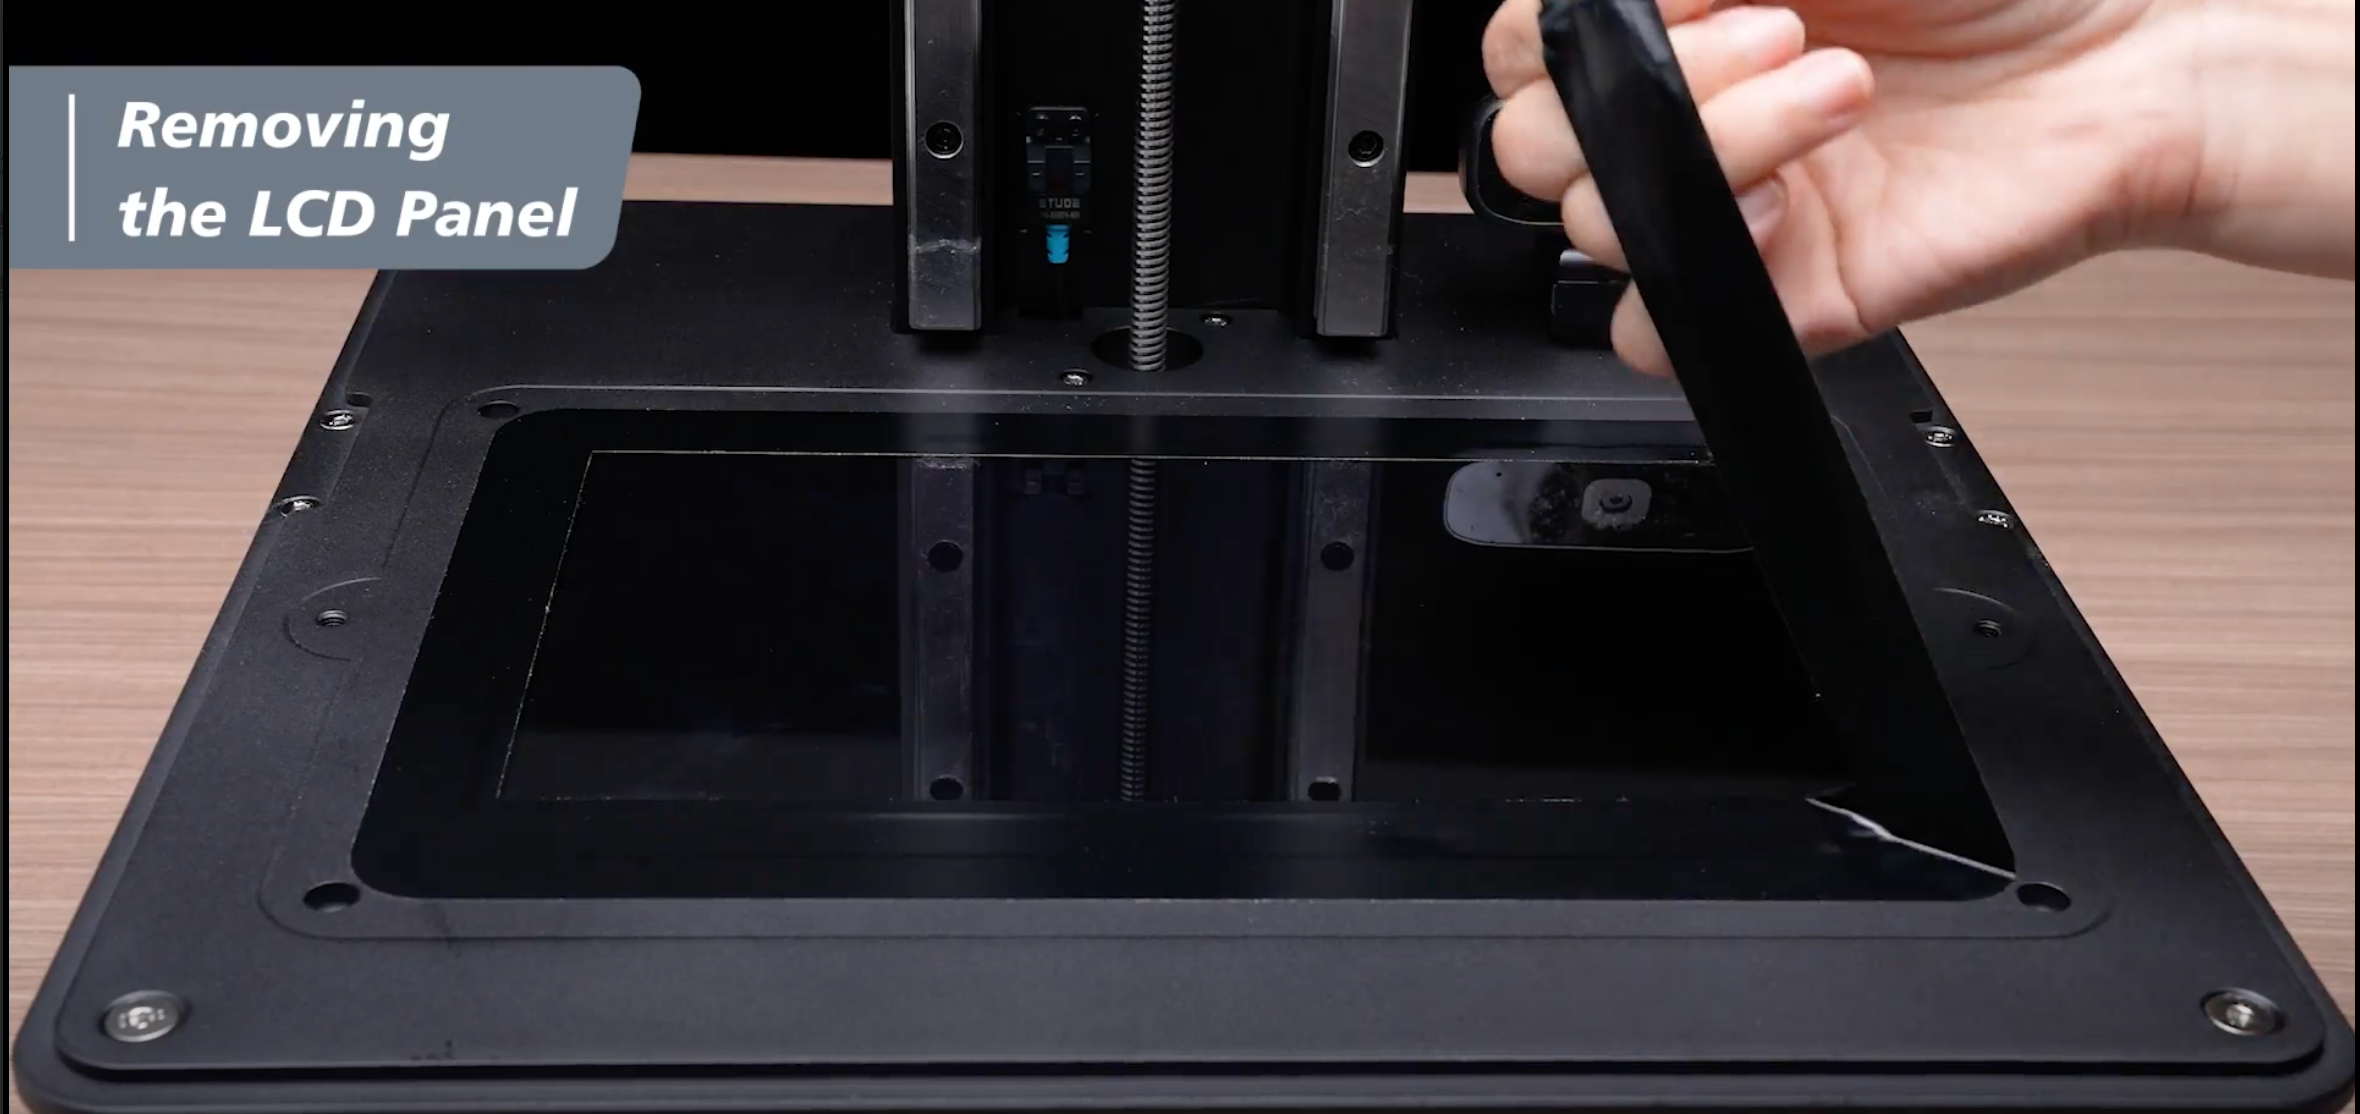
Step 3: Remove the LCD screen from the machine.
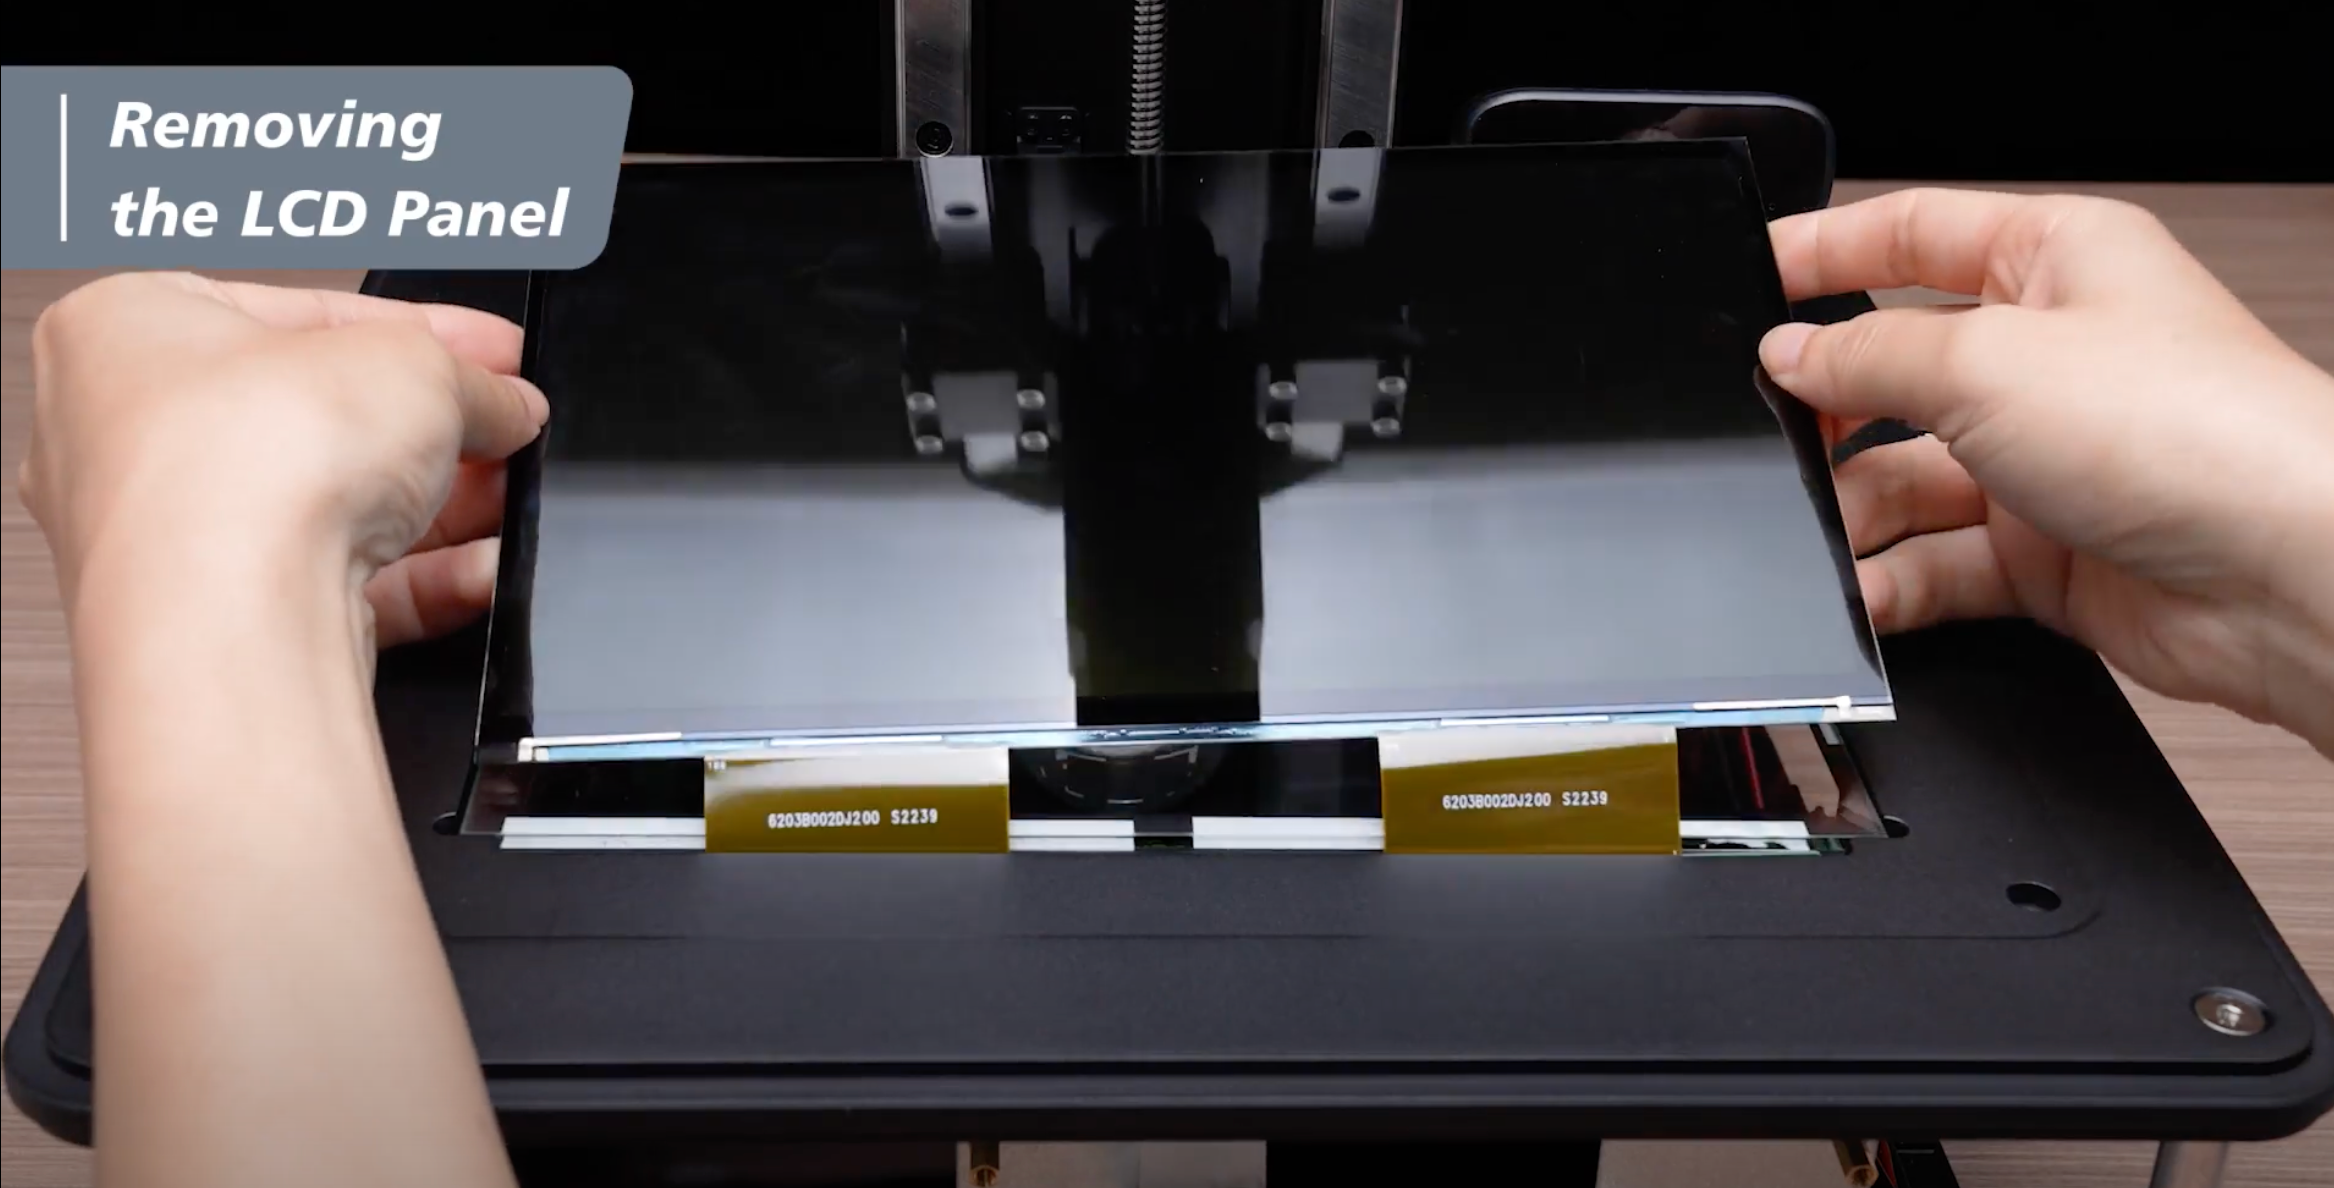
The LCD Panel is now removed.
 Now that both the 8K LCD panel and mainboard are removed, we can start the installation of the new 12K LCD and mainboard.
Installing the 12K Mainboard and LCD Panel
Installing the Mainboard
Step 1: Use both hands to plug the large white terminal block onto the new 12K mainboard. Make sure that the grooves of the white terminal are facing you when you push them down.
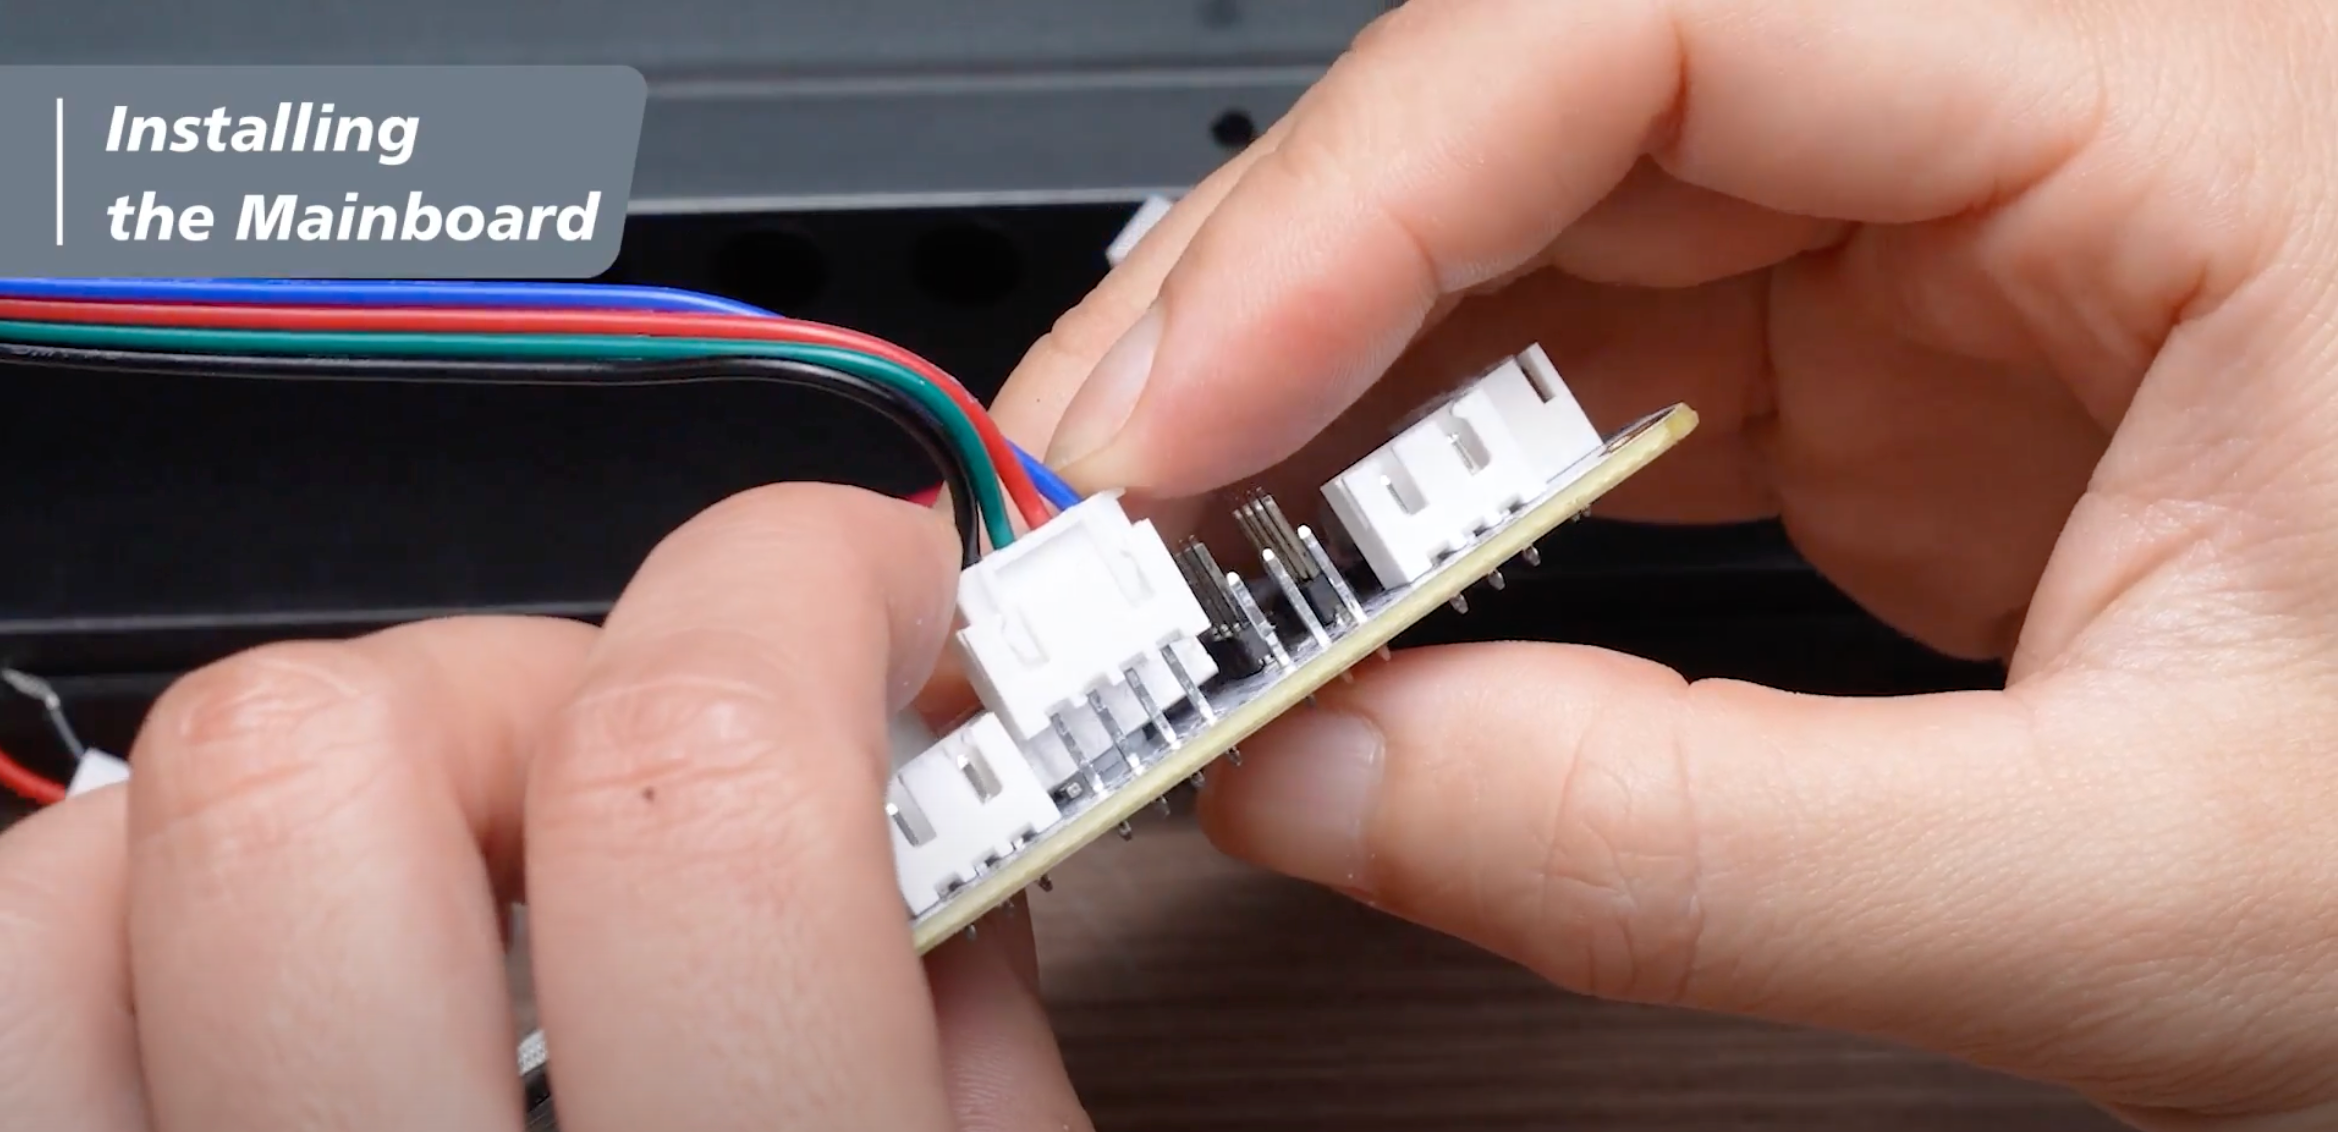
Step 2: Plug the small white terminal block in. Make sure the white terminal blocks are parallel.
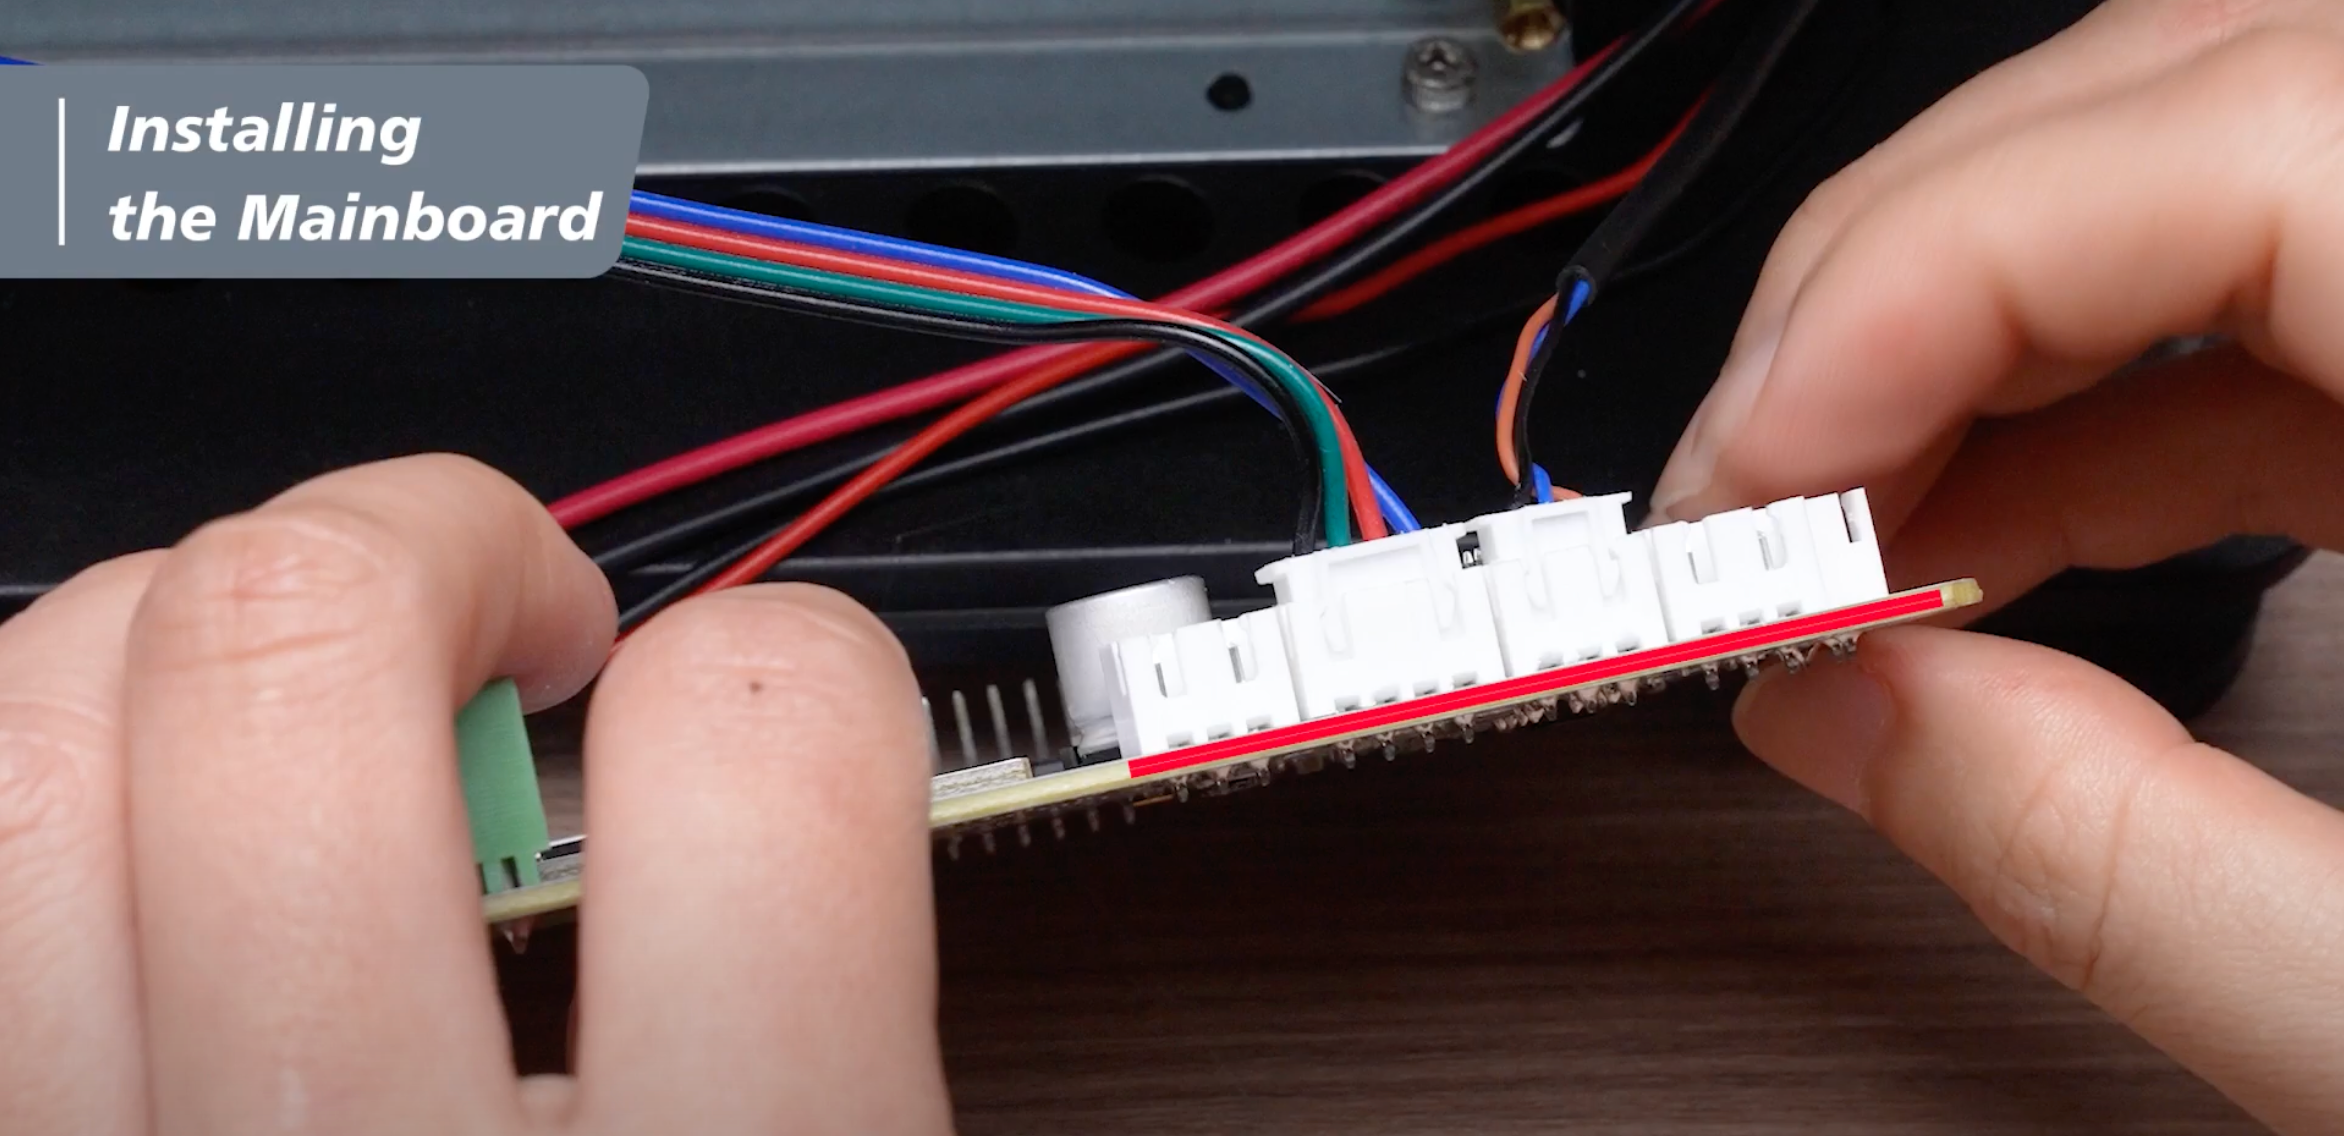
Step 3: Put the LCD panel back to the machine, then use 2.5mm Allen Wrench to tighten the screws on the four sides of the mainboard.
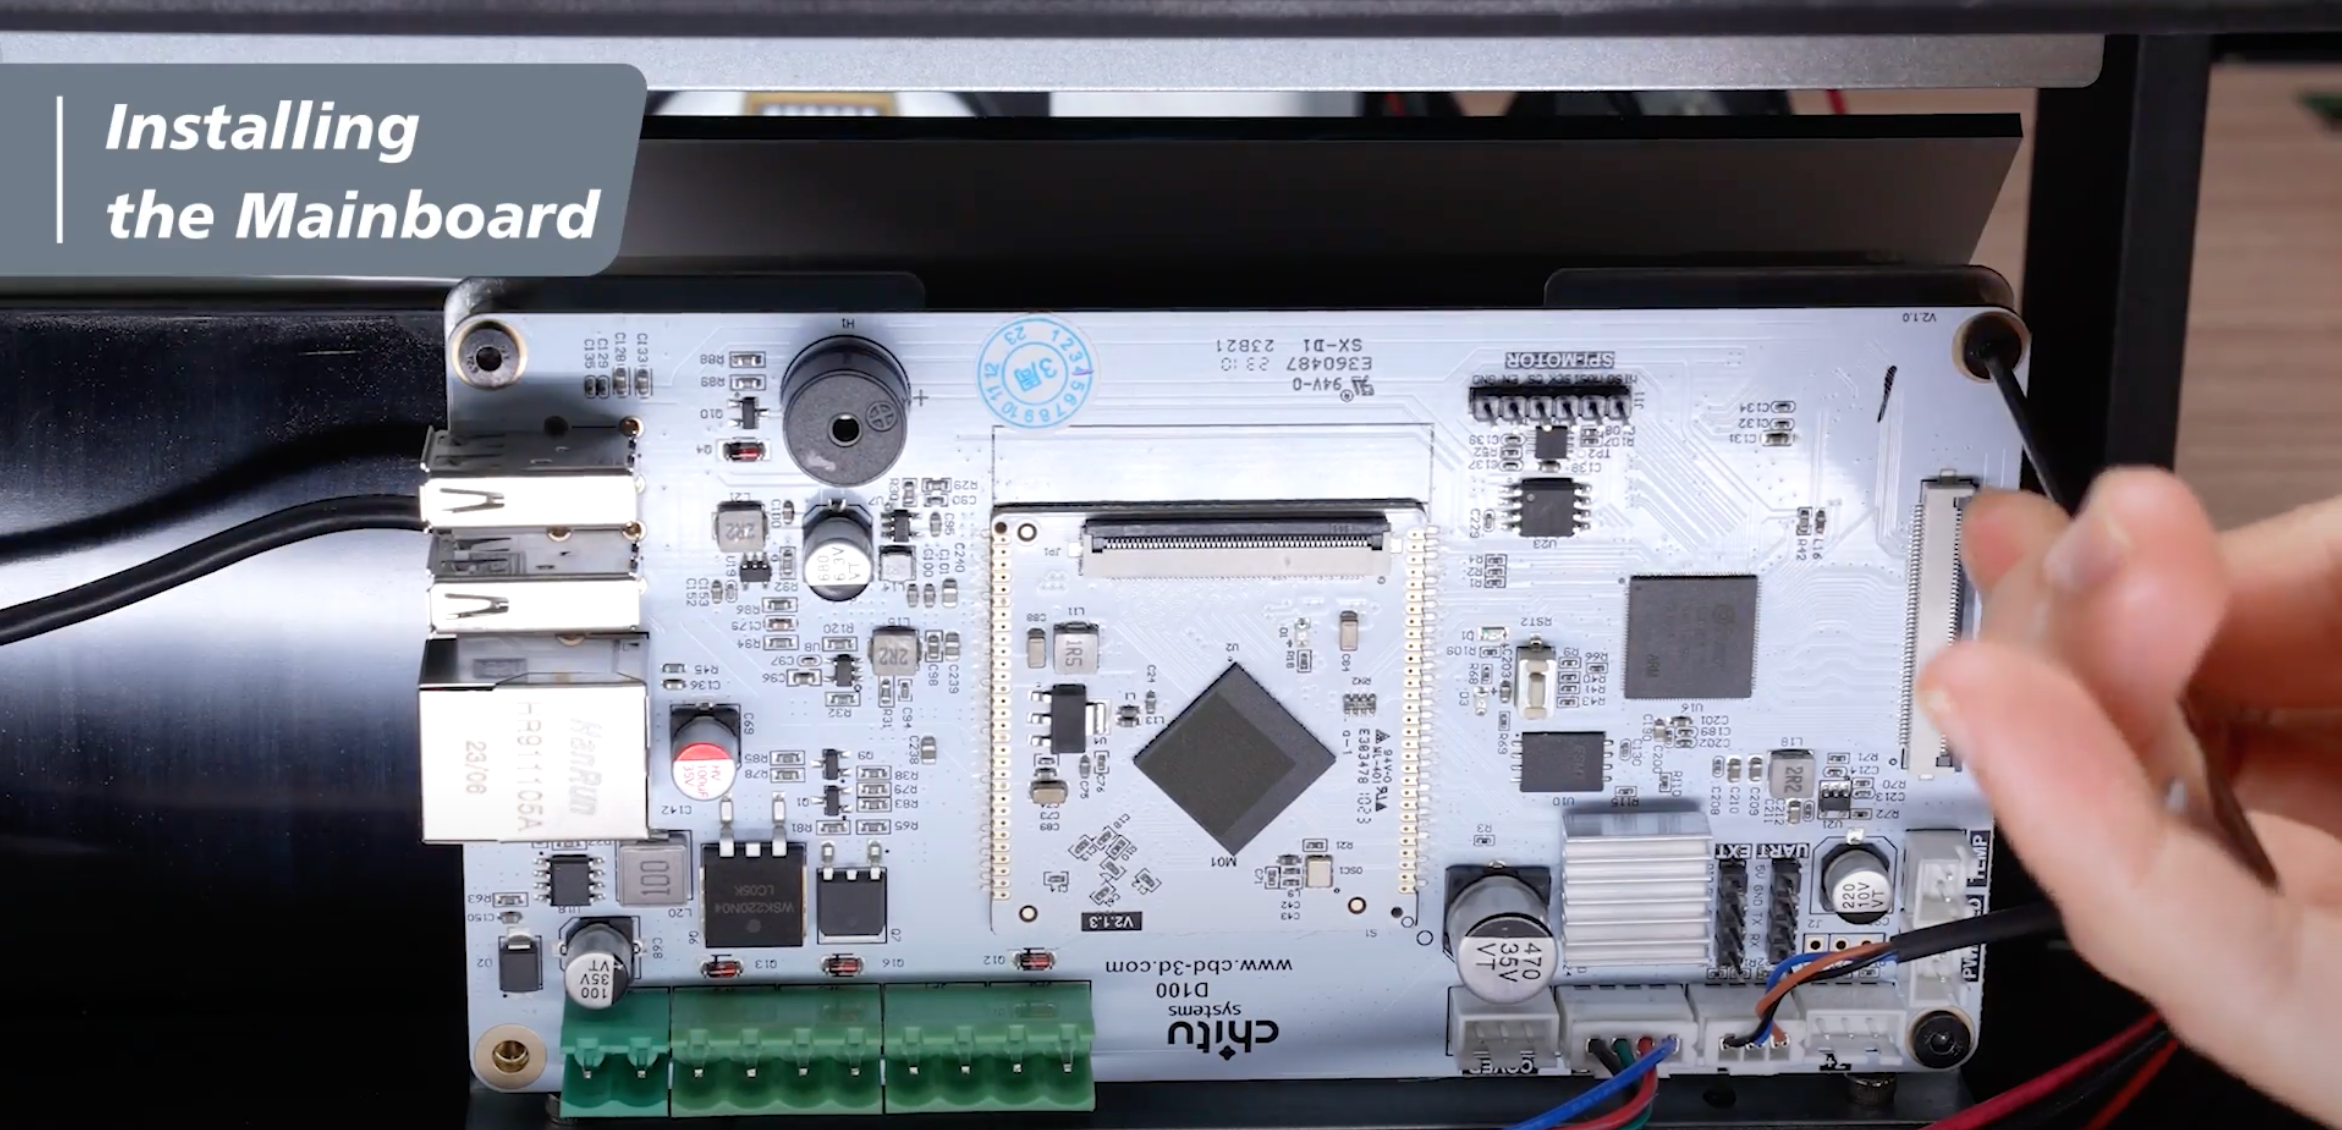
Step 4: Loosen all the screws from the 3 green terminal blocks provided in the 12K Upgrade Kit.Connect the cables to the 3 green terminal blocks. The red cable should be on the left, and the black one should be on the right.
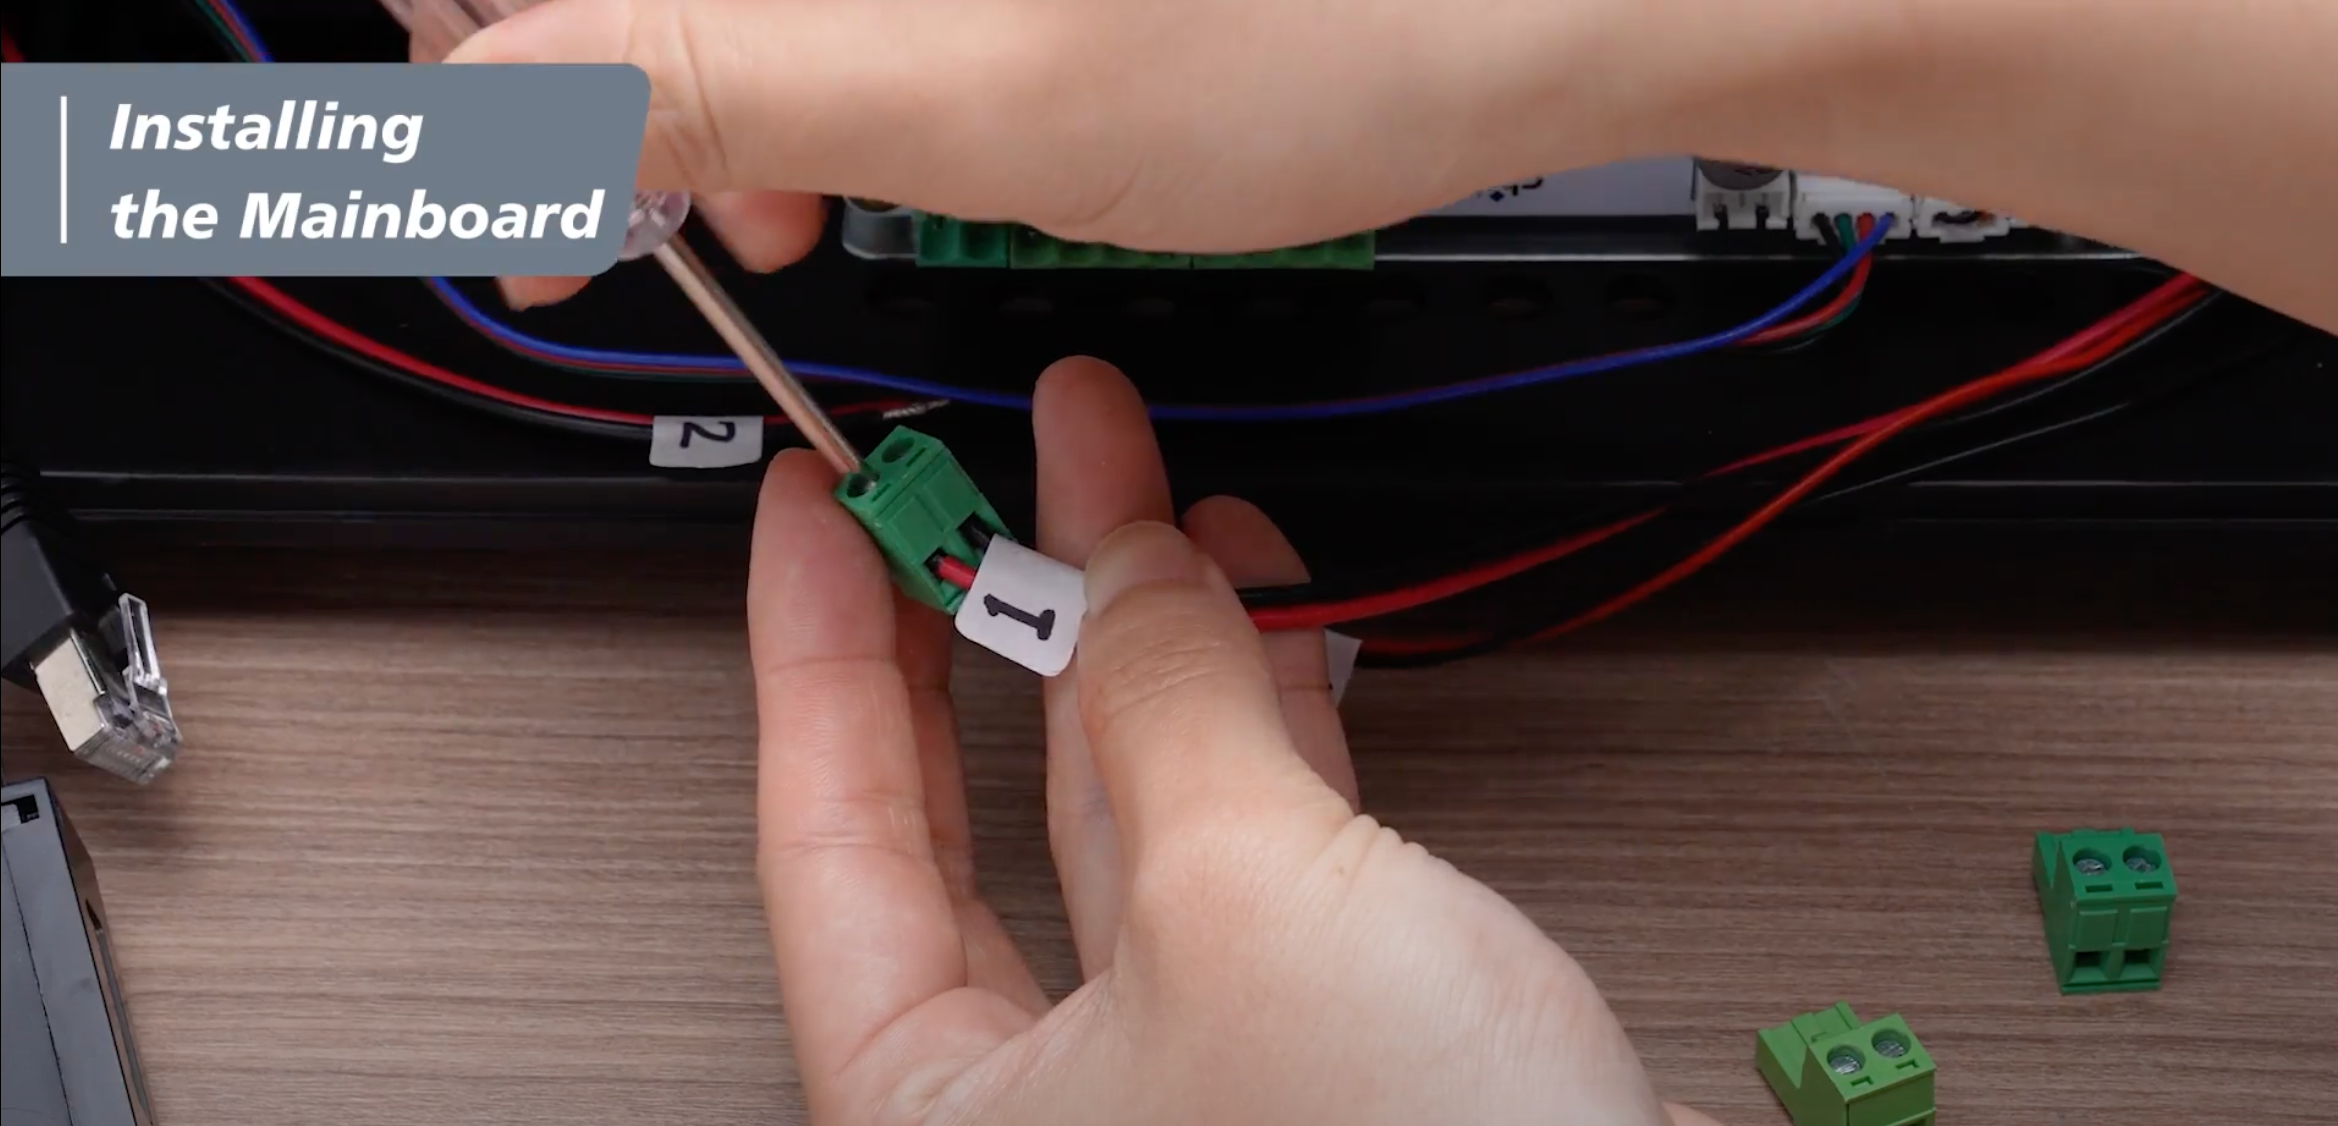
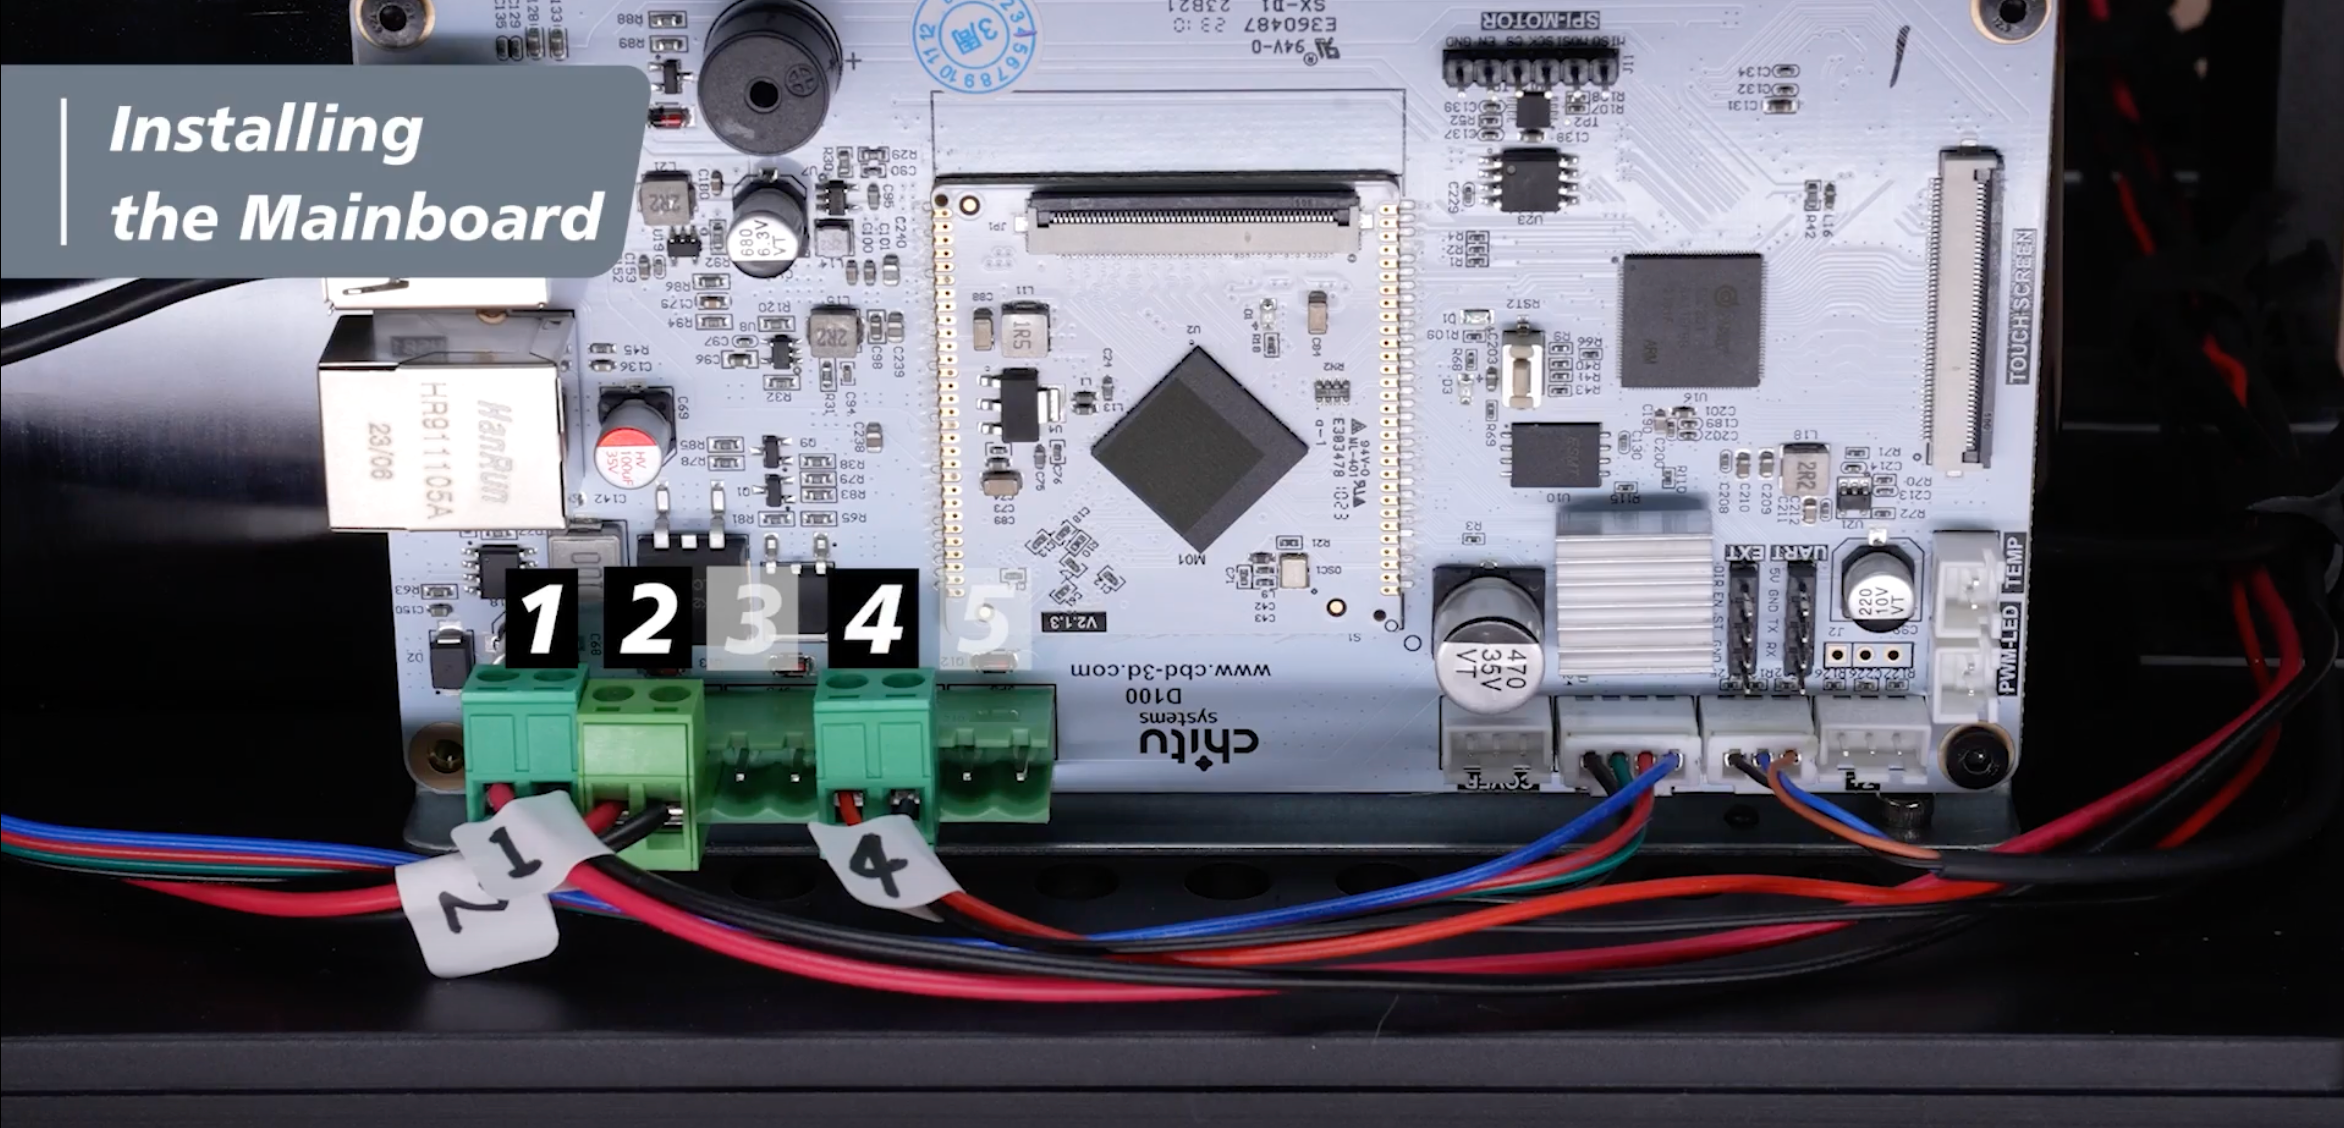
Step 5: Plug the No.2 green terminal block, followed by No.1 and No.4. After all the green terminals are installed successfully, you can now remove the label stickers we use to mark the cables.
Step 6: Attach the USB splitter and network cable back to the mainboard.
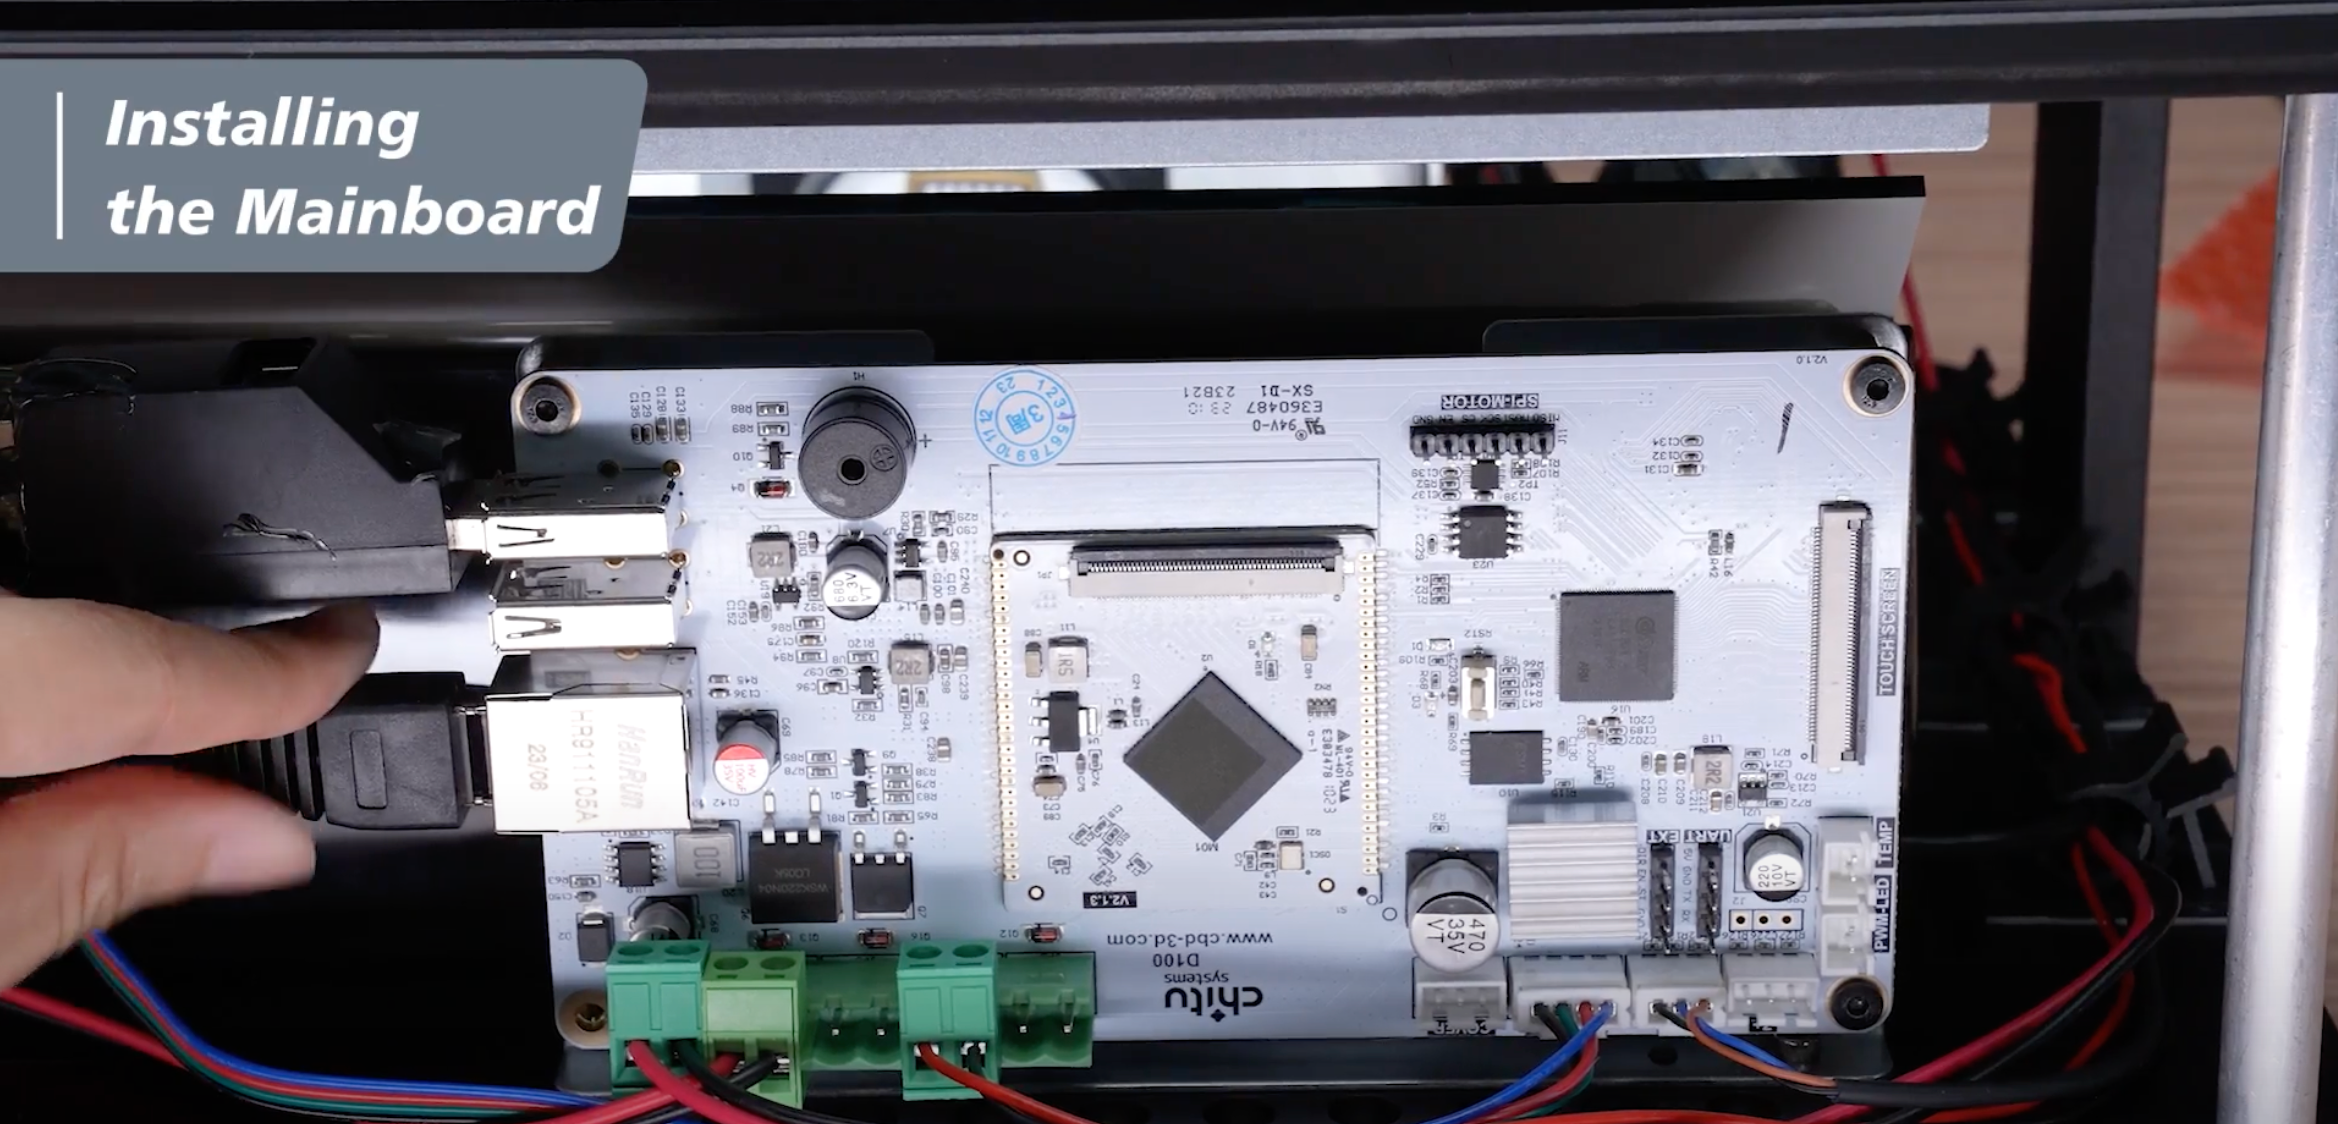
Lastly, remember to arrange your cable back to the hub so it looks neat and clean. Just like that, you’ve completed the mainboard installation.
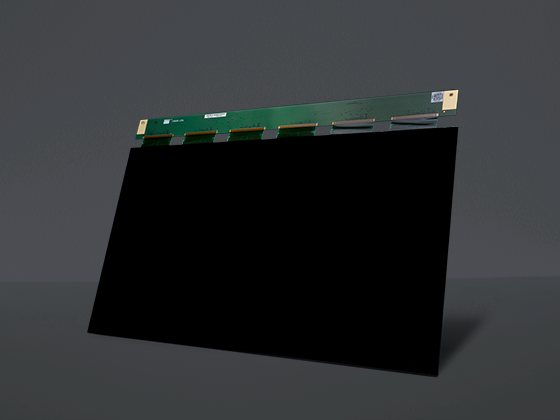
Installing the LCD Panel
Step 1: Make sure that the lined surface is positioned on the back of the LCD ribbon cable before attaching it to the LCD screen. Unclip the buckle on the LCD screen and plug in the LCD ribbon cable with the engraved “LCD” in the front. Then secure it with the acetate cloth tape.
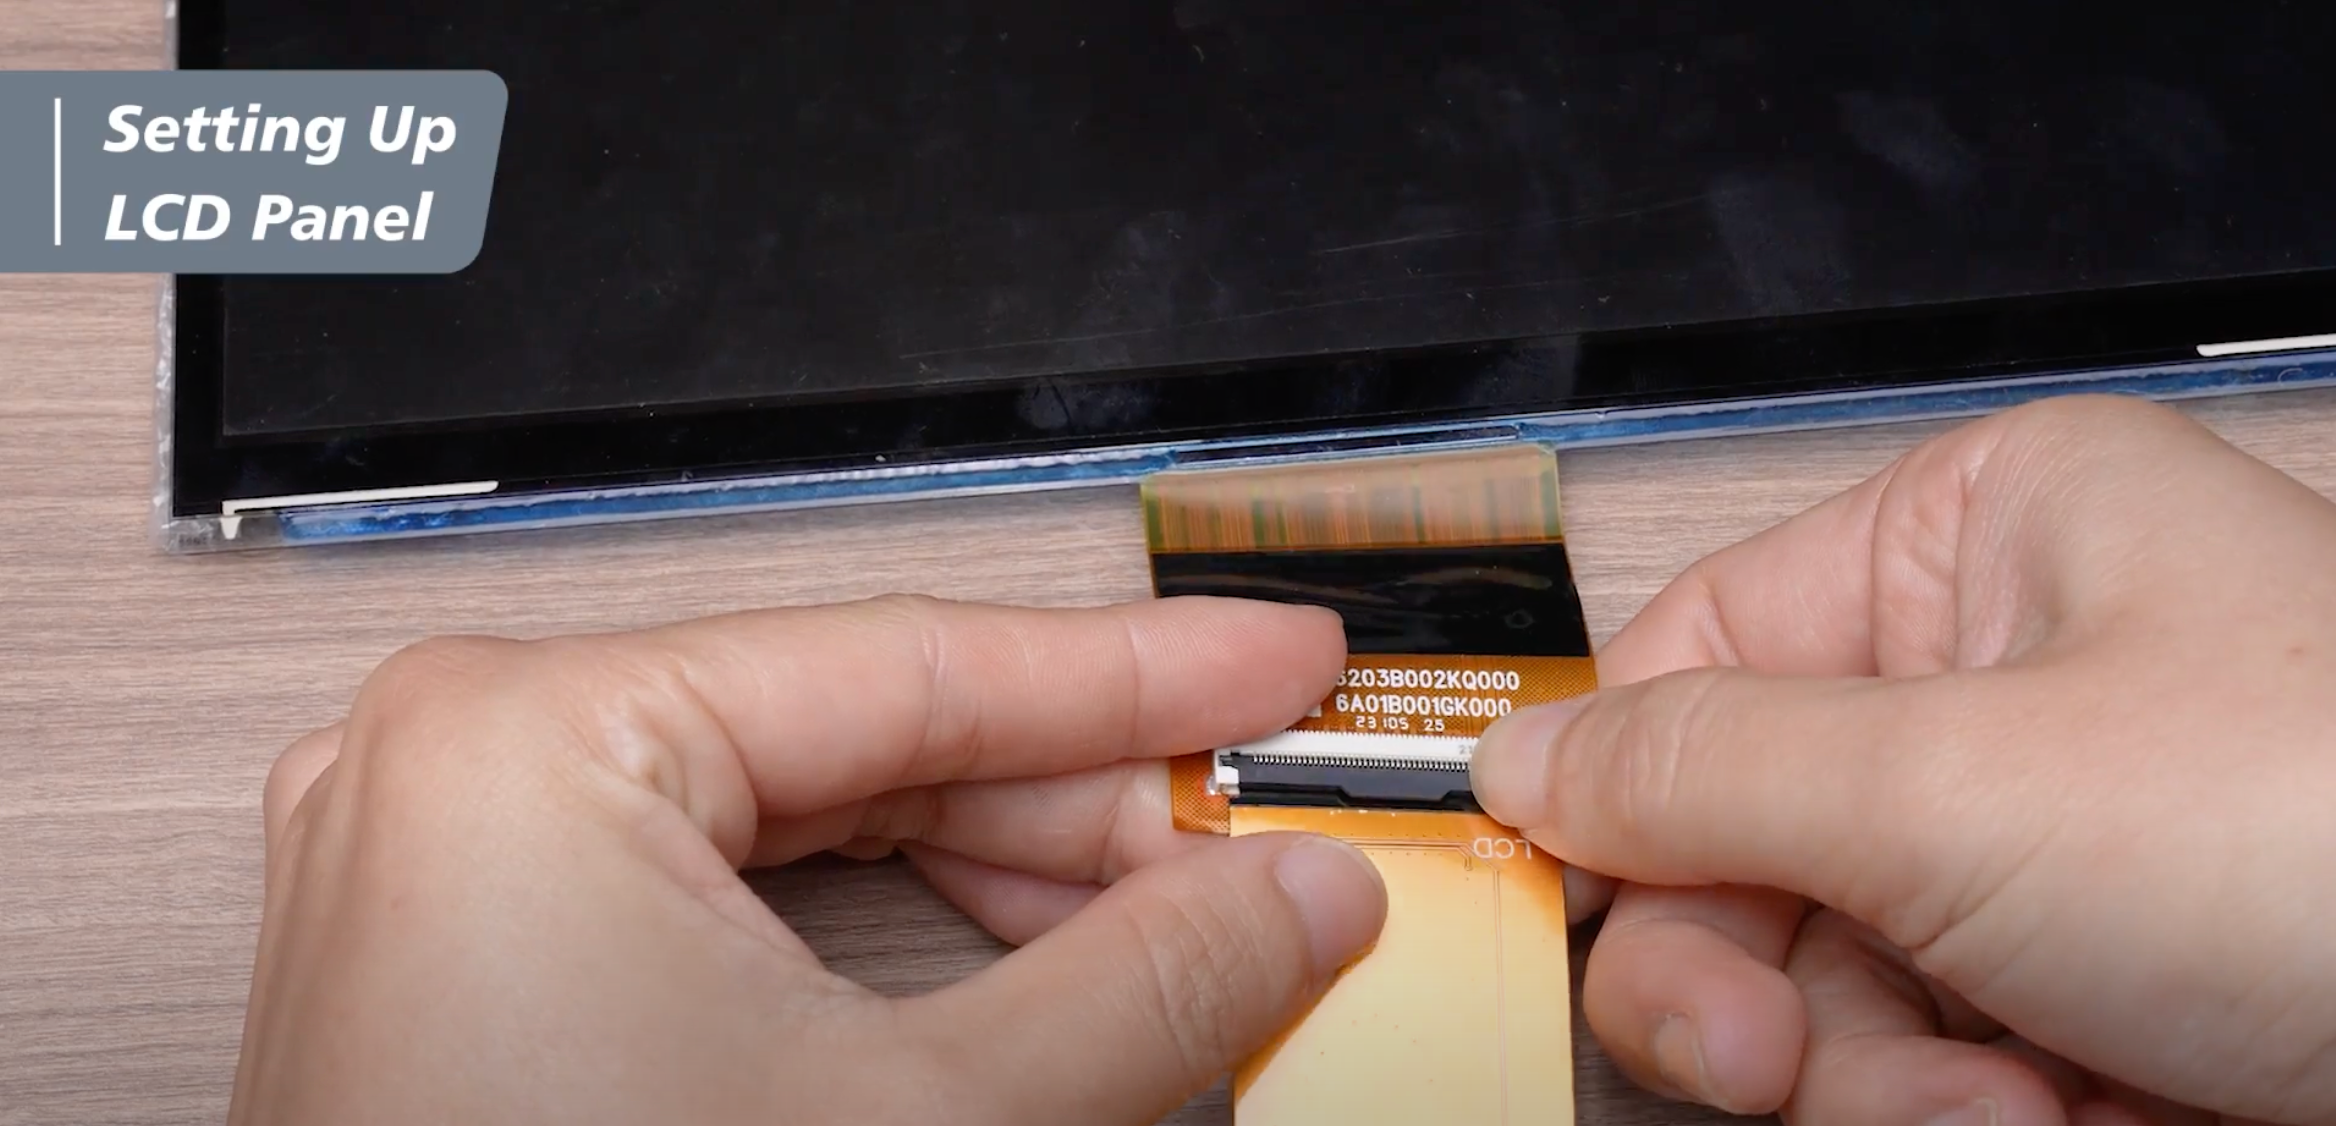
Step 2: Remove the screen protector layer that is marked with the green label sticker.
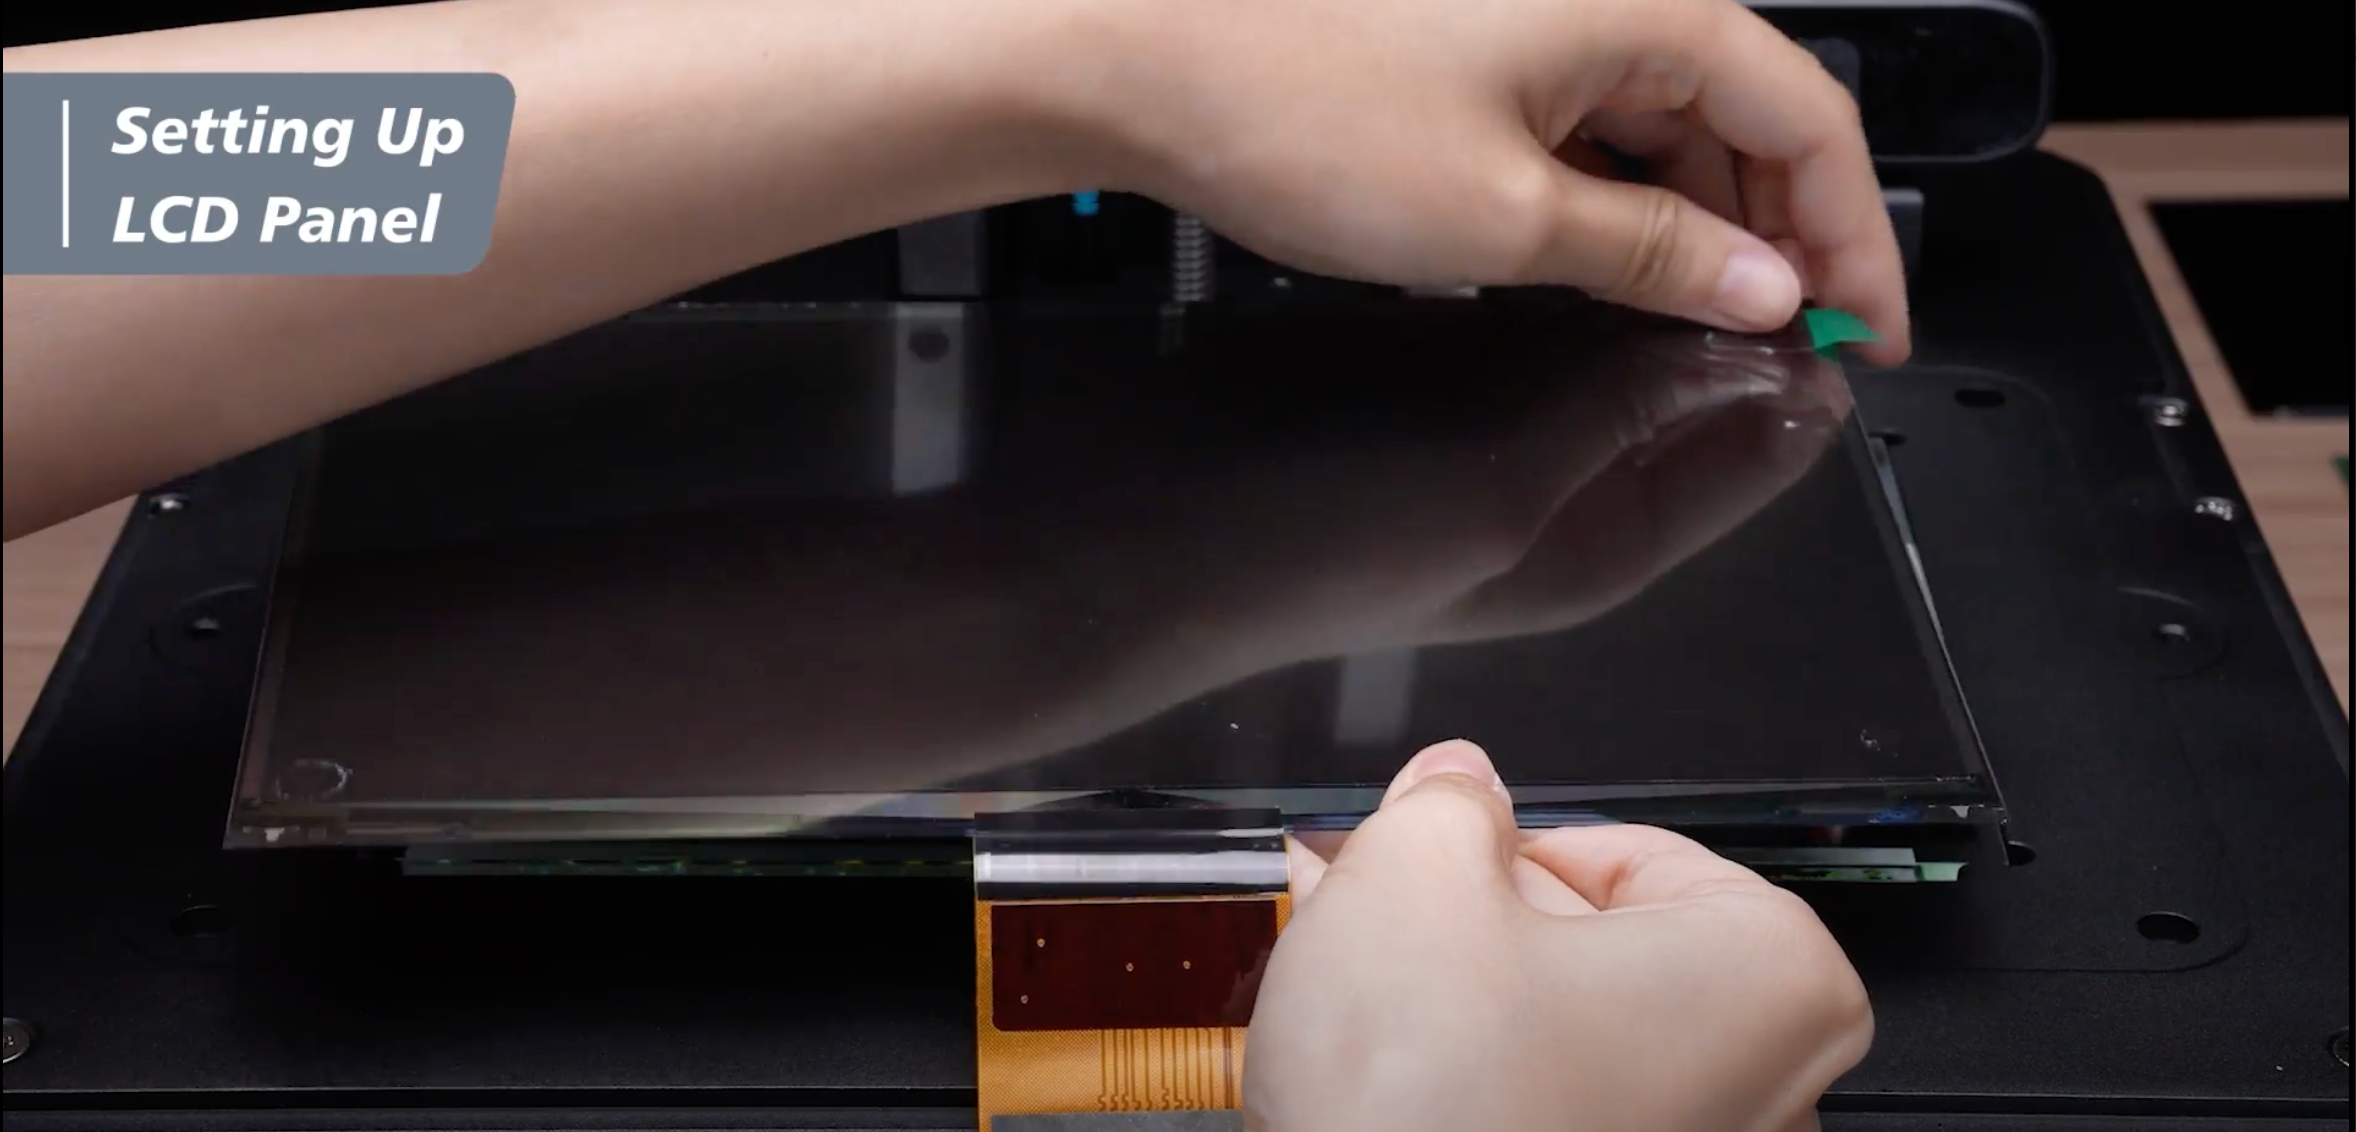
Step 3: Pass the LCD ribbon cable through the groove.
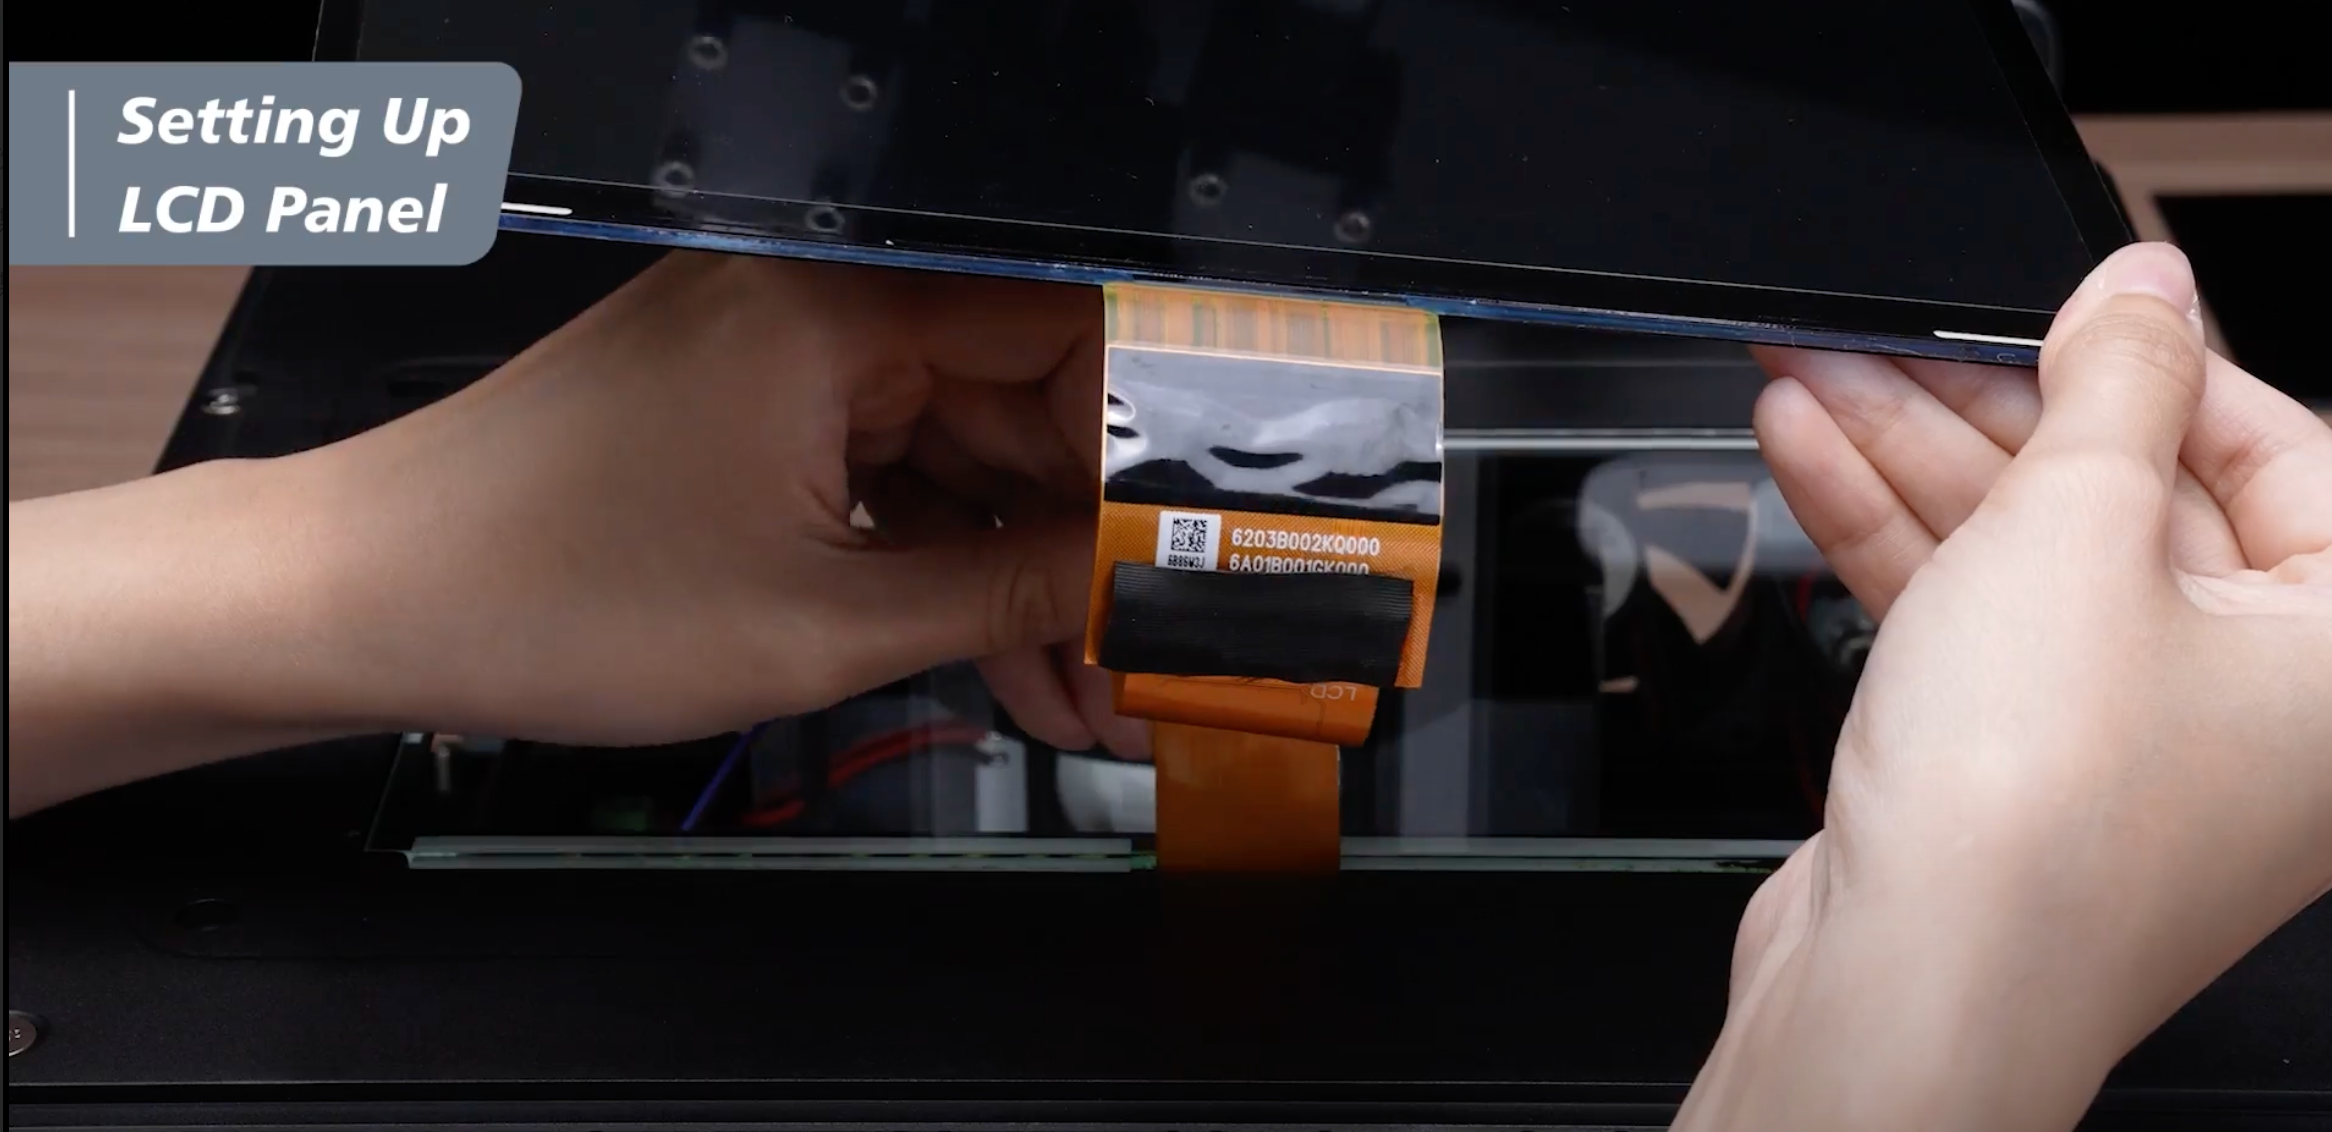
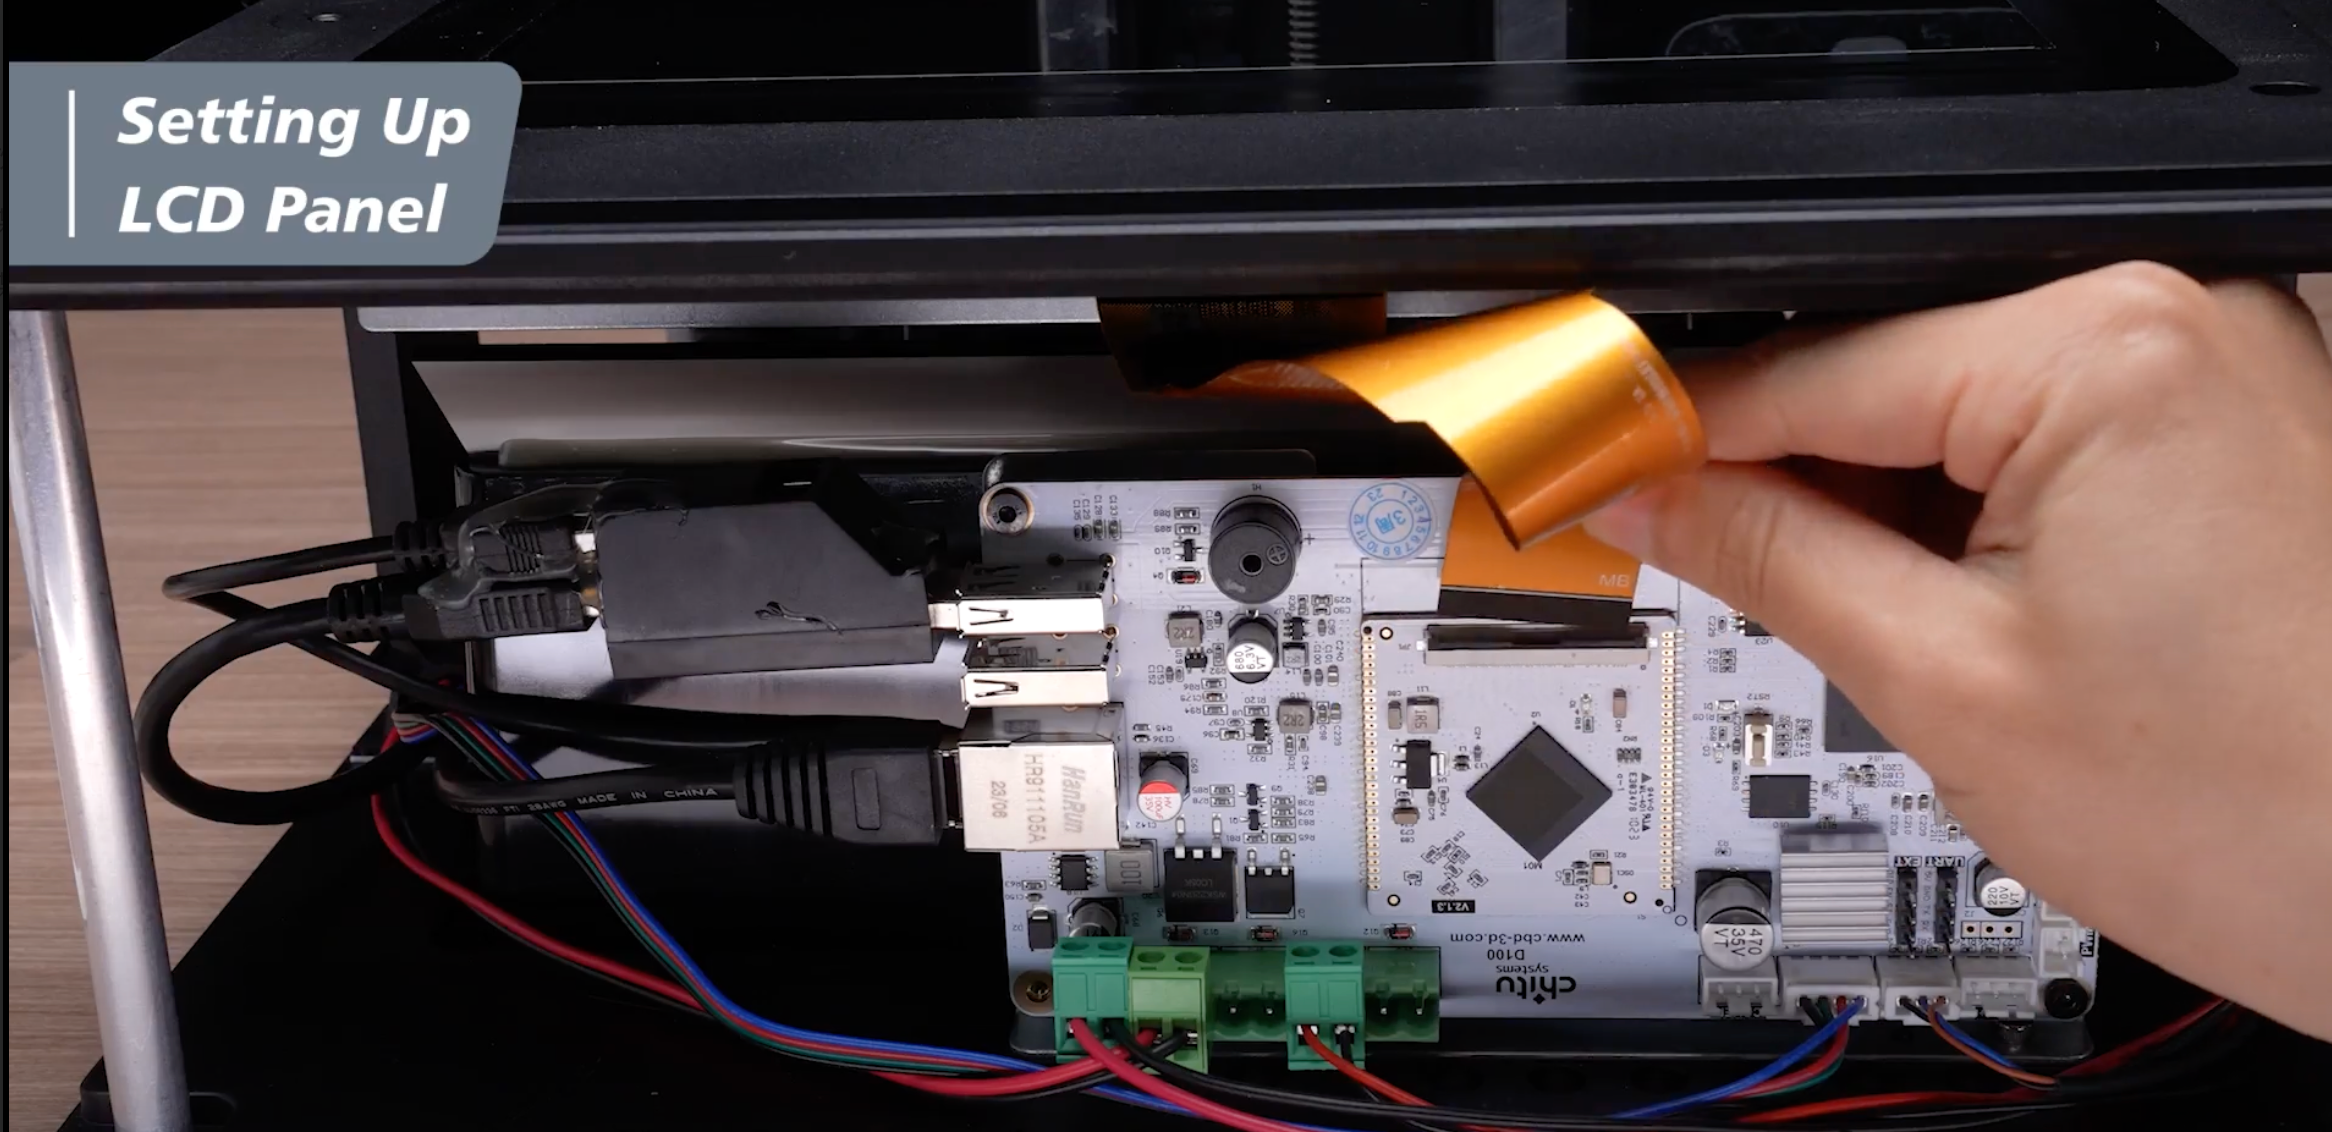
Step 4: Unclip the LCD buckle on the mainboard, plug in the LCD ribbon cable, and secure it. Then stick the acetate cloth tape back on it. Remember to tidy up the remaining cables by pushing them back into the mainboard after connecting the LCD ribbon cable.
Step 5: Use the LCD frame tape to secure the LCD screen. Start by peeling off the adhesive on the left side of the tape and gently stick it around the LCD screen. Be careful not to accidentally cover the grooves for the resin vat.
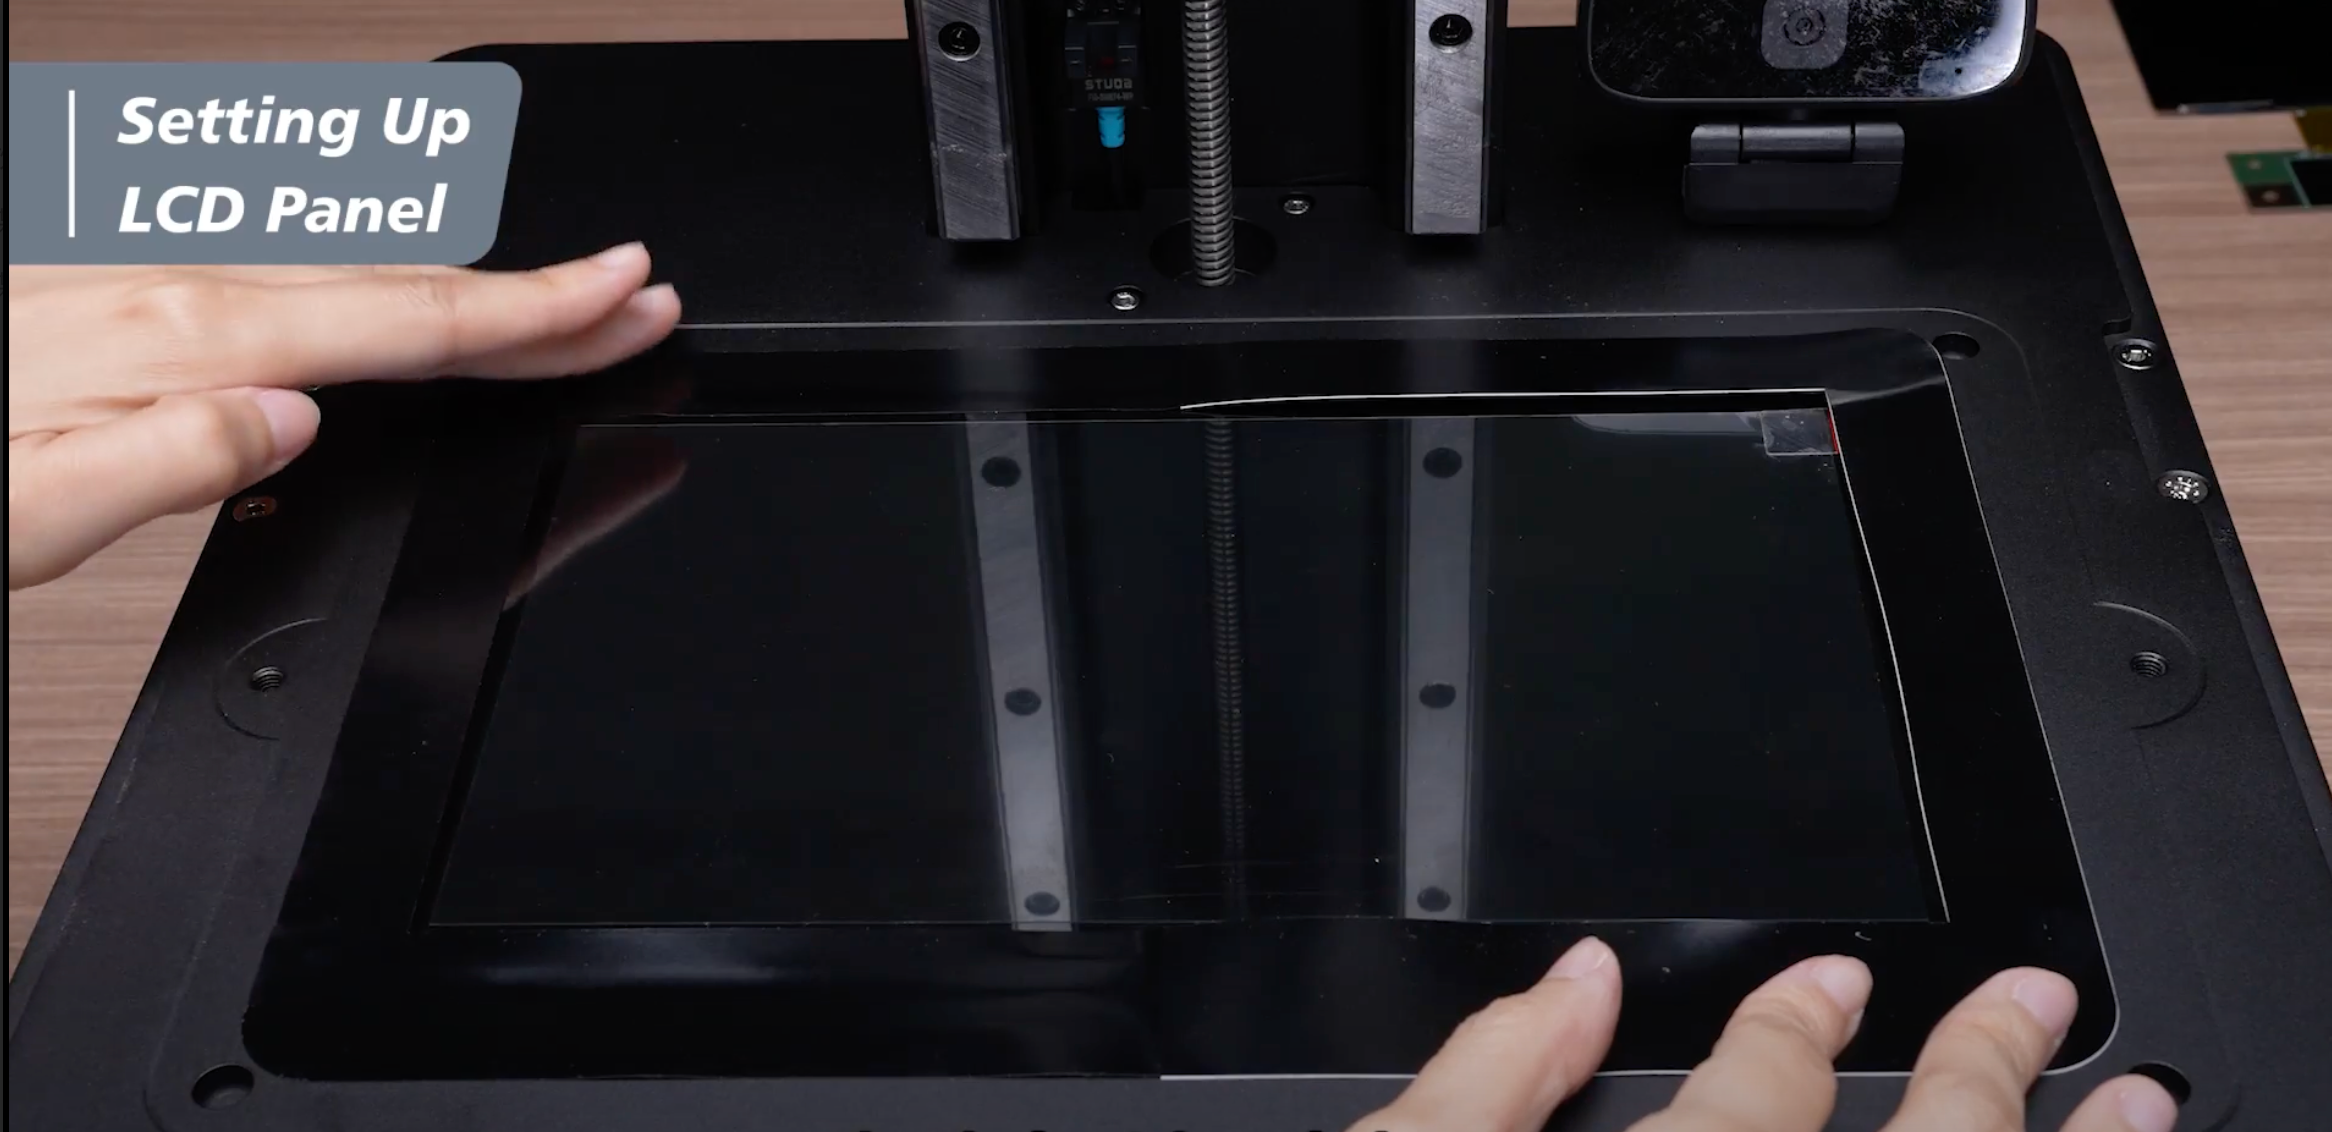 Step 7: Remove the protective film with the red label sticker.
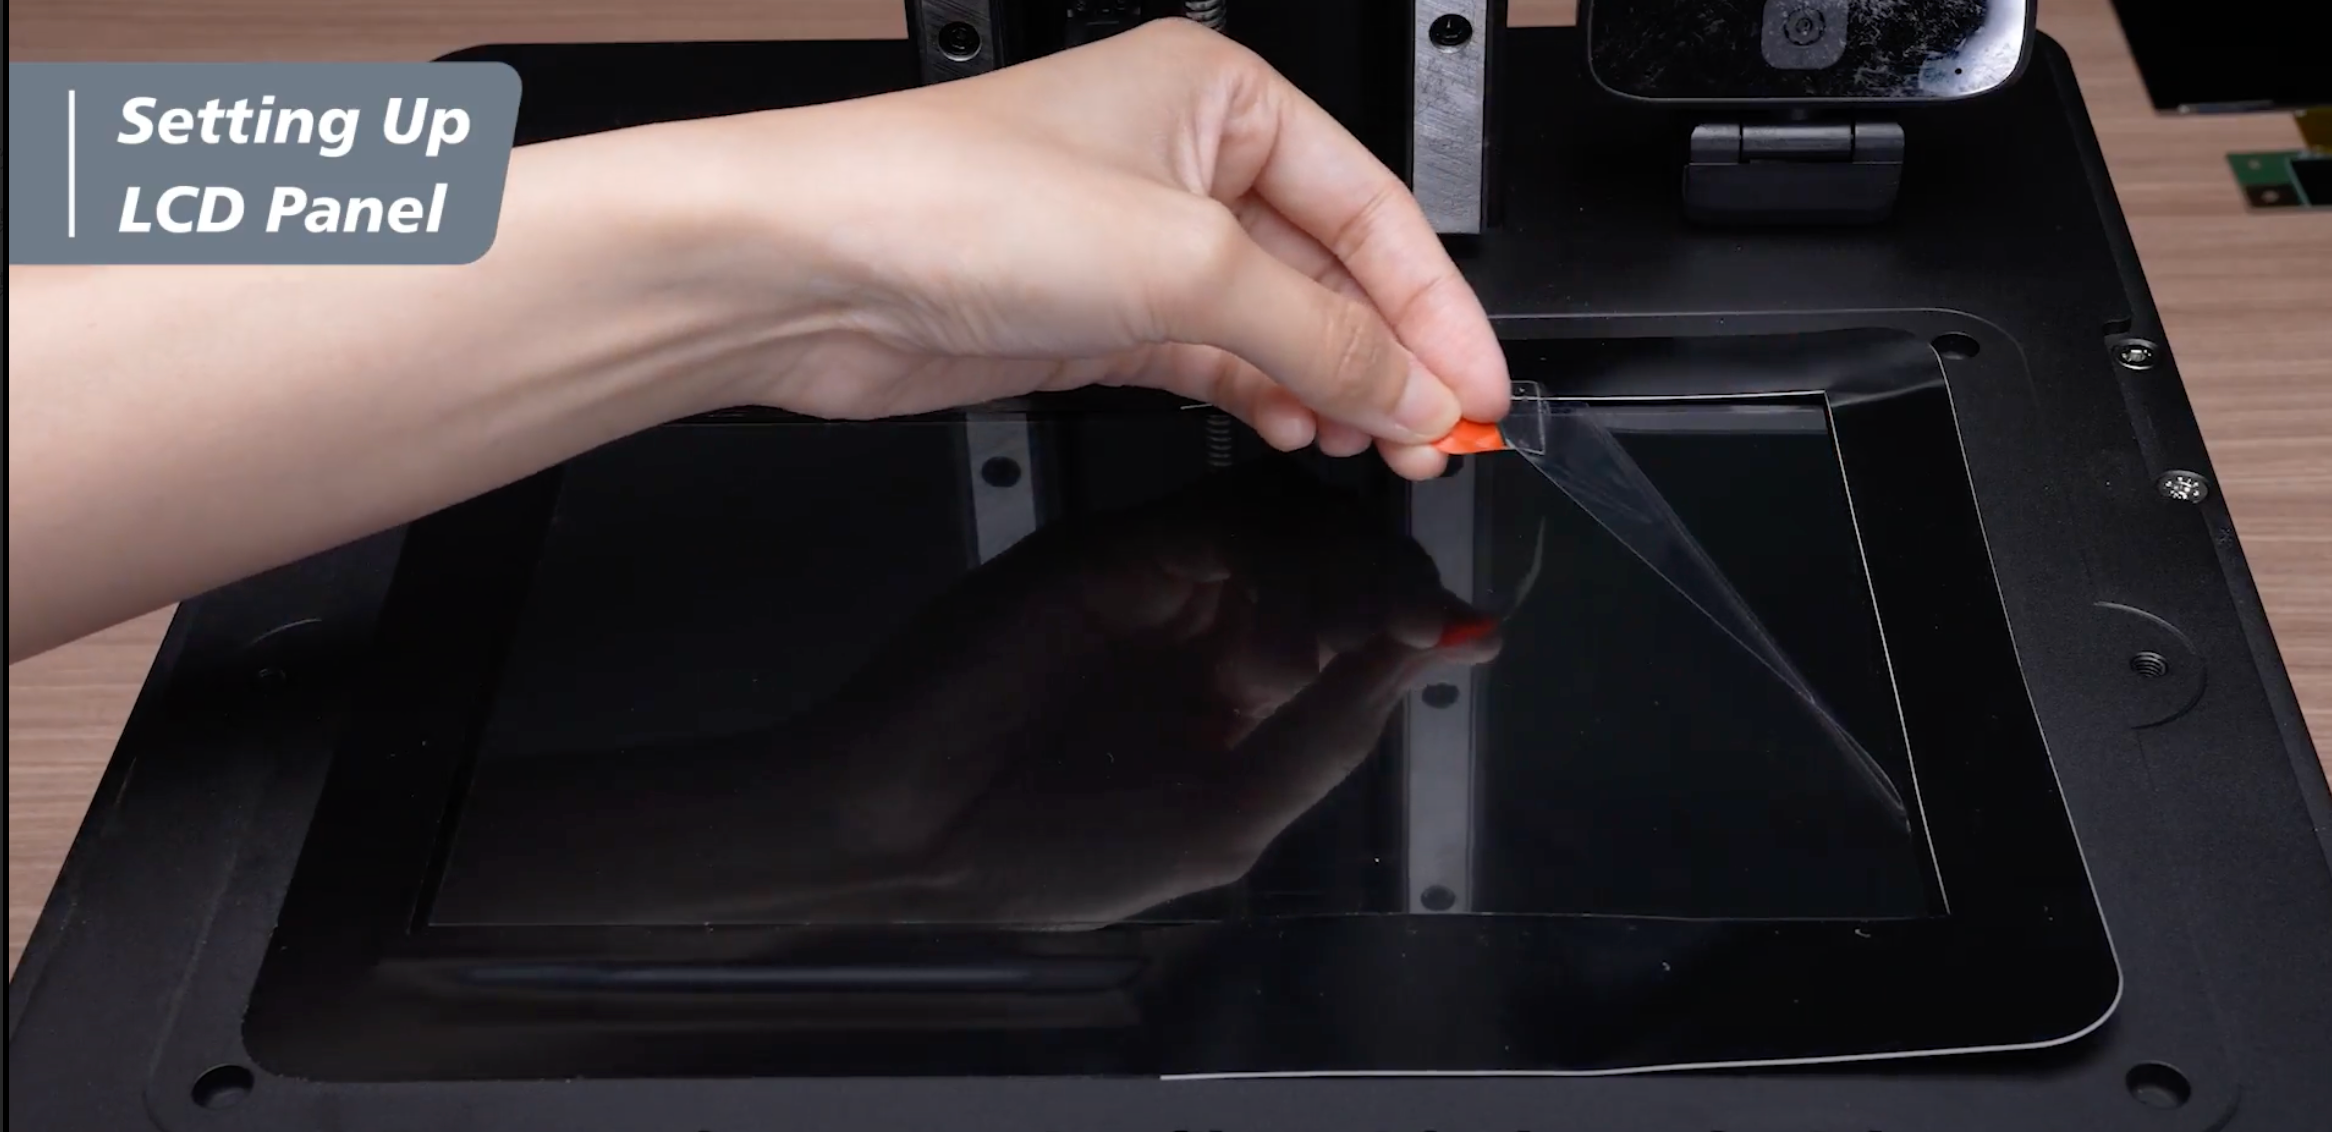
Step 8: Peel off the adhesive on the right side of the LCD frame tape and stick it gently around the LCD screen. To make it easier, we suggest tearing off and sticking the adhesive simultaneously.
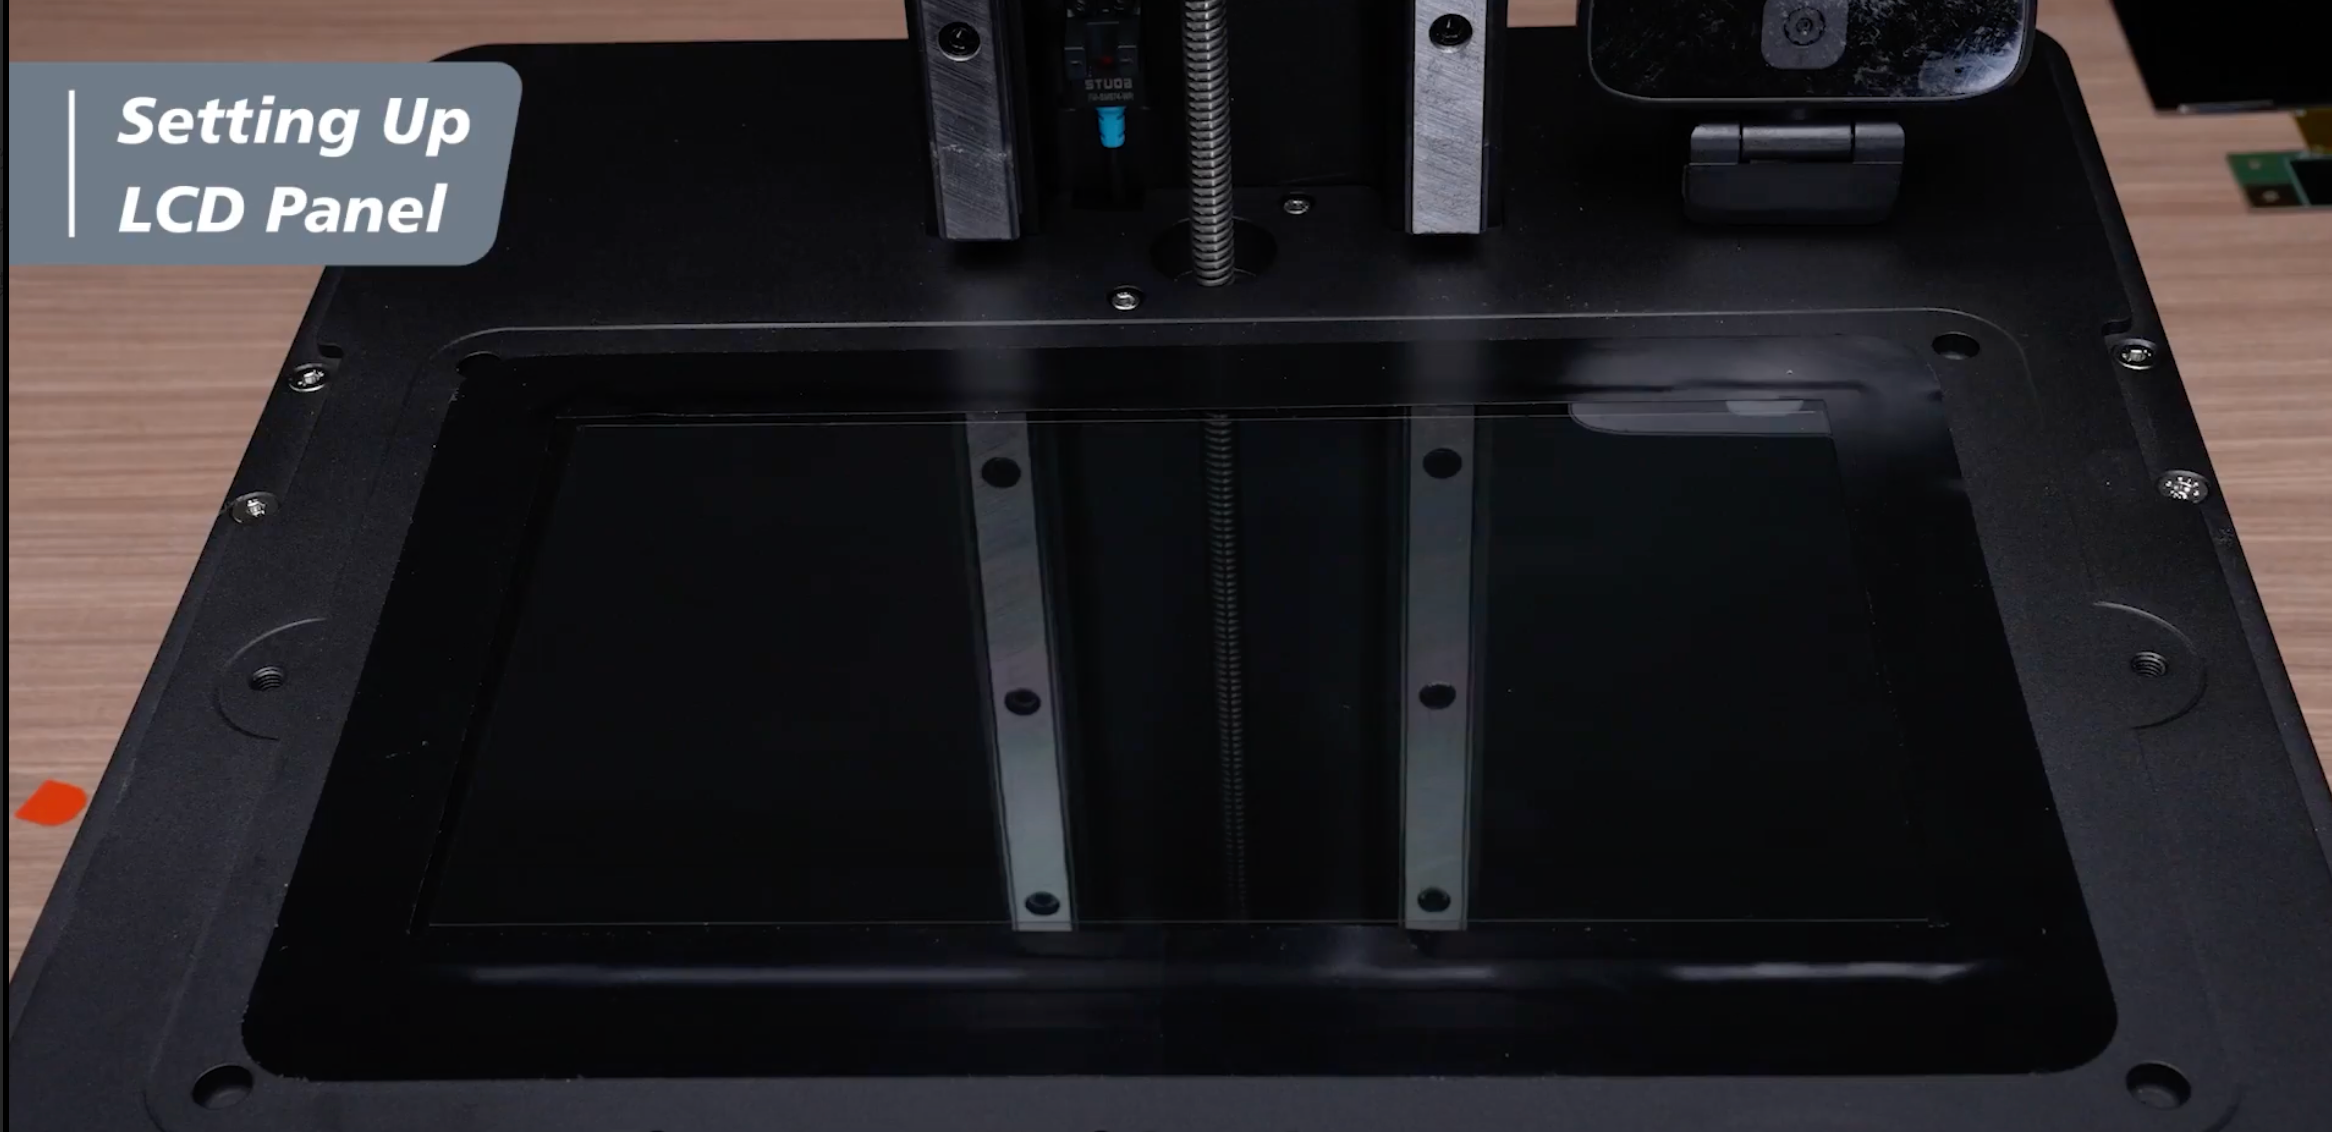
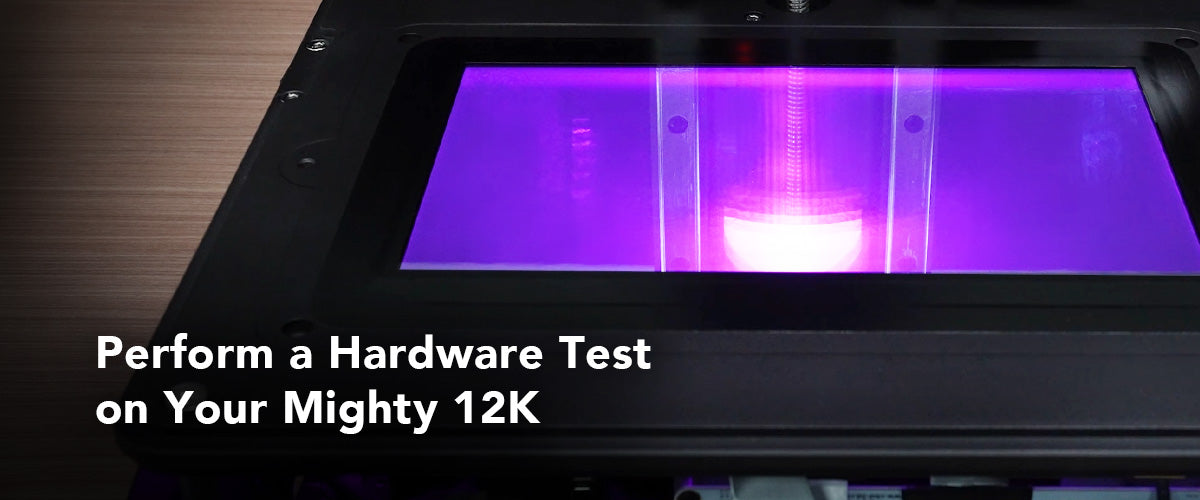
Your Mighty 8K has now been upgraded to 12K, and you can start to perform a complete hardware test to check if your Sonic Mighty 8K works well after installing the 12K Upgrade Kit.




1 comment
Charles F Lamb III
I finally spent the day doing the upgrade to my Sonic mighty 8K to 12 K.
Unfortunately, nothing happens.
I left the front cover slightly open, and when I power it up I can see three yellow lights on the main board.
I checked and rechecked all the steps I went through and can’t figure what went wrong.
———
Phrozen Technology replied:
Hello Charles, Thank you for commenting.
The lights on the motherboard lit up after powering it up, which should mean that you’ve connected your motherboard to the power correctly and the motherboard is working fine. If you see nothing showing up on the touchscreen after powering it up, please check if the connection of the touchscreen and to the motherboard has been done correctly. Some common issue is that people will place the connector of the flat flexible cable upside down, which the connector has pins on only one side so that it won’t transfer any single if doing so.
Please refer to this article on how to replace the touchscreen on the Mighty 8K/12K: https://helpcenter.phrozen3d.com/hc/en-us/articles/6453770031257—Sonic-Mighty-8K-Replacing-the-LCD
If you need further assistance, please contact our customer support team where we have expertise ready to assist you diagnose the problem. You can submit our customer support team a request by filling in the form on this page: https://helpcenter.phrozen3d.com/hc/en-us/requests/new
Hope this helps.
Best, Phrozen Team
>