So, you finally finished printing all those model parts after 12 hours of printing. Now what?
Of course, your 3D printing process doesn’t stop here. Now that your models are done printing, it’s time to clean and cure them as part of the whole 3D print post processing. This includes cleaning your models thoroughly to get rid of the uncured resin, post-curing to make sure your models are completely cured, removing supports, and even polishing and painting them.
Some people might think that removing supports could be such a hassle, especially when working with intricate models with tons of tricky support placement. Too little supports may cause printing failure, while too much or too thick of supports will make it hard to remove resin support marks. So, it’s important for 3D printing enthusiasts like you to find the balance through experience and practice.
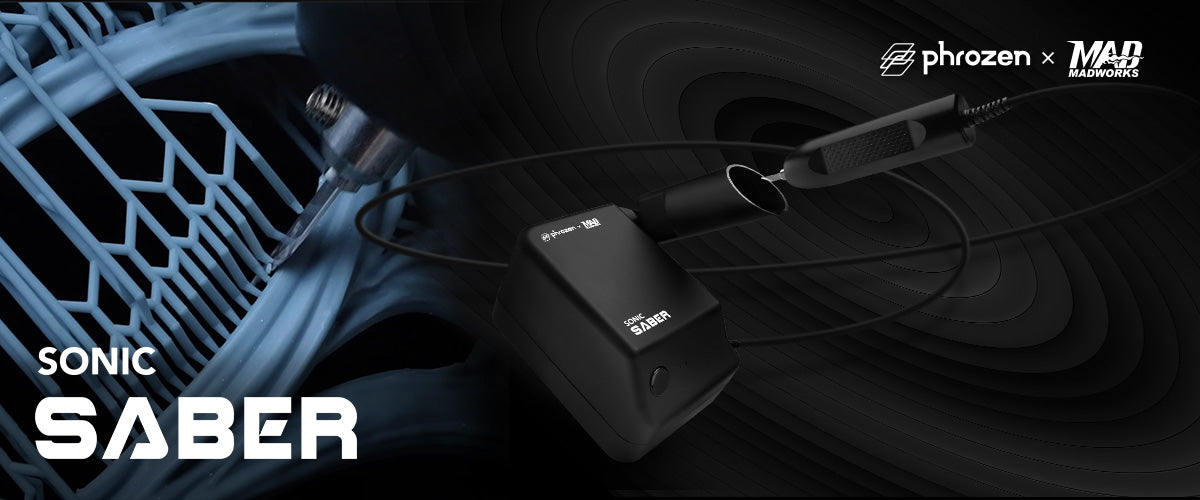
Sonic Saber the Ultrasonic Cutter
If you’ve never heard of the Sonic Saber before, you are definitely missing out on a tool that could significantly boost your post-processing efficiency, especially in the support removal department.
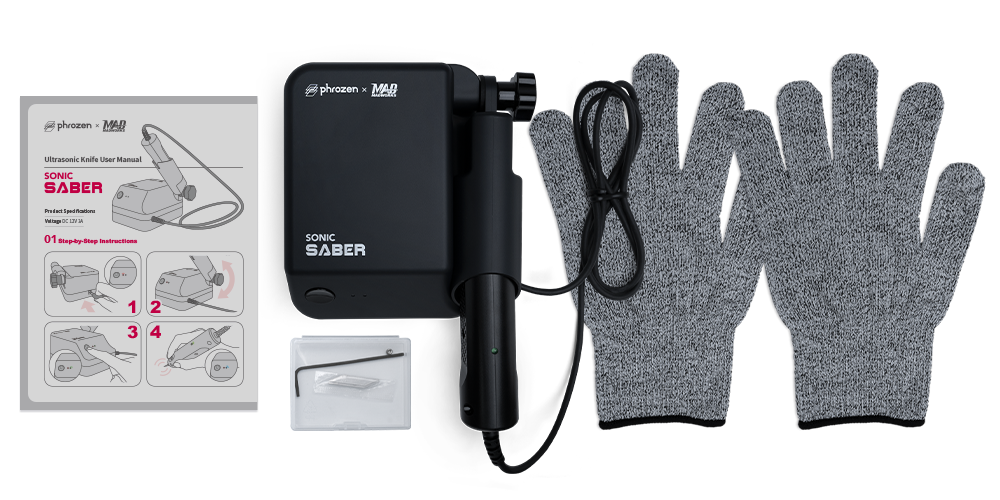
The Phrozen Sonic Saber was launched last year to elevate your 3D printing experience. It makes removing supports hassle-free with the power of ultrasonic cutting—a sharp precision blade vibrating at a remarkable 40,000 times per second. In addition, it’s also a great tool to trim and put some finishing touches on your prints.
In this article, we’ll dive deep, unveiling everything about this ultrasonic knife tool and why you might want to snatch ‘em if you haven’t yet. Let’s jump in!
Remove Supports From 3D Prints Effectively: Say Bye-Bye to Traditional Art Knife
Previously, removing supports from 3D print was often done by ripping the supports with hands, or using the traditional art knife, craft knife, or pliers when working with delicate parts. It’s a much cheaper way to do it, but it’s also more time-consuming and can be difficult when you are working with harder resin. Not to mention the leftover tiny nubs from cutting the supports, leaving lots of support marks that’ll require tons of sanding and polishing, a huge risk of damaging your models and losing details.
With the Sonic Saber, you won’t need to worry about these risks!

As the ultrasonic cutter was designed with an intuitive pen-shaped design, you can easily maneuver it to cut your supports with precision, right at the base—eliminating the appearance of tiny, unwanted nubs on your model surfaces. The thin knife will also help you to go deep into the nook and crevices, removing resin support marks with ease.
Remove Resin Support Marks Gently
Let’s say you’ve removed the supports from your 3D print models before post-curing. This means you might now have a model with its support removed, but might still have some leftover support marks from the pull. Did you regret not using your Sonic Saber in the first place? Well, you might.
But according to Dennys Wang, you can still use your ultrasonic cutter to fix it now!
By gently moving the blade on the support marks, Dennys said you can easily scrap off unwanted marks or even model details. We’ve made a whole article covering Dennys’ thoughts on why the Sonic Saber is such a versatile tool for 3D printing post processing.
Trim, Modify, and Adjust
If you are 3D printing in a place with huge temperature fluctuations, you might be a part of us who occasionally have unfit joints during assembly because both the protruding parts and the holes have overexposed after some temperature change. It was not the most pleasant experience considering you’ve spent hours printing and cleaning those models. But don’t get mad and throw them all away yet.
Grab your trusty ultrasonic knife and let Sonic Saber do its magic.
Thinly slice that overexposed nub from your model parts and carve it out layer by layer until it can easily fit into its corresponding hole. With the Sonic Saber, you can cut through printed resin models just like you cut room-temperature butter—soft and smooth.

Safe Design With Button Control
With such a powerful and versatile tool like this ultrasonic cutter, you might hesitate to get it due to the fact that it’ll accidentally cut through everything you own and hurt yourself? Well, rest assured.
Despite the knife being as sharp as other art and craft knives available in the market, the Sonic Saber was designed with your utmost safety in mind. In order to activate the vibration, a button on the pen-shaped part would need to be continuously pressed. You might think that it’s such an unnecessary step, but we understand that we sometimes get too excited about our models that we accidentally drop our tools. With this feature, at least it wouldn’t continue to vibrate and cut through everything when it falls.
Versatile and Compatible With Various Material
Consider getting this ultrasonic knife but thought it might not be that beneficial for you as you are not a frequent printer? The good news is, you can use the Sonic Saber on other projects too!

Be it various types of boards, balsa wood, or even PVC, the Sonic Saber can easily cut through it. Dennys Wang also did a thorough test with even more materials in his video, or you can read through the summary of his test in his Sonic Saber review.
Not Sharp Enough? Simply Replace the Blade!
You might realize that after months of continuously using your beloved ultrasonic knife, the blade might not be as sharp as it used to be when you first received it. We understand that any blade will eventually get blunt when used regularly, so we’ve prepared the blade replacement kit in case you ever need to replace your blade.

The blade replacement kit will come with twenty blade replacements, some collets, setscrews, and an instruction card to make sure you’ll follow through with all the steps necessary to replace the blades, so you’ll always have the best experience with your Sonic Saber even after replacements.
Carve Details, Add Signatures, and More
Sonic Saber is so versatile its function doesn’t end there!
Our community has since let us know about the various creative ways they’ve been using the Sonic Saber for, including using the ultrasonic blade to add special touches of details after the models are completed, such as battle marks, signatures, and more. The possibilities are endless with this one.
All in all, although marketed as a tool to remove supports from 3D prints, turns out it was also a great tool to remove support marks, modify your models, and add details, in a more efficient and easier way compared to traditional craft knives.
So, what do you think about the Sonic Saber? Would this be the next addition to your 3D printing wishlist? Or will it go straight to the cart?

